نتيجة البحث
تم العثور على 478 عنصر لـ ""
- How to Create a Stunning Manga Character on a Beautiful Background
How to Create a Stunning Manga Character on a Beautiful Background I welcome you to a new lesson for today, in which we will see how we can draw a manga character on a prepared, previously drawn background. There are multiple techniques, but I chose for you an easy and feasible method, so let’s begin. We start preparing the background on which we will draw, and there are many explanations on the site that show you how to design backgrounds for manga scenes. I chose a seat on the train , to draw Manga character on a beautiful background The manga character that we will draw will be sitting here, on the chair. The first thing we do is to draw an initial structure for the body’s position, two lines. The first line will represent the upper part of the body, and the second line will represent the lower part of the body. Then at the top we will draw a horizontal line, representing the shoulders, and the line at the bottom, as well as the body from below. The final drawing should form two triangles connected to each other, with the middle being the waist. The most important part is the lower section, which will form the meeting point between our drawing and the background. We must adjust the drawing of the body sitting on the seat, by drawing a rectangle in line with the angle of the seat. The same applies to the shoulders. We add a layer, and on it we draw the initial shape of the body, and the most important thing we have to define is the neck and legs. We draw a circle at the middle of the shoulders, and an “X” from the center of the circle We do the same thing at the bottom, from there we will draw the legs, and the direction is marked in yellow. We draw a line from the bottom of the neck circle, towards the top, with an X, until we obtain a cylindrical shape, through which we will be able to draw the neck easily. Through the line that separates the circle, we will draw a line downward, in order to separate the upper part of the body. We follow the same steps for the legs and arms Drawing a manga character on a beautiful background and face We draw a circle above the body We draw a rectangle on the right side We draw a line dividing the circle in half From the middle line, we divide the rectangle in half to determine where to draw the nose and mouth. We draw two parallel lines "to draw the eye" From the two parallel lines designated for the eye, we draw an inverted triangle, whose two lines meet at the bottom. The line that divides the circle in half helps us draw the hair, starting from there and outward. We use the initial structure in order to draw the details of the manga character, and here the features of the character will become clear to us well. We choose the color black, in order to ink our drawing, and the pen used is the G Pen We draw each part in a separate layer like this: Layer to ink the body A layer for inking the hair Layer for inking clothes A layer for inking extras (such as accessories, books, etc.) Tones Now the tones stage, we will color in white, and in all shades of grey, and as for the hair, it will be black, with a white highlight. Shading We copy the character sketch layer, add a “multiply” effect to it, and color the layer gray, in order to give it a shadow. Thus, we have finished drawing a manga character on a pre-prepared background. Practice well, so that you can benefit from it when you draw your own manga. متوسط التقييم هو null من 5, على أساس 0 عدد الأصوات, أعجبهم شارك Love it? Rate it Don’t love it Not great Satisfied Really good Love it
- تجهيز صفحات المانجا و رسم لوحات المشاهد
تجهيز صفحات المانجا و رسم لوحات المشاهد مرحباً بكل أصدقائي في شرح مخصص للمانجا ، اليوم سوغ نتعلم كيفية تجهيز صفحات المانجا ، و أيضاً رسم لوحات المانجا "بانل Panel " ، بأسلوب سهل و سريع و بخطوات سهلة. البرنامج المستخدم هو : كليب ستديو باينت إي إكس Clip studio paint EX ، لأجهزة الكمبيوتر رابط التحميل ، والشراء لمرة واحدة ، البرنامج المخصص لرسم الانمي و صناعة المانجا الأفضل في العالم من هـــــنــــــا أولاً وقبل كل شيء ، يجب علينا رسم السكتش ،للمشاهد الخاصة بالمانجا ، في صفحة واحدة كاملة ، و كل قسم عبارة عن صفحة مانجا ، ونرسم الصفحة التي بعدها ،قرب الصفحة الأولى ، و هكذا حتى ننهي التخطيط. ليس من الضروري أن تحتوي على التفاصيل الكاملة، يكفي فقط رسم أماكن تواجد الشخصيات و تخطيط سريع للخلفية تحضير بالبرنامج : نفتح البرنامج في ملف جديد، وهنا كما تلاحظون ، نحتار خيار المانجا ، وهي ما تخول لنا فتح إعدادات المانجا . بعد ذلك نكتب اسم المانجا، و ثم نحدد حجم الملف أو الورقة وهو عادة يفضل أن يكون A4 ، ثم نختار في الأسفل عدد الصفحات. و نضغط أوك Ok. الصفحات : هنا تظهر لنا جميع الصفحات التي اخترناها ، و أول ورقة مخصصة للغلاف ،غلاف المانجا ، وأنا سوف أفصل له درس خاص. و أسفله نجد صفحات المانجا مرتبة رابط التحميل ، والشراء لمرة واحدة ، البرنامج المخصص لرسم الانمي و صناعة المانجا الأفضل في العالم من هـــــنــــــا التخطيط : في أول صفحة، نرسم و نخطط أشكال و أحجام المشاهد " Panel " ، وهي مشاهد المانجا ، وطبعاً نتطرق أولاً للسيناريو الذي رسمناه، ومن هناك نحدد عدد المشاهد المطلوبة في الصورة الواحدة. الرسم: نبدأ الأن باختيار الأداة الظاهرة في الشاشة ، واسمها Frame border ، وهي المسؤولة عن رسم اللوحات. نضع طبقة التخطيط في الأسفل ، و من فوقها نقوم باستعمال الأداة برسم مستطيل. تقسيم اللوحات : نختار أداة Cut frame border ، وهي التي تقوم بقص المستطيل لمشاهد منفصلة. نكرر الأمر ذاته في جميع الصفحات التحكم باللوحات : نختار أداةOperation ،و بها نتمكن من التحكم بأطراف اللوحة ، فكما تلاحظون تظهر لكم أربع نقاط زرقاء و من خلالها ، نحرك المشهد كما نريد، لأي زاوية نريد الأمر ذاته ينطبق على زوايا اللوحة، من خلال النقاط الحمراء التي تمكننا من تحريك تلك الزوايا و شدها لأي نقطة ، حتى نحصل على الحجم الذي نريده لمشهد المانجا. هذه هي الخطوات التي يجب أن نسير عليها ، كما أوضحت في أول التدوينة ، أننا علينا الاعتماد على السيناريو أولاً ، ومن بعدها ثانياً السكتش و ثالثاً نقوم بتطبيق كل الخطوات من أجل رسم المشاهد الخاصة بالمانجا . الصفحات النهائية هكذا نكون انتهينا من تحضير الصفحات من خلال رسم اللوحات أو المشاهد لكل صفحة ، ويجب أن يكون اعتماداً على السيناريو المقرر للمانجا الخاصة بكم. أتمنى أن تجربوا هذه الطريقة السهلة ، للمانجات التي تخططون لها ، وأنا من جهتي سوف أحضر المزيد من الدروس المفصلة للمرات القادمة. 4.0 4 أعجبهم متوسط التقييم هو 4 من 5, على أساس 4 عدد الأصوات, أعجبهم شارك Love it? Rate it Really good Don’t love it Not great Satisfied Really good Love it
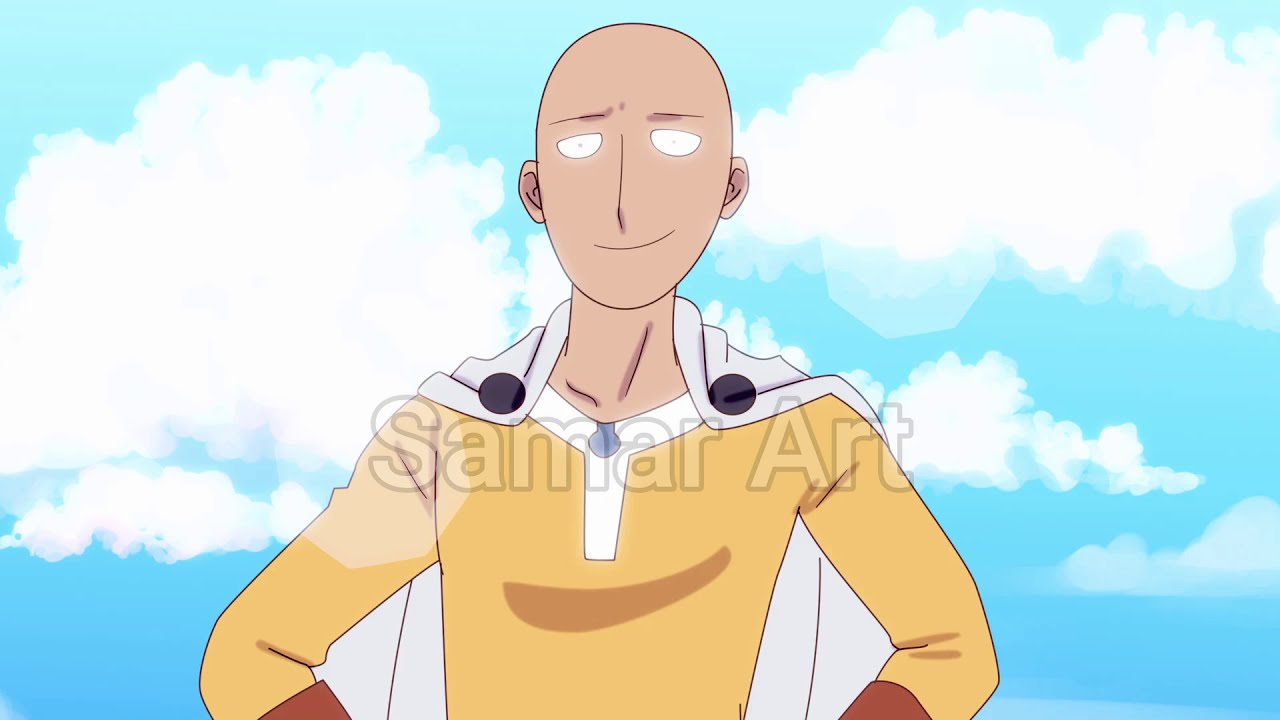
- Animate Saitama from anime One-punch man in one day
Animate Saitama from anime One-punch man in one day In this post, I will explain in a simple way how you moved the character Saitama from the anime One Punch Man, in just one day, in order to finish a scene on a day that is not difficult at all, especially when you are free on that day. Sketch I collected some pictures of Saitama from the net, put them on the screen, and then I drew in my mind the movement that I wanted, which was his speech, and then he punched the ground strongly, then I drew a simple and quick sketch of the movement, with adjustments, erasures and repetition of the drawing until I reach the desired result, and this is the most important stage. Let your hand rest and draw as you wish, because we will fix everything later. Inking After the quick lines, I drew directly black, with cleaner lines over the diagram, but in a single layer, and I repeated that, erased all the previous errors, and focused more on making the lines as neat as possible, and being airtight, because Toon Boom Harmony that I work with, does not color if there is a small hole in the drawing. Coloring After drawing I painted, without shading, and I relied on finishing one color first, for example, “I color the dress in yellow in all scenes, and when I finish with the yellow color, I move directly to the red color and finish it in all the scenes etc.”, with coloring the floor and stones And everything that surrounds the character, and I add the background that I drew in advance in the Paint Studio clip program. Camera and effects The last step is always the movement of the camera and the effects, and it is the easiest step for me and I love it a lot and I add whatever effects I like and I play with the movement of the camera however I want, as you notice during the video that the camera shakes when it punches the ground, and when I finished it I added the lights Like sunshine and light bloom in order to give it a more anime look. Thus, I explained without complicating how I did this scene, I started it in the day and finished it at night, and I did not finish in my life a whole scene in one day, it is true that I finished in a day, but it was very tiring, and I did not like the idea of my long sitting for a scene Therefore, I do not think I will repeat this matter, on the contrary, I found that doing a scene on several days is easier and better and does not cause fatigue. متوسط التقييم هو null من 5, على أساس 0 عدد الأصوات, أعجبهم شارك Love it? Rate it Don’t love it Not great Satisfied Really good Love it
- allchapters مانجا العربية قصة أريج و جمال جميع الفصول
Next جميع الفصول الفصلُ السّابِق الفصلُ التّالي
- all chapters مانجا صفوان مانجا ملونة للصغار
Next جميع الفصول الفصلُ السّابِق الفصلُ التّالي
- the escape manga
الفصل الأول
- the escape manga مانجا عربيةع عن هروب سجينين
الهروب الفصل كاملاً ١٠/١٢/١٨ التّعليقات حول المانجا comments debug التّعليقات تسجيل الدخول اكتب تعليقاً اكتب تعليقاً مشاركة أفكارك كن أول من يعلِّق.
- Izaajmangaarabic مانجا ويب تون ملونة عربية بعنوان "إزعاج المتفوقين"
إزعاج المتفوقين الفصل كاملاً ٢٤/١٢/٢٣ التّعليقات حول المانجا comments debug التّعليقات Log In اكتب تعليقاً اكتب تعليقاً Share Your Thoughts Be the first to write a comment.
- Izaajmangaarabic
إزعاج المتفوقين
- مانجا بماذا أناديك Chapter 6
Next الفصلُ السّادِس الفصلُ السّابِق الفصلُ التّالي
- مانجا بماذا أناديك Chapter 5
Next الفَصلُ الخامِس الفصلُ السّابِق الفصلُ التّالي
- مانجا بماذا أناديك Chapter 3
Next الفَصلُ الثّالث الفصلُ السّابِق الفصلُ التّالي