نتيجة البحث
تم العثور على 478 عنصر لـ ""
- How to animate anime eye blinking with toon boom
How to animate anime eye blinking with toon boom Hello, I came back to you after I took a break from the site, and today the explanation will be on how to move the anime eye, and make it blink, in an easy way and it will only take a few minutes So please follow the explanation with me! Drawing We begin to draw the eye, and the beginning is with the eyelashes, as you can see here Then we move on to drawing and coloring the white of the eye, and it's okay to add a light blue shading inside the eye After that, we move to a different layer, where we draw the pupil and color it with the color we want Then in another separate layer, we draw the eyebrows, and as you can see, I marked the layers for you and what they contain with the arrow It is necessary to add the peg to the eye and the pupil together, and one for the eyebrows And everything is ready to animate! Animating Click on the eyes layer, and select the Transform tool It is very important to determine the point of the pivot, which is the blue point that appears in the middle of the eye, because while closing the eye, it will rest there, without moving to the other side. And the tool that helps us in this is specified in the image, when we click on the layer, add the peg, flip the letter B, then choose the tool specified in the image, and from there we specify the location of the center point And we add a key frame Then we move to the "Timeline" and add a move key, or key frame, and bring the eye down and close it like this And we go back to add another key frame, and we open the eye The final result I hope you liked the explanation, and if you want me to give specific explanations, or you don't understand a specific tool in Toon Boom Harmony, write me your comments below, and I will respond to you. متوسط التقييم هو null من 5, على أساس 0 عدد الأصوات, أعجبهم شارك Love it? Rate it Don’t love it Not great Satisfied Really good Love it
- اشرف حسون
< Back اشرف حسون المغرب 17 Previous Next
- How To Make Your Own Anime Animation
How To Make Your Own Anime Animation The "Idea Reader" anime I created and animated, if you follow the instructions below, you will be able to design your own anime as well. There is no doubt that anime design has become of interest to many, especially since tools are available these days, and because young people are fond of anime, and every person wants us to design and produce an episode, or even an anime scene, from the work of his hands, in order to show his creativity and ideas, and In order to share his unique talent with the world. Therefore, I came to you with ideas and suggestions, to help you start designing your own movie, with the quality of Japanese anime, and now let's go to the steps. The idea : It must be an idea that has never been in the arena before, and do not forget that anime is one of the most difficult arts at all, so try to come up with an idea, pull the follower, and make him not stop watching, so the best way to come with an idea is to watch A group of translated anime, and try to record every idea you like on a sheet of paper, and when you finish, keep the ideas that you want to quote, and you have a solution of two, either you merge the ideas, or you come up with an idea derived from the quotes. Scenario: It is one of the foundations of the anime, and it is what makes you walk according to the idea of the anime, before you write the script, divide the number of pages, so as not to prolong the writing on each page, it is necessary during writing the script, is to write the dialogue of the characters, but I personally advise you, to You write the dialogue of the characters, when you completely finish the script, because writing them together may not give you the full right to write an interesting dialogue, and you may confuse the dialogue with events. Add table and split scenes In order not to fall into big trouble, decide before starting, whether you want to work in "anime" or "cartoon", because there is a difference between them. Anime has a distinct character, and working on it is more accurate and more difficult. As for cartoon, it is easier and the work for you is simpler. . Drawing : Supposedly when you say anime, the drawings must be really an anime, and this is a mistake many people face, when they do not know the difference between anime and others, because anime has a unique quality in it, and your characters must be distinguished by that, the drawing and characters must be of one character, For example, you want an arrogant character, then the drawing must express that, otherwise viewers will not notice the character's characteristics, so try as much as possible to link your drawing with your character's characteristics. We quickly design the character to visualize what he looks like scenes : After preparing the story and the characters, it is now time to prepare the clips for the anime movie, which determine for you how the characters move, the camera, and the things around them, each scene must be unique in its character, especially those that express the state of the characters, or the most important circumstances that They pass by, or an important and memorable moment, add to that zoom in and out, and the shots in which the camera is at different angles, for example from the ceiling, or near the face of the character, and one of the most important shots that you should pay attention to is action, so it should be It is fun, and lightning-fast, especially as it contains a large number of effects. We paint scenes without fine detail, only the important lines with the movement of the camera in red Backgrounds : Before starting the animation, draw all the backgrounds for animation, and this is using Photoshop, not Elton Boom, because Photoshop backgrounds are more beautiful and give more realism, or if you like, paint the background you want, just before the desired scene. Animating : And now we have come to the fun part, which is the animation, "Animation", and here you must attend your own program, which allows you to design animation, and I recommend you Toon Boom Harmony, it is the best and easiest, it gives you a lot of options that help you In a professional movie production. Animate one of the anime scenes you made Editing : After completing your film, and doing everything, the last step remains which is montage, save the entire video, and put it in your favorite montage program, where you start by cutting and erasing scenes that you do not want, or changing their places, and you may add some texts, In order to explain to the viewer something, and not lose sight of the most important elements of the film, namely music and sounds, there is no film that is free of them, so add sound effects for each movement, such as the sound of water at the tap, or the sound of stones when they break or the sound of an explosion ... Music : Add music that expresses the situation in front of you, and one of the most important things in any animated movie is dubbing, so all you have to do is add your voice, read your dialogue in the scenario, and in order to change the tone of your voice, add effects to it And if you would like to make it easier for you to work, invite your brothers or friends to join you in dubbing the film, give each character a voice from your friends, make them read the script well, and let them know the feelings that they must feel during the scenes, and when arranging everything Sit in a quiet place, and record the voices of your friends alone, not together, it is much easier. You can use any editing program you want some advices : You need to be in a quiet place, to be attentive to your work Hire some friends to help you with some errands, so you can finish quickly Don't speed up your performance, you want the animation to be smooth, so take your time Retry if you fail to design the animation, not everything works out If movement becomes difficult for you, you can use an animation from any anime movie When you are borrowing a scene from another anime, do not try to copy it all, but change it. Final scene from one of my anime, after doing all the previous steps Tips to make it easy for you: Draw backgrounds before anything, and draw front accessories, such as a tree, chair, wall, etc. When you move, do not color after each direct movement, but you must completely finish moving, so that things do not get confused. Color after you finish stirring Add shadows, this is something you shouldn't lose sight of because it gives aesthetic to your movie If there are scenes that need effects, add them, using another effect program Do not animate more than one character, as this may make it difficult for you. informations : You have to bear in mind well, that work like this requires patience and effort, so do not think that it is easy, because doing one scene requires a large staff, but it is not impossible for you to make your film, because the tools and programs have become available now, so you have to be prepared With the idea and the story before starting, so as not to stop in the middle of your work, and divide the number of hours per day, and it is preferable to work at least 6 hours a day, with a break every 3 hours. By following these steps, you will have finished designing a professional anime movie, from your home, and with both hands, it is very easy, you just have to be a talented person who is determined to reach his goal in the world of anime design. Also, here are links to anime work that you made on YouTube, so that you know that it is possible and not impossible: This is my first anime movie ever, and it won the admiration of many, and since then I have been continuously improving and progressing in animation. I hope that you will subscribe to the newsletter to receive notifications about new animation lessons, anime and manga updates, and I will be happy to share with you the blog post via Facebook, Twitter and Instagram Perhaps someone benefits, and you can join our group that includes talented people in dubbing, drawing and authoring where we create together projects Varied here here 1.0 1 أعجبهم متوسط التقييم هو 1 من 5, على أساس 1 عدد الأصوات, أعجبهم شارك Love it? Rate it Don’t love it Don’t love it Not great Satisfied Really good Love it
- كيف ترسم الشجرة بأسلوب الانمي الياباني
كيف ترسم الشجرة بأسلوب الانمي الياباني مرحباً أصدقائي بشرح كيفية رسم الشجرة بطريقة الانمي الياباني ، باستخدام فرشاة واحدة ، دون الحاجة لتغيير الأدوات ، و النتيجة سوف تكون مبهرة و جميلة ، لذا انصحكم بمراجعة الطريقة ، و بالمناسبة ، ليس بالضرورة أن تستخدموا نفس برنامج الرسم الذي استخدمه في هذه الدروس، و لكن يمكنكم أن تطبقوا الطريقة نفسها ببرنامج كليب ستديو . رابط تحميل برنامج رسم الانمي و المانجا : https://www.dpbolvw.net/click-100566624-14336797 نبدأ في رسم ساق الشجرة بشكل سريع ، و نضيف أطرافها بشكل متباعد و غير متسق ، و يمكنكم إضافة يد للشجرة بعدها نقوم برسم أوراق الشجر بشكل دائري و بعدة أحجام ، بحيث تكون الأوراق في الخلف أكبر و نقوم بتصغيرها كلما كانت في المقدمة نرسم ساق الشجرة أولاً ، مع العلم أنه يمكنكم القيام بهذه الخطوة لاحقاً بعد رسم أوراق الشجرة ، ولكنني أفضّل هذه الخطوة حتى أعلم أين أذهب حين أرسم أوراق الشجرة بعدها ننتقل لاختيار لون غامق " أزرق مخضر" و هو ما سيكون ظل الأوراق، و نرسمها بطبقة منفصلة و يجب أن تكون خلف ساق شجرة الانمي، هنا استخدمت فرشاة ورق الشجر و في طبقة جديدة، نضيفها أمام طبقة الساق ، نقوم برسم أوراق الشجرة يجب أن نرسم بشكل عشوائي ، طالما أننا نستخدم الفرشاة الجاهزة و إلا لن تبدو الشجرة طبيعية نترك بعض الفراغات و هنا نضيف طبقة أخرى ، و نرسم عليها المزيد من الأوراق، و لكن بألوان مختلفة ، مرة بالأخضر الفاتح ، ثم الأصفر، و القليل من البرتقالي هنا و هناك رابط تحميل برنامج رسم الانمي و المانجا : https://www.dpbolvw.net/click-100566624-14336797 حين ننتهي من إضافة أوراق شجرة الانمي ، ننتقل للساق ، و نقوم بتظليلها، لاحظوا أنني أضفت ظلاً مطابقاً لأوراق الشجر ،هذا لأنني استخدمت نفس الفرشاة التي رسمت بها ، من أجل إضافة الظل. و هنا نختم بإضافة إضافة بسيطة للساق ، و ها قد انتهينا، أتمنى أنكم استفدتم من هذه الخطوات السهلة و البسيطة ، والتي تعطي نتيجة رائعة في نهاية المطاف، , والتي يمكننا استخدامها في الانميات و المانجا. 1.0 1 أعجبهم متوسط التقييم هو 1 من 5, على أساس 1 عدد الأصوات, أعجبهم شارك Love it? Rate it Don’t love it Don’t love it Not great Satisfied Really good Love it
- How to make manga and add tones and shading
How to make manga and add tones and shading Today we will discuss how to draw your manga scenes. In the past, I posted to you how to design the manga, write the story and design the characters, and here we have reached the stage of drawing and adding the tuna to the drawings, so let's start. 1 Before we start drawing, it is necessary to leave a space for the dialogue balloons, and in the first we will add the paintings, and then the balloons for all scenes, and from this lesson you can know the appropriate balloon for each painting: Dialog balloons in the manga you must know You can add the dialogue now or later, because ClipPaint does not support writing in Arabic yet, I add it in Photoshop 2 After we add the panels or the "panel", we draw the "sketch" depending on the scenario, and here we choose your favorite inking tool or pen in order to draw the body and clothes We draw the body (face and skin) in a layer, clothes on a layer, and accessories on a layer as well 3 In this step, we draw all the features on a separate layer, We make sure that the eyes are dark and the lips and nose are small Do not forget to make the upper eyelashes thicker, this will increase the beauty of the characters, especially girls 4 We add "Layer" now and paint the hair with the same brush, but with a smaller size, this will show how soft the hair is, and you have the option to change the brush as well. Our movement should be light while drawing the hair, and add after the tufts here and there, so that the hair does not look flat. The bangs can interfere with the eyes, this is normal Draw some flying hairs, especially in outdoor scenes Finally, don't forget to paint the accessories The page is ready! 5 Now it's the shading stage and the addition of "tunes", there are two types of shading in front of us, and I will explain each of them separately The first step is shading or coloring the hair, in which we color the hair in black, or gray, and choose a lighter color in order to add shine And using a soft pen, we draw a line that directs us to where the light is And draw lines from top to bottom, close to each other And here we draw similar lines, but in the other direction And this is how "highlights" for hair are formed for us Now the usual shading: using the pen, in which we define the place of coloring, choose the gray color or any degree of black and gray, and fill that area This method is classic, and gives the manga a smooth appearance, and does not cause much confusion Secondly, “toning”: This is the common way to draw Japanese manga around the world, and it has a great aesthetic, helping us to fill in the spaces and shading with several types of shadows. Through the options, you can play with shading as you like, as you can make it soft, or prominent, and this type of shading is the most common in Japanese manga. But in order to speed up the pace of my work, I gave up adding tones and shading to my mangaes, and I relied heavily on coloring in black only, whether for hair, or some parts of clothes, and I found that this matter forgets me a lot. But for you, I advise you to try these three methods, and rely on one of them متوسط التقييم هو null من 5, على أساس 0 عدد الأصوات, أعجبهم شارك Love it? Rate it Don’t love it Not great Satisfied Really good Love it
- كيف ترسم وجه انمي ينظر للجانب و الأعلى
كيف ترسم وجه انمي ينظر للجانب و الأعلى مرحباً بكم في شرح جديد ، حول كيفية رسم وجه شخصية انمي تنظر للأعلى بكل سهولة، فلا شك أن رسم الوجه بزوايا مختلفة ، لأنه امر معقد ، خاصة عندما تكون شخصية الانمي تنظر للأعلى ، و أنا أحياناً اضطر أن ارسم مراراً و تكراراً ، حتى أحصل على النتيجة المرجوة، لذلك سوف أريكم طريقتي في الرسم هذه، آملة أن يفيدكم. 1 البداية تكون " كما تعودتم مني " أن نرسم دائرة "ترمز للرأس" ، ومن هناك ، نقوم برسم الخط الفاصل للوجه، بالاتجاه الذي تنظر إليه الشخصية. و كما تلاحظون أيضاً، نرسم خطين متوازيين للعينين، و يعلوه خط الجبهة ، ومن الأسفل ، نحدد مكان الذّقن من الضّروري تحديد مكان الذّقن و العنق ، لأن شخصية الانمي هنا تنظر للأعلى ، و بهذه الطّريقة يظهر العنق أكثر في الصورة هنا حددّت لكم مكان كل شيء من ملامح الوجه ، كما هو ظاهر أمامكم في الصّورة ، احفظوا الصّورة عندكم حتى تعودوا إليها لاحقاً الخط الفاصل للوجه "في منتصف الوجه" حيث سنرسم عليه الفم و الأنف فيما بعد من الأعلى خط الجبهة الخطان المخصصان للعينين في الأسفل خط الذّقن على الجانب خط الأذن 2 مستعينين بالتّخطيط السّابق، سنقوم الآن برسم تفاصيل ملامح وجه شخصية الانمي ، و قد كتبت لكم على الصّورة كيف يتم الأمر العين الموجودة على اليمين، تبدو أكبر و أطول، لأنها مواجهة للكاميرا، فكما نعلم كلما ابتعد الجسم عن الكاميرا، كلما كان أصغر الأنف يتجه بالإتجاه الذّي تنظر إليه الشّخصية و الرّاس كما ترون معي، يظهر من الخلف أكثر ، أي أنه علينا أن نرسم الشّعر أكثر وضوحاً هناك و بما أنّ الشّخصية تنظر للجانب و للأعلى قليلاً ، فأرنبة الأنف ستكون مرتفعة قليلاً و من الضّروري ألّا ننسى ظهور العنق حين تنظر شخصية الانمي للأعلى يمكنكم رسم الفم تحت الأنف مباشرة ، لأنني أفضل أن أجعلها أبعد قليلاً ، من إجل إعطاء الرّسمة بعض العمق ها هي الرّسمة بعد أن اتبعنا جميع الخطوات المذكورة سابقاُ، عن كيفية رسم شخصية انمي تنظر للجانب و الأعلى قليلاً 3 هنا سنضيف بعض التّفاصيل و التي ستكون على ذوقكم ، فيمكنكم رسم شعر الانمي كيفما شئتم لاحظوا حين رسمنا الشعر ، في المنتصف "معتمدين على الخط الفاصل للوجه" يمكننا بسهولة تحديد مكان منبت الشّعر، و رسم الخصلات ابتداءً من تلك النقطة ، و لا يسري الشّعر بخطٍ واحد، بل يتجه لجميع الإتجاهات ، فحينما نقترب من الخلف، فالشّعر يتجه للخلف، و حين نتجه للجانب، فالشّعر يتجه للجانب و هَلُمَ جَرا! و في الجهة اليسرى، شعر الانمي " بما أنه بعيد عن الكاميرا" يظهر بشكل أقل ، و الشّعر الذي رسمناه في الجهة اليمنى ، يظهر أكثر بكثير. بعض الأخطاء لتجنبها في الجهة اليمنى ، نرى أن الأنف طويل ، تقريباً بطول الوجه ، و هذا خطأ فادح، لأن شخصية الانمي هذه تنظر للأعلى بشكلٍ طفيف، فمن الطّبيعي ان يكون يرتفع الأنف للأعلى ، و إلا ستبدو الرّسمة غير صحيحة و من الأسفل، يظهر الذّقن أوسع كذلك ، و من تحته يبرز العنق و أمّا بالنسبة للفم، حاله كحال الأنف، نرفعه للأعلى هو الآخر، و من الخطأ رسمه في الأسفل هكذا يكون الدّرس لليوم قد انتهى، و حاولت فيه إظهار الطّرق الصّحيحة لرسم وجه الانمي من زاوية مختلفة، مع إظهاء بعض الأخطاء و تفاديها، وسوف نكمل هذه السّلسلة في الدّروس القادمة ، إذا سوف نرسم وجه الانمي من زوايا أصعب، حتى نتعلم سوياً، و إلى ذلك الوقت، آمل منكم يا أصدقائي أن تتدربوا على هذه الخطوات اليوم. 1.0 1 أعجبهم متوسط التقييم هو 1 من 5, على أساس 1 عدد الأصوات, أعجبهم شارك Love it? Rate it Don’t love it Don’t love it Not great Satisfied Really good Love it
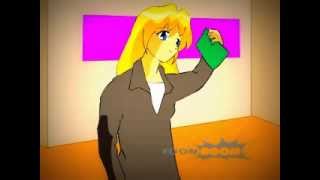
- انمي الفتيات الثلاث | من تصميمي مع صوتي بالدبلجة
انمي الفتيات الثلاث | من تصميمي مع صوتي بالدبلجة قبل حوالي 7 ، قمت بتصميم انمي مميز و رائع " بالنسبة لي " ، بانمي قصير ، يتحدث عن ثلاث فتيات ، يتعرضن لمواقف طريفة ، بصراحة حتى لا أكذب ، لم أقم بإضافة أي قصة في الانمي "كالعادة " ، يعيشن في بيت واحد ، استوحيته من الجاسوسات ، 3 فتيات ، و يعشن معا. الجديد في هذا الانمي ، بإضافة صوتي "أنا" ، فعلا قمت بإضافة صوتي ، في دبلجة الفتيات الثلاث ،مع تغيير طبقات الصوت ، كما يفعل المدبلجون ، و هنا قمت باستخدام برنامج في تغيير الصوت ، و هو ما جعله يتغير إلى صوت ألي في إحدى اللقطات ، و بصراحة كنت استمتع بالدبلجة ، و شعرت انني أضفت شيئا مميزا ألى الانمي. التحريك ، أو الانيميشن ، طبعا ، برنامجي الأول و الأخير ، تون بوم ، بالنسخة الأقدم ، لا ادري كيف كنت استمتع بالانيميشن ، و كيف لم اشعر بالملل " الذي اشعر به الأن" ، على الرغم من ان خبرتي كانت اقل. على كل حال اتمنى ان يكون قد اعجبكم . #انيميشن #انمي #ToonBoom #برنامجالانمي #ToonBoomHarmony #هارموني #قناتيعلىيوتيوب 5.0 5 أعجبهم متوسط التقييم هو 5 من 5, على أساس 5 عدد الأصوات, أعجبهم شارك Love it? Rate it Love it Don’t love it Not great Satisfied Really good Love it
- تحريك حمامة تطير بالتون بون هارموني
تحريك حمامة تطير بالتون بون هارموني مرحباً أصدقائي ـ أعتذر على الإطالة، فكما تعلمون أنني أنشغل باستمرار ، لكن عدت بدرس انميشين جديد ، فلا يوجد أجمل من تحضير درس خفيف في هذه الأجواء المثلجة ، و سوف نقوم بتحريك طائر أو حمامة تطير ببرنامج تون بوم هارموني و البخطوات و الصور و برنامج رسم الخلفيات الذي استخدمه دوماً هو كليب ستديو باينت Clip studio paint ، للشراء و التحميل مجاناً ، من هــــنــــا 1 نفتح برنامج التحريك ، ونقوم برسم حمامة بأي شكل ، لكنني رسمتها من الجانب ، وسوف يظهر الجناح الأيسر أمامنا ، بينما الآخر في الخلف 2 بعد أن رسمنا الحركة الأولى ، وكما عودتكم دائماً ، نرسم الحركة الأخيرة بعدها مباشرة في "فريم" و إطار جديد 3 " الإن بتويين" أو الإطارات البينية ، هي الخطوة القادمة، و التي سوف نرسم فيها الحركة في المنتصف. لا تنسوا أن تشغلوا خاصية " أونيون سكين" أو "قشرة البصلة" ، لأنها تتيح لنا أن نرى ما رسمنه مسبقاً و ما رسمناه لاحقاً. و نستمر بهذه الخطوات حتى ننتهي تماماً عدد الإطارات "الفريمات" هو ثمانية 8 سوف أريكم الرسمات التي احتجتها من أجل إنهاء الحركة بالصور و التعليمات 1 الحركة الأساسية و هو فتح الجناحين للأعلى بشكل مستقيم 2 البدأ في إنزال الجناح 3 فرد الجناحين للطرفين ، ونلاحظ ارتفاع طرف الجناح للأعلى ، وهذا ينم عن القيام بنزول الجناحين للأسفل 4 نزول الجناحين بنفس الوقت 5 الحركة التي انتهينا بها المرة الماضية ، وهي نزول الجناحين للأسفل بشكل مستقيم 6 و الآن الحركة المعاكسة ، وهي رفعهما للأعلى ، ومن هنا تبدأ الحركة 7 و ها هما الجناحان يرتفعان قليلاً 8 الحركة النهائية و نقوم بعدها بتكرار الإطارات من أجل الحصول على حركة من الطيران لا منتهية، أي أنه علينا أن ننسخ "الفريمات" قرب بعضها وفي الأسفل ، أترككم مع المشهد النهائي لطريقة تحريك عصفور انمي ، و آمل أن نلتقي مجدداً الحركة النهائية متوسط التقييم هو null من 5, على أساس 0 عدد الأصوات, أعجبهم شارك Love it? Rate it Don’t love it Not great Satisfied Really good Love it
- مانجا بماذا أناديك Chapter 1
Next الفَصل الأول الفصلُ السّابِق الفصلُ التّالي
- Animate a flying pigeon with toon boom harmony
Animate a flying pigeon with toon boom harmony Hello my friends - I apologize for the length, as you know that I am constantly busy, but I came back with a new animation lesson. There is nothing more beautiful than preparing a light lesson in this snowy weather, and we will move a bird or a flying dove with the program Toon Boom Harmony, steps and pictures And the background drawing program that I always used is Clip studio paint, for purchase and download for free, from Here 1We open the animation program, we draw a pigeon in any shape, but I drew it from the side, the left wing will appear in front of us, while the other is in the back 2 After we drew the first movement, and as you always return, we draw the last movement immediately after it in a "frame" and a new frame 3 The "enbetoin" or the interframes, is the next step, in which we will draw the movement in the middle. Don't forget to turn on the "Onion Skin" or "Onion Skin" feature, because it allows us to see what we drew before and what we drew later. And we continue with these steps until we are completely finished The number of frames is eight 8 I'll show you the drawings I needed to finish the animation with pictures and instructions 1 The main movement is to open the wings straight up 2 Begin to lower the wing 3 Spread the wings to the two ends, and note the height of the tip of the wing upwards, and this indicates that the wings go down. 4 Descending both wings at the same time 5 The movement we finished last time, which is the flapping of the wings straight downwards 6 And now the opposite movement, which is to raise them up, and from here the movement begins 7 And here the wings are raised a little 8 final movement And then we repeat the frames in order to get an infinite flight movement, that is, we have to copy the "frames" near each other Below, I leave you with the final scene of how to animate the anime bird, and I hope we meet again The final movement متوسط التقييم هو null من 5, على أساس 0 عدد الأصوات, أعجبهم شارك Love it? Rate it Don’t love it Not great Satisfied Really good Love it
- Animate reflection of the scene on a car windshield an anime style
Animate reflection of the scene on a car windshield an anime style Today we will learn how to design a beautiful anime scene, a girl inside a car, watching the outside scene, and how to make the scene reflect on the car windshield, in a transparent manner, and move the car in a way that makes it appear as if it is moving. Follow with me. Drawing the car and the girl : As usual, we start preparing the scene, and we start drawing the car from the inside in a layer, and the outside in a layer, from the top only, without highlighting the wheels And draw the girl in another layer. Then we proceed to coloring, as shown to us in the video above. Add the glass in a separate layer : We add a layer "Layer" and paint the windshield, and paint it white or dark gray. Note: The size and shape of the glass must match the windows of the car through which the girl is looking Insert background: At this point, we add any background we want to be reflected on the car's windshield. Adding the mask cutter : We go to the "Node library" We choose the "Cutter" and we add the "Cutter" tool, (you can search for it in the library) Then we go to the "Node view", where we can see everything we have done. And from there to the layer that contains the background, and we add a mask to it while pressing the Alt button And connect it to the layer that contains the windshield of the car. And double-click on the "black square" cutter tool, until the image is inside the glass frame Make the view more transparent : Now we come to the part of reducing the image “the view”, so that the glass is transparent, from the Node view, we double-click on the layer for the background, and from it this menu appears for us and we do the following: Advanced > opacity > 51 Animation the background: We move the scene or the background on the glass, through the Transform tool, in the opposite direction of the car's movement, so that it appears as if it is actually moving Click on the background And we add to it Peg Select the move tool and take the image to the right Animating the car : And now to the last part, so that we will move the car slightly We go to the Node library We select the Shake tool. And to the Node view, and double-click on the tool, until this menu appears Then choose the following settings And now the lesson is over, I hope it was easy, and I'm happy to share this information with you, because I've always wanted to make a similar scene, where the character is sitting inside the car, staring away, and I've always wanted to see the background reflection on the windshield, and I asked Whether I can do it or is it hard, but luckily for me it's easier than I expected. Try the method on the car or train and master it. متوسط التقييم هو null من 5, على أساس 0 عدد الأصوات, أعجبهم شارك Love it? Rate it Don’t love it Not great Satisfied Really good Love it
- the escape manga مانجا عربيةع عن هروب سجينين
الهروب الفصل كاملاً ١٠/١٢/١٨ التّعليقات حول المانجا comments debug التّعليقات تسجيل الدخول اكتب تعليقاً اكتب تعليقاً مشاركة أفكارك كن أول من يعلِّق.