نتيجة البحث
تم العثور على 478 عنصر لـ ""
- How to Animate a Walking Anime Character Using Animation Bones: A Comprehensive Guide
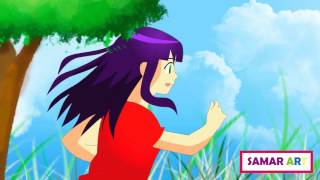
How to Animate a Walking Anime Character Using Animation Bones: A Comprehensive Guide Welcome to a special lesson, in which I will show you how to animate a walking anime character, from the side, using the Toon Boom Harmony program, without the need to draw at all. Just follow the steps with me carefully. This is an anime character that I designed using the Toon Boom Harmony program from several locations, and I saved it in the library, until it is used in animation. In today’s lesson, I will choose to move him from the side, as shown in the picture, and delete the rest of the unnecessary frames. Note, this program is intended for computers How to animate a walking anime character The first thing we must do is to activate the animation feature, and then after that, we go to the “Transform” tool, which is present in the program, and the animation method is as follows: We move the right leg forward Left leg backwards Right arm backwards Left arm forward We press on the leg and press the letter B, and it will be identified with us, and it is necessary that the keyboard be in English. Then we add a key frame or “key frame”, after we go through the number of frames or frames we want, and we move, but this time in reverse: We move the right leg backwards Left leg forward Right arm forward Left arm backwards The walking speed of an anime character depends on the number of frames. The higher the number, the slower the movement. Now between the two movements, after we have completed the first stage, now comes the rhythm stage, which is the young man rising and falling upward, but very slightly without exaggeration. All we have to do is add a key frame for the “peg” or “peg” of the entire body, in the middle between the two movements, and add a key frame, and raise the character a little to the top. Here we move towards the leg, and we are in the frame after the middle, and we press the letter B, then we bend the knee slightly, raise it up, and raise the foot slightly. This will benefit us in order to improve the young man's gait. This method can work better than any other program that uses bone animation We have finished the animation, and all we have to do now is just copy the animation, without needing to move it along the timeline or time line. We define the frames from the beginning until the frame at which the movement ends We copy We click on the last frame of the movement We paste over it We repeat this process along the schedule, and for the duration we want for the animation, in order to animate a walking anime character. Add a background to the scene We choose the option that I specified for you in the image below, and then we add any anime image from our computer, after which it will appear within the program. We add a “Peg” to it, and a “Keyframe” keyframe. We go through several frames, choose the “Transform” tool and drag the background from the left of the screen to the right, in order to make it appear as if it is moving when the young man walks. The issue of movement speed is up to you. If you reduce the frames, the anime background movement will be faster, and vice versa This is the final result for “animating a walking anime character.” We animated a young anime man walking with ease, and without the need to draw. All we did was that we added it from the library, ready-drawn, and animated it in a very simple manner, without complications. I hope the explanation was satisfactory. Your approval, and there are more lessons coming to the site, God willing. If you have any questions about the program, write a comment, or message me. متوسط التقييم هو null من 5, على أساس 0 عدد الأصوات, أعجبهم شارك Love it? Rate it Don’t love it Not great Satisfied Really good Love it
- صممت أول فيلم انمي في حياتي!
صممت أول فيلم انمي في حياتي! برنامج المونتاج الذي استعمله دوماً هو فيلمورا Filmora ، للشراء و التحميل مجاناً ، في الأسفل و برنامج رسم الخلفيات الذي استعمله دوماً هو كليب ستديو باينت Clip studio paint ، للشراء و التحميل مجاناً ، في الأسفل و أخيراً ، قمت بما كنت أعجز عنه لسنوات ، ألا و هو ، الكتابة و التحريك ، في آن واحد! ، مما شكل تحدياً أمام ما كنت أخاف منه ، لكن النتيجة كانت أفضل مما توقعت .لطالما كنت أعجز من كتابة قصة ، وبعدها التحريك ، لأنني لا أقدر أن اضبط وقتي ، و لا يمكنني السير ضمن ما أكتبه ، على العموم دعوني أقل لكم ، كيف صممت أول فيلم انمي في حياتي ، من جميع الجهات . القصة : تحكي قصة فيلم الانمي الخاص بي ، عن فتاة تدعى "تايوكو"، تقضي وقتاً مملاُ في البيت ، إذ تشاهد التلفاز ، و فجأة تأتي والدتها ، و تدخل الصالة ، وتطلب منها غاضبة ، أن تنظف الأواني المطبخية ، و تضطر الفتاة ، أن تفعل ذلك مكرهة ، و حين تدخل المطبخ ، و تبدأ التنظيف ، تجد طائراً لطيفا ، يغرد عند النافذة ، و تستمتع الفتاة "تايوكو " بتغريده ، ويحن يذهب العصفور من امامها ، تحاول اللحاق به ، و تخرج من المنزل ، و بينما هي تلاحقه ، تفقد أثره ، و تجري داخل مكان غريب ، لتجد نفسها ، في عالم سحري.هذا العالم جميل جدا ، إذ تجد كل ما تشتهيه ، من حلويات و فواكه ، وكل ما هو لذيذ ، و تبدأ بالتذوق ، من كل قطعة ، و فجأة ، تأتي صربة على رأسها ، لتجد أنها كانت تحلم ، فتقول لها أمها ، أن تكمل التنظيف ، و إلا لن تشاهد التلفاز ، و تقوم "تايوكو " بطرد العصفور ، لأنه هو من قام بجعلها تلتهي ، حين كانت تحلم بالعالم الجميل . الأنيميشن : التحريك ، كالعادة ، أقوم باستخدام برنامج ، تون بوم انيميشن فيه ، "تحدثت عنه ، في تدوينة سابقة " ، لكن هذه المرة الأولى ، التي أشعر فيها ، أن التحريك كان سهلا علي ، و الأن أدركت السبب ، ألا و هو ، أنني قمت بكتابة السيناريو ، و قمت بتحضير اللقطات ، " الستوري بورد storybaord، " ، و الخلفيات مسبقاً ، مما جعلني أركز أكثر على كل لقطة لوحدها ، و جعلني أعطي كل حركة ، المزيد من الاهتمام "رغم أنه ليس أفضل شيء بعد " ، و كنت امشي بوتيرة متتالية ، و شعرت أن العمل لم يكن صعبا كما تخيلته .رغم أن هذا الفيلم الانمي الاول لي ، إلا أنني لم اشعر انه افضل ما عندي ، لان التحريك لم يكن بتلك السلاسة التي كنت اريدها ، لكن بما انني اثبت انه بمقدوري ان التزم بالسيناريو الذي كتبته ، قهذا يعطيني أملا ، أنه مستقبلا ، سوف أتمكن من تصميم فيلم انمي عربي ، متكامل ، من جميع النواحي ، ابتداءً من الفكرة ، و انتهاءً بالتحريك. #انيميشن #انمي #ToonBoomHarmony #ToonBoom #التونبوم #قناتيعلىيوتيوب #يوتيوب متوسط التقييم هو null من 5, على أساس 12 عدد الأصوات, أعجبهم شارك Love it? Rate it Don’t love it Not great Satisfied Really good Love it
- Learn to draw anime mouth with coloring
Learn to draw anime mouth with coloring Welcome to a new explanation and I apologize for the absence, because I was busy with many things, but I came back with a lot of new lessons in my pocket. Welcome to a new explanation and I apologize for the absence, because I was busy with many things, but I came back with a lot of new lessons in my pocket. The drawing software 1 We begin to draw the initial outline, which will be a rectangle with a line in the middle. 2 Then we draw a curved line inside, and the bottom line is the lower lip, and the upper line is the upper lip. We make sure that the line in the middle, will be our guide in order to split the mouth. 3 We add the teeth, and the tongue The drawing software 4 We draw the whole mouth, and outline it in black 5 We're done inking 6 This is the final look after coloring Here we see how the rectangle helped us determine the size of the smile, and the length of the lips, so use this method whenever you draw the mouth Drawing multiple shapes for anime mouth The drawing software 1 Using the same method, we draw the sketch randomly, only in order to determine the desired shape to draw the anime mouth 2 We ink over the lines we drew earlier. 3 Here are the ready-made anime lips, each of them expressing a character's status. 4 We start coloring 5 Shading Let me explain to you the details here, we see that the lines are heading in a certain direction, the open mouth looks like a triangle "No. 2", and the zigzag mouth looks like the waves of the sea "No. 3" It is just one line for each side, notice how each arrow points to the direction of each line from the upper and lower lip. The mouth in the world of anime is the easiest at all among all other types of drawings, so drawing it is easy, and it only needs certain lines to show us the final shape. More lessons متوسط التقييم هو null من 5, على أساس 0 عدد الأصوات, أعجبهم شارك Love it? Rate it Don’t love it Not great Satisfied Really good Love it
- Learn to draw manga by adding dialogue balloons
Learn to draw manga by adding dialogue balloons Today we will complete a series of teaching Arabic manga drawing, and we will talk about the easiest step in the manga industry, which is adding speech bubbles, or what is known as dialogue balloons, which is a balloon in a certain way, which we add to the manga scenes, and through it the character speaks, and expresses what wanders in her mind. The method is easy, now let's see how Write dialogue It is necessary to write the dialogue in any program we want, and as we learned previously, we write the story and the script before deciding on the drawing, as we copy the required dialogues, as shown in the image below, and add them to Photoshop, and choose the desired font Copy the sentence After we have added the sentences to Adobe Photoshop, we select the entire page, and copy the page I do this because the program I draw manga with does not support Arabic yet It is necessary that the page does not contain any backgrounds Add balloons After we added the words, we now include the balloons for each sentence, and it is necessary to understand that each case has a special balloon that expresses the feelings of the manga character, as we cannot put the same balloon for each scene This does not include the balloon shape that you adopt for your manga, I'm talking about the balloon that expresses feelings of shock, fear and other things... On this page the balloons were normal Adjusting the balloon to suit each scene The next step, is to modify the bubbles that we added, and we mention here, only the necessary scenes, we choose the scenes that express the special situation of each character, and we look at forming speech bubbles and choose what fits with the phrase, we pull out the balloon and add it in a new layer , and adjust its size Add the arrow pointing to the characters The last step for the manga dialogue bubbles left for us is to add the arrow that points to each speaker, from the left window, we choose and define the starting point that should be close to the manga character, and we simply point the balloon arrow towards it Add dialogue to manga We go to the manga drawing program, and paste what we copied earlier, and as you can see in the picture, the text has appeared in front of us But it has a white background, at the bottom you can see how to get rid of it in a second We go to the following option: Edit > Convert brightness to opacity In this way, the white background will disappear and we will have only the dialogue, and we can add it and drag it towards the balloon designated for it, which is related to the manga character who is speaking Distribute phrases to manga characters In the options on the left side, there are many selection tools, and we choose from them what is written at the bottom Selection area > Rectangle Next, we select the required phrase, and we drag the sentence towards the balloon In this way, we have learned how to add balloons and speech bubbles to our manga, and it did not take much effort, you can play with the shapes of dialogue balloons as much as you want, and create shapes that fit with your comic, and I meet you in a new lesson. متوسط التقييم هو null من 5, على أساس 0 عدد الأصوات, أعجبهم شارك Love it? Rate it Don’t love it Not great Satisfied Really good Love it
- أحمد باقر طاهر
< Back أحمد باقر طاهر عراقي 23 Previous Next
- Webtoon Design: A Step-by-Step Explanation with Pictures
Webtoon Design: A Step-by-Step Explanation with Pictures Welcome to a lesson, which is the first of its kind on my site, and it is about webtoons, which are the type of comic stories that are shown on the Internet, and are often in color, because they are not printed, unlike manga, which is in black and white, because they are printed at a low cost. In general, I had to explain the difference briefly before starting the lesson. Story and script of the webtoon We write the story that will be turned into a webtoon. You have the freedom to write it in any program you want, and we divide it in a table. Each number represents a specific shot, and its proximity is the description and dialogue. It is true that scheduling the scenario is optional, but it is practical in terms of saving time and effort Balloons and dialogue We now open the drawing program that we will work on. The first thing we have to do is define and divide the scenes that will appear on the page. In webtoons, the scenes are often under each other, but we can arrange them like Japanese manga. Before drawing, it is necessary to add dialogue balloons to the pages, so that we know the space allocated for drawing the characters. Adding balloons after drawing will cover what you have drawn, and you may not find enough space for the balloons. The sketch the webtoon We begin to draw the basic lines of the scenes, green for the initial shape of the body, blue for the face, and red for the detailed drawing. Inking and coloring the webtoon After the sketch, the inking stage will come, with black color, we lighten the sketch layer, and then we begin drawing directly above it. It is necessary to ink each part separately, the hair in a separate layer, and the body as well as the clothes. The method is as follows: I add a new folder dedicated to inking, and inside it is a folder dedicated to coloring, and each folder has a layer. Layer for drawing hair Body drawing layer Layer for drawing clothes and accessories Adding a separate layer for each part helps us modify what we want, without affecting the entire drawing In the coloring folder, I add a folder for each part of the drawing Skin coloring folder Facial features coloring folder Hair coloring folder Clothes coloring folder Optional add-ons and accessories coloring folder Example: In the hair coloring folder as shown below, I colored the hair yellow, and in a separate layer I added shadow, and in an additional layer, we can add shine to the hair. Add backgrounds to the webtoon As you are accustomed to me, I do not draw the backgrounds myself, but rather I use 3D models, and this is what mangaka and webtooners always do. I take the place I want, which is the school classroom, and specify the angle I want, and from there, I choose the option to turn the shot into an anime drawing. Then I added the effect of softening the color intensity, in order to make it more anime-like. Notice the difference between the right and left images, how the chapter in the “after” image looks brighter and more beautiful than the previous one, which looks dark in relation to the webtoon story. Effects the webtoon It is important that some shots contain effects that express the characters’ emotions, such as screaming, shock, fear, and other feelings, and here I will show you how to do that. We choose Figure from the left menu, select the appropriate form of effect and its intensity, and add it to the panel. A layer with this effect will appear. You can control the color and thickness of the lines as well Publishing method It is known that webtoons are displayed by scrolling down, because they are intended for viewing on mobile phones, so we must follow that method while publishing. Here is a video that will explain it to you This, the final result of the entire page will be. I hope you have benefited, and stay tuned for more lessons dedicated to manga. I will see you well. To read the full manga from Here متوسط التقييم هو null من 5, على أساس 0 عدد الأصوات, أعجبهم شارك Love it? Rate it Don’t love it Not great Satisfied Really good Love it
- هاشم الشريف
< Back هاشم الشريف سعودي 18 Previous Next
- Preparing manga pages and drawing scenes paintings
Preparing manga pages and drawing scenes paintings Hello all my friends, in an explanation dedicated to manga, today we will learn how to prepare manga pages, and also draw manga panels, in an easy and fast way and in easy steps. The program used is: Clip studio paint EX, for computers Download link, and one-time purchase, the best anime and manga drawing program in the world from Here First of all, we must draw the sketch, of the manga scenes, on one complete page, and each section is a manga page, and draw the next page, near the first page, and so on until we finish the planning. It does not have to contain all the details, it is enough just to draw the locations of the characters and a quick layout of the background Software preparation: We open the program in a new file, and here, as you can see, we choose the manga option, which is what allows us to open the manga settings. After that, we write the name of the manga, and then we specify the size of the file or paper, which is usually A4, and then we choose the number of pages at the bottom. And we press Ok. Pages : Here we are shown all the pages we have chosen, and the first paper dedicated to the cover, the cover of the manga, and I will give him a special lesson. And below, we find the manga pages arranged The program used is: Clip studio paint EX, for computers Download link, and one-time purchase, the best anime and manga drawing program in the world from Here Sketch : On the first page, we draw and plan the shapes and sizes of the scenes "Panel", which are the manga scenes, and of course we first address the scenario that we drew, and from there we determine the number of scenes required in one image. Drawing: Now we start by choosing the tool that appears on the screen, its name is Frame border, which is responsible for drawing the panels. we put The layout layer is at the bottom, and on top of it we use the tool to draw a rectangle. Split panels : We choose the Cut frame border tool , which cuts the rectangle for separate scenes. We repeat the same thing on all pages Control the panels: We choose the Operation tool, and with it we can control the edges of the panel, as you can see, four blue points appear for you and through them, we move the scene as we want, to any angle we want The same applies to the corners of the canvas, through the red dots that enable us to move those corners and tighten them to any point, until we get the size we want for the manga scene. These are the steps that we must follow, as I explained in the first post, that we have to rely on the script first, and then secondly the sketch and thirdly we apply all the steps in order to draw the manga scenes. final pages This is how we have finished preparing the pages by drawing paintings or scenes for each page, and it should be based on the script for your manga. I hope you will try this easy method, for the manga you are planning, and I will bring more detailed tutorials for the next time. متوسط التقييم هو null من 5, على أساس 0 عدد الأصوات, أعجبهم شارك Love it? Rate it Don’t love it Not great Satisfied Really good Love it
- كيف ترسم السماء بطريقة الانمي
كيف ترسم السماء بطريقة الانمي مرحباً أصدقائي في تدوينة جديدة ، سأقوم فيها برسم السماء ، بأسلوب الانمي ، و الأسلوب سهل جداً ، سماء زرقاء متدرجة اللون ، و غيوم ببيضاء مع التظليل، و أشعة الشمس، و هيا بنا نرى معاً كيفية رسم السماء بأسلوب الانمي. البرنامج المستخدم للتحميل من هـــنــــا نبدأ أولاً في فتح برنامج الرسم أيّاً كان ، بحيث تكون الصفحة بيضاء ، نرسم أشكال الغيوم بعدة أحجام ، و تكون السماء في الأعلى مليئة بالغيوم الكبيرة و من الأسفل بالغيوم الصغيرة. الغيوم الصغيرة يمكن أن تكون بشكل غير متناسق الغيوم الكبيرة يجب أن تكون في الوراء و أمامها المزيد من الغيوم ثم نلون الصفحة كلها باللون الأزرق السّماوي ، مع التدرج باللون ، من الأعلى أدكن من الأسفل ، و نرسم الغيوم باللون الأبيض نتأكد أن يكون أسفل الغيوم "مغبشاً" قليلاً من الضّروري أن ترسم الغيوم بطبقة مختلفة " الغيوم التي في الوراء في طبقة ، والتي أمامها في طبقة" في هذه الرسمة احتجت إلى أربع طبقات نقوم هنا بالتظليل من الغيوم التي في الوراء و حتى الأمام ، ونمشي بالفرشاة بشكلٍ دائري و نحن نظلل يجب أن نخفف التظليل في الأعلى و أن نكثفه في الأسفل و هنا ننتقل للغيوم التي أمامها ، ونستمر البرنامج المستخدم للرسم للتحميل من هـــنــــا و ها انتهى التظليل بشكل تام الغيوم التي في الخلف أغمق من تلك التي في الأمام و ها هي النتيجة النّهائية ، بعد أن رسمنا الشمس ، و نضيف الإضاءة ، و البريق من أجل إعطاء إشراقة للسماء أتمنى أنه أعجبكم الدرس السريع ، و هناك المزيد من الدروس في جعبتي ، تتكون من التحريك و المانجا و الانمي ، لذا اشتركوا في المدونة و شاركوها مع الجميع ، إلى اللقاء 1.0 1 أعجبهم متوسط التقييم هو 1 من 5, على أساس 1 عدد الأصوات, أعجبهم شارك Love it? Rate it Don’t love it Don’t love it Not great Satisfied Really good Love it
- طريقة تحريك المطر في تون بوم بطريقة الانمي بسهولة
طريقة تحريك المطر في تون بوم بطريقة الانمي بسهولة مرحباً في شرح جديد يتمحور حول التحريك "الأنميشين" ، وهنا سوف نستعرض معاً طريقة سهلة جداً في تحريك المطر أتقنتها منذ فترة قريبة ، وقررت أن أشاركها معكم ، لأنني في السابق كنت أجرب المطر الذي يوفره برنامج #تون_بوم_هارموني ، وكانت صعبة و معقد بل ولم تكن النتيجة كما أرجوها ، لذلك اعتمدت هذه الطريقة و لنرى ما هي. البرامج المستخدمة في إنجاز الأنميشين تحميل تون بوم هارموني الجديد برنامج المونتاج الذي استعمله دوماً هو فيلمورا Filmora ، للشراء و التحميل مجاناً ، في الأسفل و برنامج رسم الخلفيات الذي استعمله دوماً هو كليب ستديو باينت Clip studio paint ، للشراء و التحميل مجاناً ، في الأسفل أولاً: نتوجه إلى برنامج الفوتوشوب أو كليب ستوديو باينت أو أي برنامج تحبون الرسم عليه ، وتضيفون المسطرة من أجل أن تساعدكم على رسم خطوط مستقيمة بشكل عامودي. و نلون الخلفية باللون الأسود من أجل أن نتمكن من مشاهدة الأمطار التي سوف نرسمها فقط. ثانياً: نضيف طبقة جديدة أو "لاير" و نختار اللون الأبيض ، و باستخدام أداة القلم أو "البين توول" نقوم برسم خطوط صغيرة بشكل عشوائي وغير منتظم ، وهذه ستكون الأمطار ، كل قطرة يجب أن تكون مختلفة عن غيرها. ثالثاً: نتخلص من الخلفية السوداء ، فتتبقى لدينا خلفية شفافة مع طبقة المطر التي رسمناها، و نقوم بتصدير الملف بصيغة PNG ، من القائمة التي في أعلى اليسار. رابعاً: نتوجه بعدها لبرنامج تون بوم هارموني ، و نضيف المطر الذي رسمناه ، من خلال تلك القائمة التي حددتها لكم باللون الأحمر " وهي المسؤولة عن إضافة الصور و الخلفيات إلى برنامج تون بوم هارموني" خامساً: في الطبقة المخصصة لصورة المطر ، نضيف pig من علامة الإدراج في القائمة السّفلية ، و في الطبقة المخصصة لصورة المطر ، نضيف pig من علامة الإدراج في القائمة السّفلية ، و بعدها نقوم بإضافة "كي فريم " key frame . ثم بعد ذلك ننتقل للإطار المفتاحي الآخر ، ونقوم بعكس الصورة ، وحددت لكم الأداة بالدائرة الحمراء. والآن أصبحت لدينا نفس الصورة و لكن مرة معكوسة ، ومرة كما هي. حيث سيبدو وكأن المطر يهطل و يتحرك دون أي مجهود وبصورة واحدة! ثم ننسخ الفريمات و نقوم بلصقها حتى يمتلئ "التايم لاين " timeline ، بعدد الإطارات المرغوب بها. هذه الطريقة عملية ولا تأخذ أي وقت، وتشبه إلى حدِ ما أسلوب الانمي ، ومن الآن فصاعداً أعتقد أنني سوف أعتمد هذه الطريقة ، لأنها تعطي المشهد واقعية أكبر. يمكنكم التحكم بعدد صور المطر التي تريدون إضافتها ، فبدلاً من واحد، تقدرون أن تضيفوا ما يصل حتى خمسة، مع عدد قطرات أقل في كل صورة ، وتجمعونها في البرنامج. ويمكنكم أن تشاهدوا المثال الحي لمشهد المطر الذي حركته، عن طريق الانمي الجديد الذي نعمل عليه، وإلى ذلك الحين ، دمتم بخير. 3.0 3 أعجبهم متوسط التقييم هو 3 من 5, على أساس 3 عدد الأصوات, أعجبهم شارك Love it? Rate it Satisfied Don’t love it Not great Satisfied Really good Love it
- First blog about animation and manga lessons for FREE
First blog about animation and manga lessons for FREE Welcome to all of you, in my new blog, which I opened specifically to share with you my thoughts, starting with my YouTube channel that I created since 2013, and from there I shared with you videos about animations, anime, and animations that I designed myself, and I was pleased with the audience’s interaction with me. and their admiration for what I was doing, and now, I decided to turn to another curve, which I always loved, which is the handicrafts, which I used to design some of in school, and I have a huge amount of ideas, I will try to present them in my blog, and in My YouTube channel, I hope you will give me your encouragement, so that I can continue my work. Thank you. #first #firstpost #myblog #firstpost متوسط التقييم هو null من 5, على أساس 0 عدد الأصوات, أعجبهم شارك Love it? Rate it Don’t love it Not great Satisfied Really good Love it
- كيف ترسم الأقدام في الانمي بطرق مختلفة
كيف ترسم الأقدام في الانمي بطرق مختلفة اليوم سوف نتعلم معاً كيفية رسم الأقدام أو الأرجل ، بأسلوب الانمي ، من عدة زوايا مختلفة ، و بطريقة سهلة جداً بالخطوات وكما نعلم أننا نواجه صعوبة كبيرة جداً في رسم الأرجل ، خاصة وأنها لا تظهر كثيراً في مشاهد الانمي و المانجا ، و السبب أن أغلب الشخصيات ترتدي الجوارب أو الأحذية، و كثيراً ما نتكاسل في رسمها. لذلك قررت أن أضيف هذا الشرح من أجل أن أساعدكم في رسم الأقدام بأسلوب سهل و دون تعقيد البرنامج المستخدم : كليب ستديو باينت ، أفضل برنامج لرسم الانمي و صناعة المانجا للتحميل من هنا التخطيط : نرسم أولاً الشكل الهندسي للأقدام ، عن طريق رسم مستطيل ضيق من الأسفل " الكعب" و عريض من الأعلى "الأصابع" ، وكما نلاحظ الشكل مقسوم لقسمين. وعند منطقة خروج الأصابع، نرسم مستطيلاً في الجهة العلوية، و نحاول أن يكون أحد الأطراف بارزاً للأعلى "مكان الإصبع الأكبر " . المنحنيات : في هذه المرحلة نرسم بعض الإنحناءات التي تحدد شكل القدم ، و مكان الكعبين لا يجب أن ننسى أن نضيف بعض العظام الموجود في الأقدام إضافة الأصابع : في المكان أو المستطيل الذي خصصناه لرسم الأصابع ، نرسم الشكل التخطيطي لها. السكتش : هنا كل ما علينا فعله هو فقط التحديد، و إبراز القدم بشكل أوضح ، و توصيل الخطوط ببعضها من أجل أن يتضح الشكل النهائي . البرنامج المستخدم : كليب ستديو باينت ، أفضل برنامج لرسم الانمي و صناعة المانجا للتحميل من هنا التحبير : بعد انتهائنا من جميع الخطوات السابقة، نأتي هنا من أجل التحبير ،باللون الأسود ، وكما نرى معاً في الصورة أدناه ، أننا رسمنا الأقدام أو الأرجل و هذه هي النتيجة. الشكل النهائي أتمنى أنكم استفدتم من الشرح المبسط ، لكيفية رسم الأقدام في الانمي ، و هذه هي الصورة النهائية بالألوان. اتبعوا هذه الطريقة لأنها سهلة و فعّالة ، و تدربوا عليها باستمرار ، و أنا ألقاكم في دروس أخرى. 5.0 5 أعجبهم متوسط التقييم هو 5 من 5, على أساس 5 عدد الأصوات, أعجبهم شارك Love it? Rate it Love it Don’t love it Not great Satisfied Really good Love it