Today we will learn together how to draw feet or legs in an anime style, from several different angles, in a very easy step-by-step manner.
As we know, we face a very great difficulty in drawing legs, especially since they do not appear much in anime and manga scenes, and the reason is that most characters wear socks or shoes, and we often get lazy in drawing them.
Therefore, I decided to add this explanation in order to help you draw feet in an easy and uncomplicated way.
My online store has everything you need as artists
First step
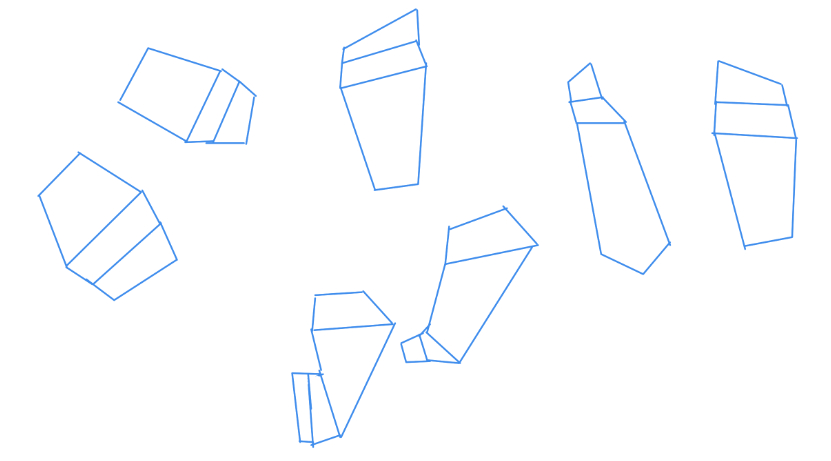
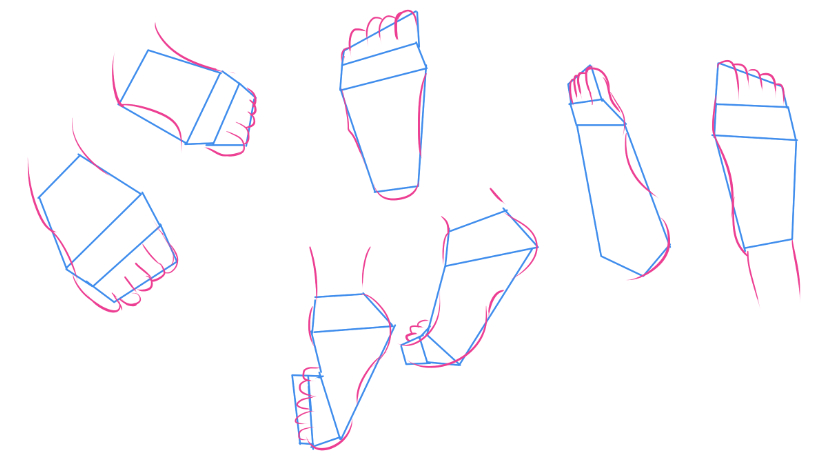
First, we draw the geometric shape of the feet, by drawing a narrow rectangle at the bottom (the heel) and a wide rectangle at the top (the toes). As we can see, the shape is divided into two parts.
At the area where the fingers emerge, we draw a rectangle on the upper side, and we try to make one of the ends protrude upwards (the place of the big finger). .
Notice that we have divided each foot into three sections:
- The upper section forms the space for the fingers, and is smaller in size.
- The middle section forms the base of the fingers, and is small in size.
- The remaining space is for the entire foot.
Step two
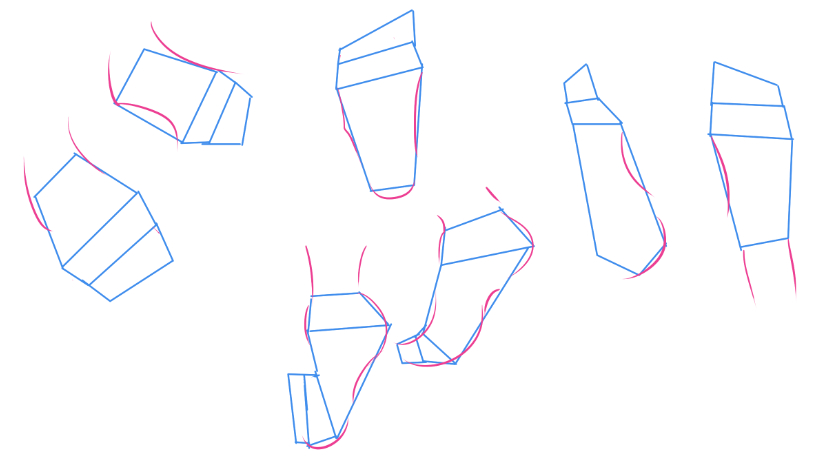
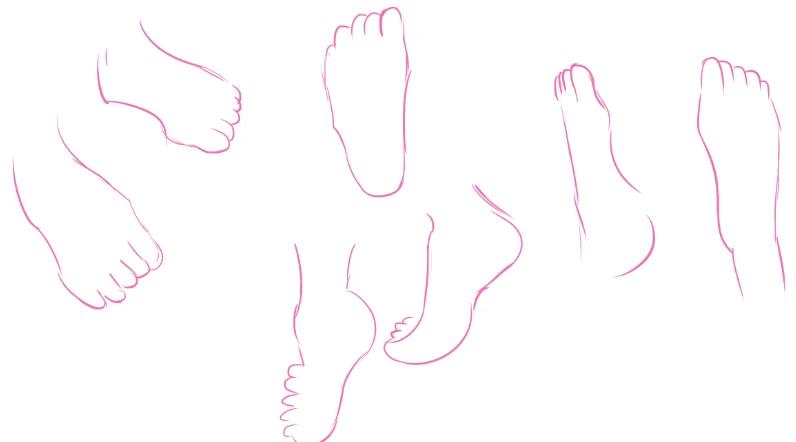
At this stage we draw some curves that define the shape of the foot and the location of the heels. We must not forget to add some of the bones present in the feet, in order to get a realistic shape as much as possible.
- We add a new layer of Layer > New Raster Layer.
- We choose Pencil Tool.
- We determine the color red or pink from Color Wheel To distinguish between the sketch and the details.
- We draw the natural curves of the feet inside the large rectangle so that the curves point inwards, and at the base of the toes the curves point outwards.
Step three
In the space or rectangle that we have allocated for drawing the fingers, we draw the schematic shape of each finger. We now begin to draw all the fingers, and we must not forget to pay attention to the fact that the sizes of the fingers are not the same shape. .
Step four
Here all we have to do is define, highlight the foot more clearly, and connect the lines together in order to make the final shape clear. .
We hide the sketch we used as a reference.
Step five
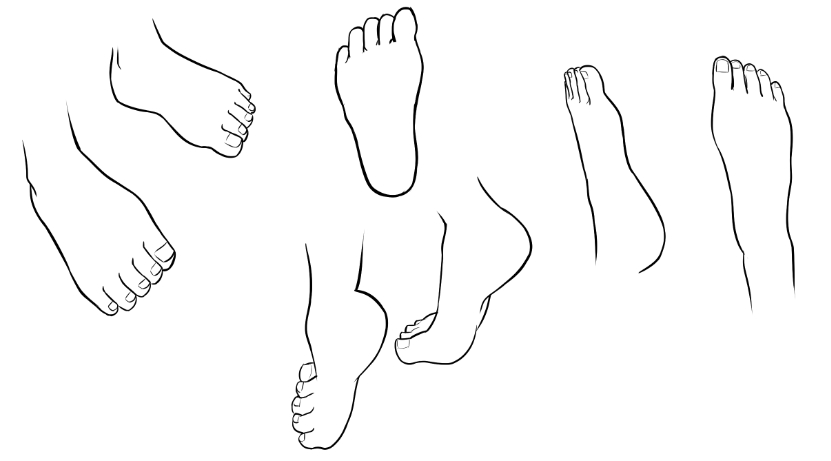
After completing all the previous steps, we come here to inking, in black, and as we can see together in the picture below, we have drawn the feet or legs and this is the result.
- We add a new layer of Layer > New Raster Layer.
- We select the pen tool (Pen Tool).
- We determine the color black from the color wheel.Color Wheel).
- We draw the entire foot based on the basic sketch.
Notes on anime foot trends
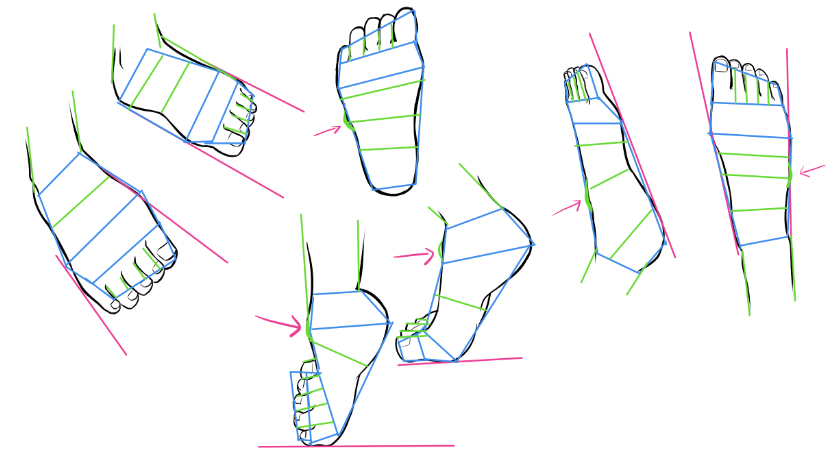
Here we see how the feet move, each according to its position:
- Foot from the side: We illustrate the curvature of the foot and the height of the heel to highlight its realistic shape while standing or walking.
- When the feet are flat on the ground: We draw the foot firmly above the ground line to determine the natural standing position.
- When feet walk: We demonstrate foot movement by raising the heel slightly, and the base of the foot towards the ground to make it look as if it is taking an actual step.
- Foot from the top: We draw the toes and the arch of the foot from a top angle to illustrate its complete shape.
Drawing the hand and how to draw the palm of the hand in anime professionally
Final form
Here we will color and shade the feet, after we have finished the sketching and inking process, and the steps are as follows:
- We add a new layer of Layer > New Raster Layer.
- We select the pen tool from Tool > Pen.
- We choose skin tone from Color Wheel.
- We close any outlets or open spaces using Close Gap In the filling tool.
- We select the filling tool from Tool > Fill We fill the feet with the same color.
- We add a new layer of Layer > New Raster LayerWe select a darker color than Color.
- WheelWe draw the shading using Pen Tool.
Drawing the hand and how to draw the palm of the hand in anime professionally
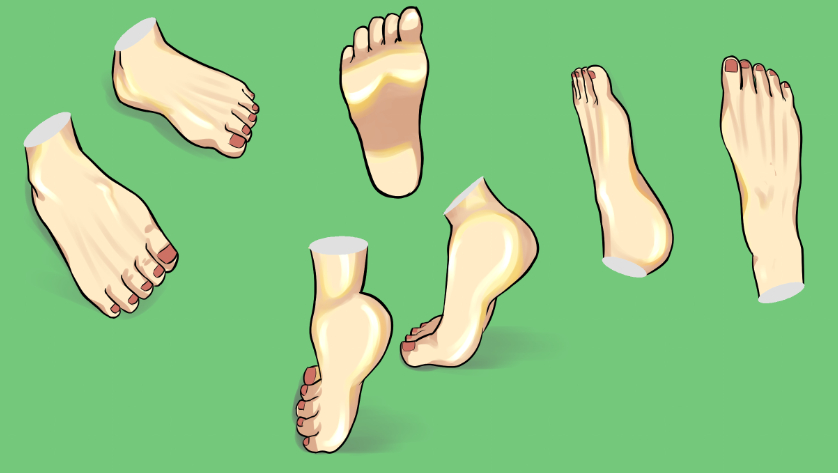
Today’s lesson has come to an end, and there is no easier explanation than this. We learned how to draw anime and manga feet in easy ways with a detailed explanation of all stages. Practice these steps several times until you master them.
Thank you, and I will see you soon, God willing.