Hello to all my friends and loved ones! In this beautiful and unique lesson, we'll show you how to draw a complete landscape using ready-made brushes from Clip Studio Paint. Here, we won't have to draw every element by hand, because we know that natural backgrounds contain many intricate details, such as grass, trees, rocks, and more, which would be very time-consuming if we tried to draw them ourselves. So, get ready to learn how to do it with me!.
My online store has everything you need as artists
First step
We prepare the page and begin working:
- We open a new file via File > New
- We add a new layer from the Layers panel via Layer > New Raster Layer
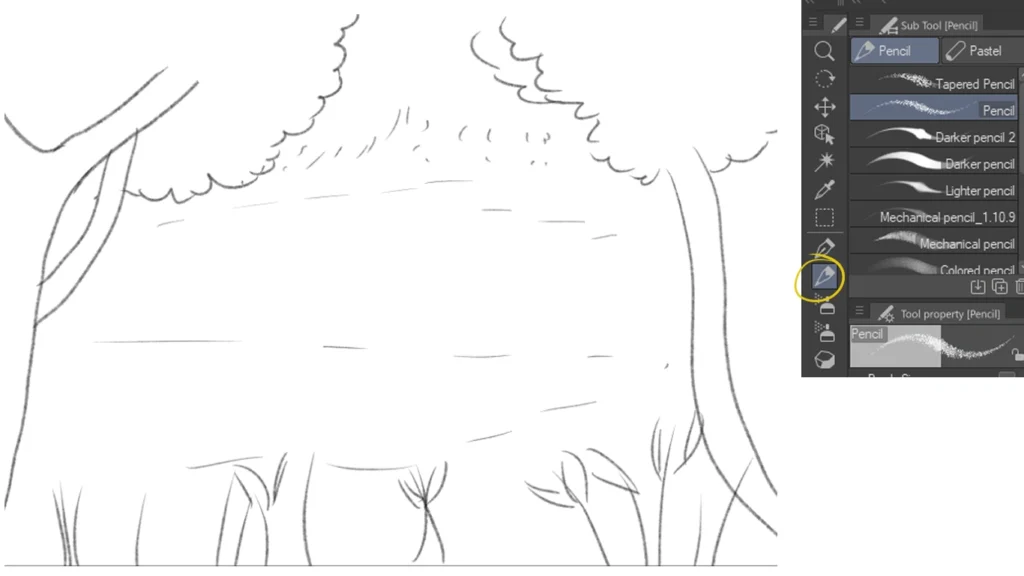
- We choose the pencil tool Pencil Tool.
- We draw the general view on the layer in a schematic way, such as two trees and some leaves.
- We determine the placement of flowers and key elements in the scene.
A look at the brushes we will be using
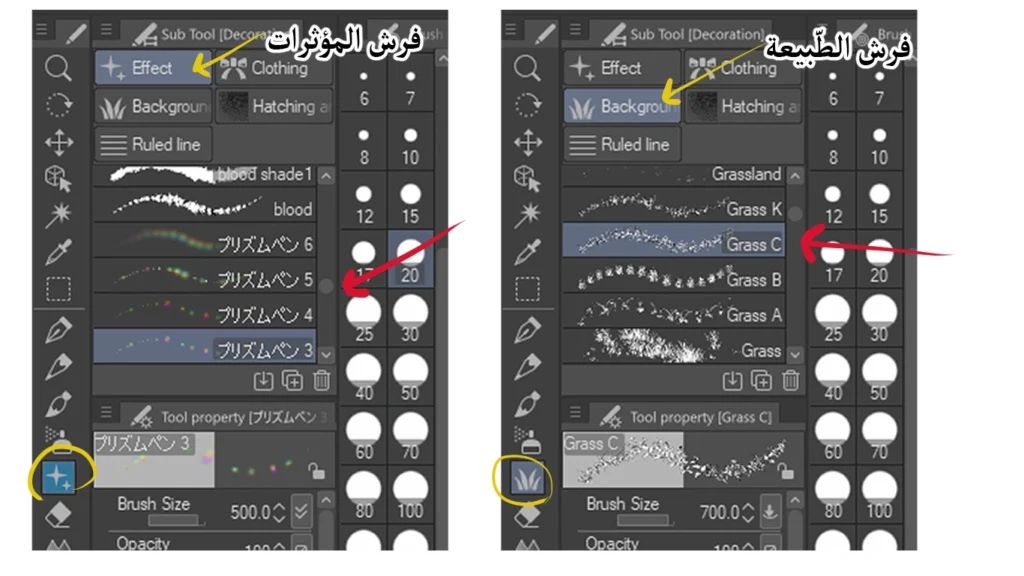
Here in the image below, you can see on the right the natural brushes, which are brushes of flowers, leaves, and twigs, and can be found within:
- Brush Tool
- Groups such as: Decoration > Vegetation
The brushes on the left are for effects after the background has been drawn, such as glitter, stars, etc., and are usually found within:
- Decoration > Effect
- Decoration > Sparkle
Step two
We add a new layer via Layer > New Raster Layer, then:
- We choose the appropriate brush from Brush Tool.
- We reduce the brush size from the top settings bar.
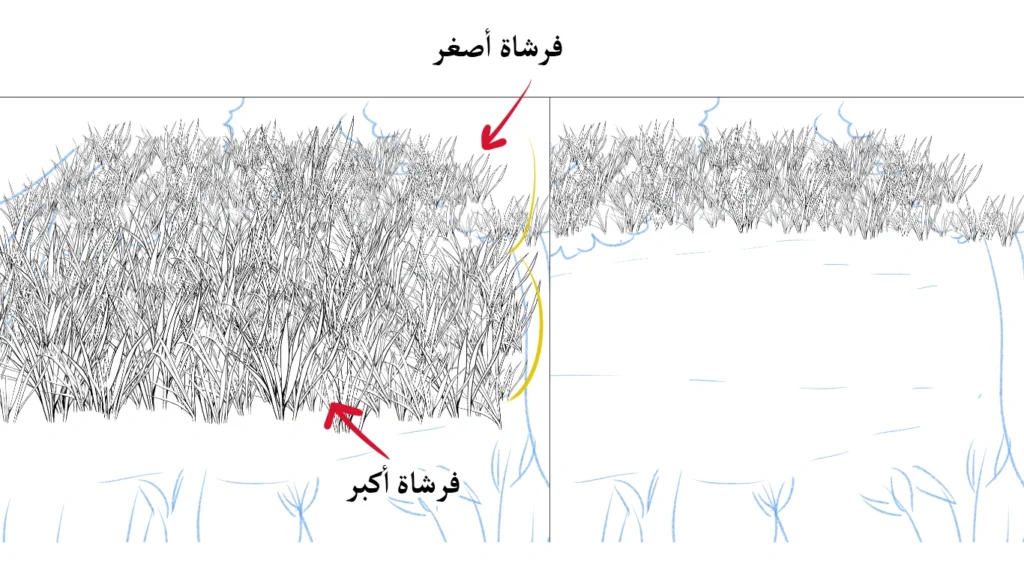
- We start drawing from the top, i.e., from the furthest elements.
- The further away the elements are, the smaller they become.
- We draw horizontally, and as we get closer to the bottom, i.e., to the front, we make the brush size a little bigger.
Types
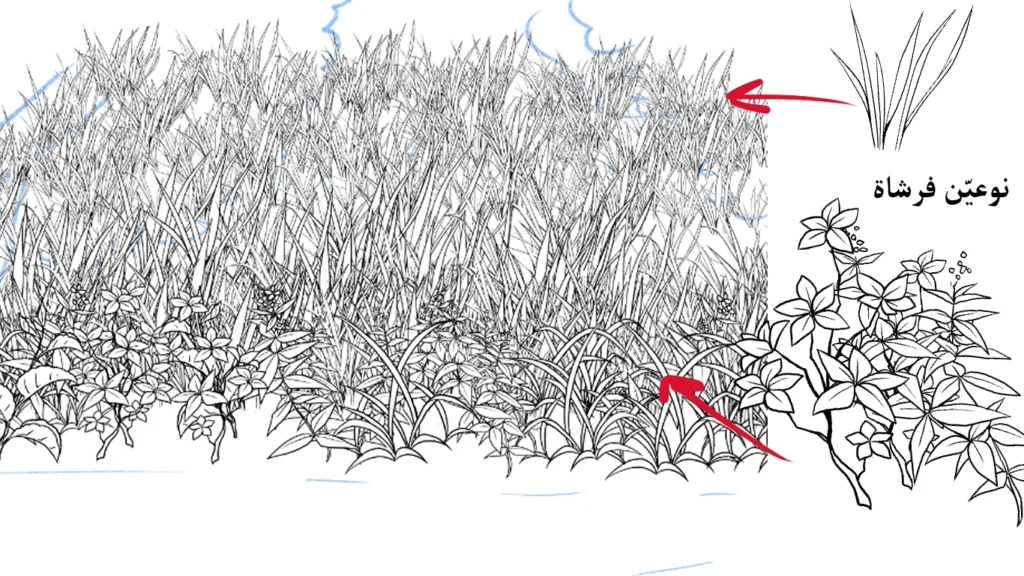
As you can see in the picture, I used two different types of paper:
- In the background, I used a simpler style with fewer details.
- At the front, I used the most beautiful and complex type, because it will be on the front.
Step three
We add a new layer, then:
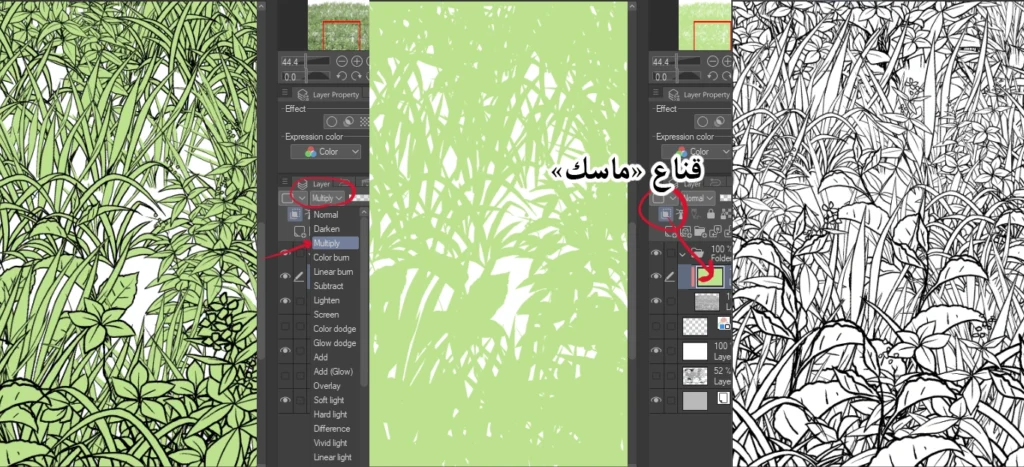
- We color it completely green using Fill Tool
- We add a layer mask across it Layer > Layer Mask > Mask Outside Selection
- This is so that the color does not go outside the boundaries of the papers we drew beforehand.
Step four
We move on to the stage of drawing the tree:
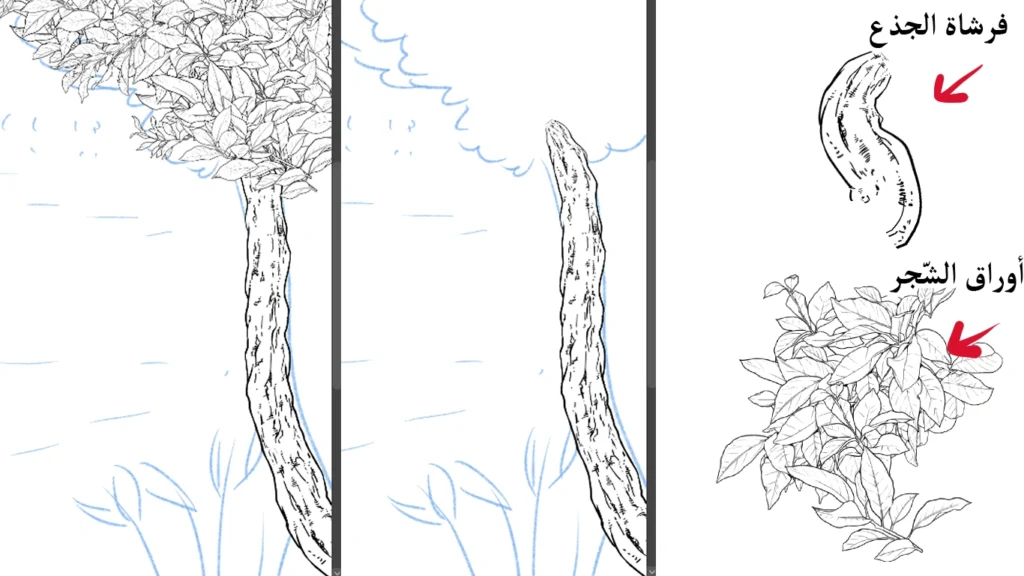
- We choose a brush specifically designed for the trunk from Brush Tool
- We draw the trunk in a separate layer.
- We add another new layer.
- We choose a leaf brush.
- We draw the tree leaves in a layer separate from the trunk.
Step five
Let's start by coloring the tree:
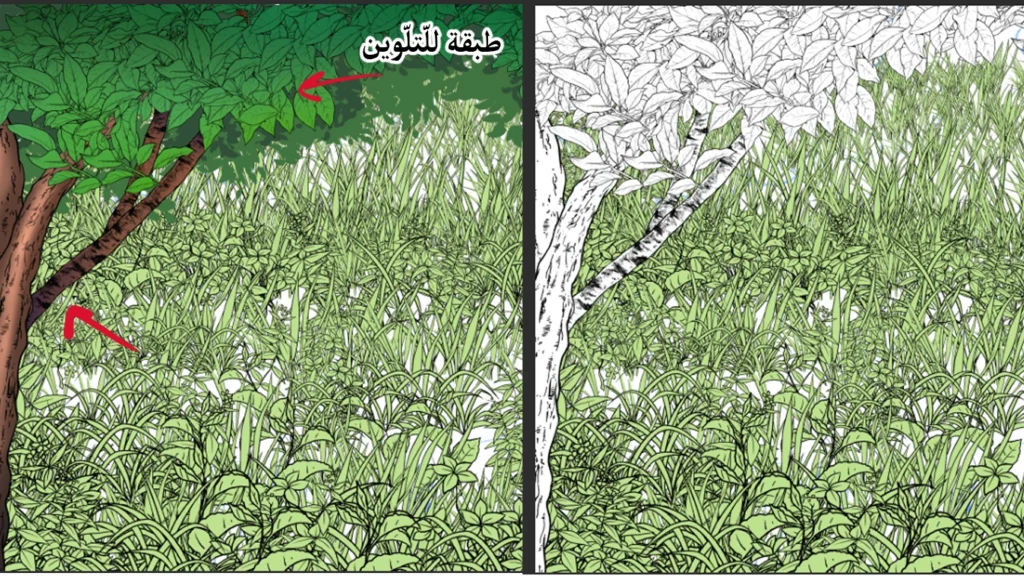
- We identify the tree trunk layer.
- We add a new layer on top of it.
- We color it brown using Fill Tool Or the brush.
- We add to it Layer Mask To confine the color within the trunk.
- We repeat the same steps for the tree leaves.
- We color the leaves in shades of green.
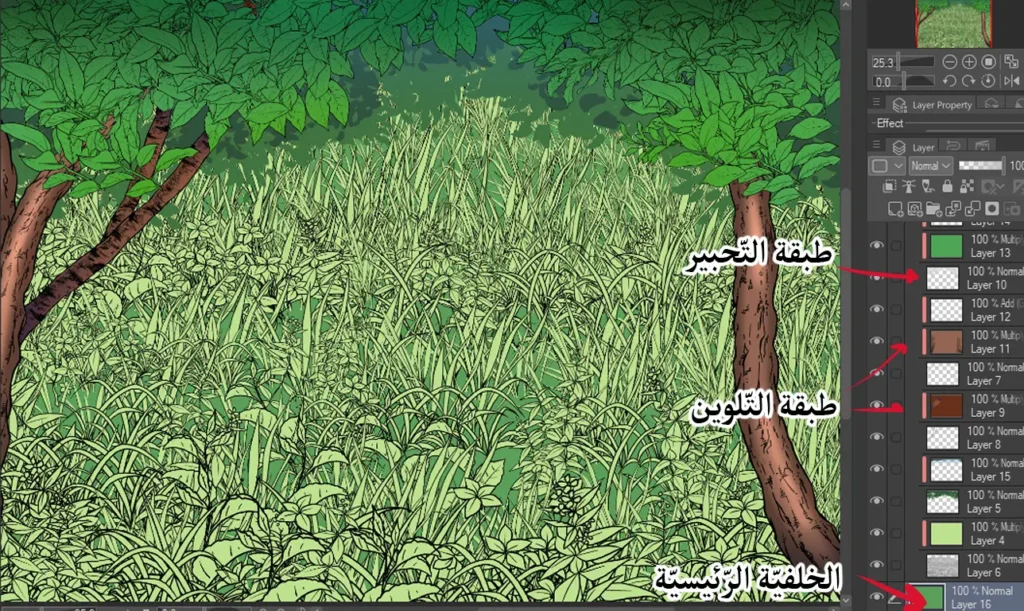
Layer arrangement
The image shows you the order used in the layers panel:
- At the top: Ink layer
- Below: Color Layers
- And in the background: the main background layer
This arrangement is very important for organizing the work.
Step six
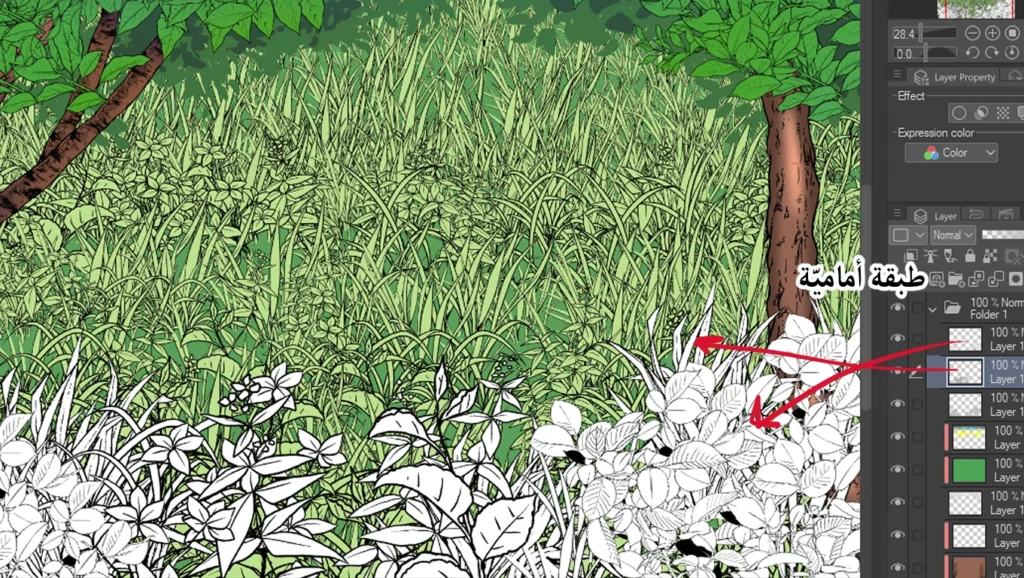
We select a new brush, then:
- We add a new layer.
- We draw some leaves and grass in the foreground.
- We color them to give an impression of closeness and distance in the scene.
Step seven
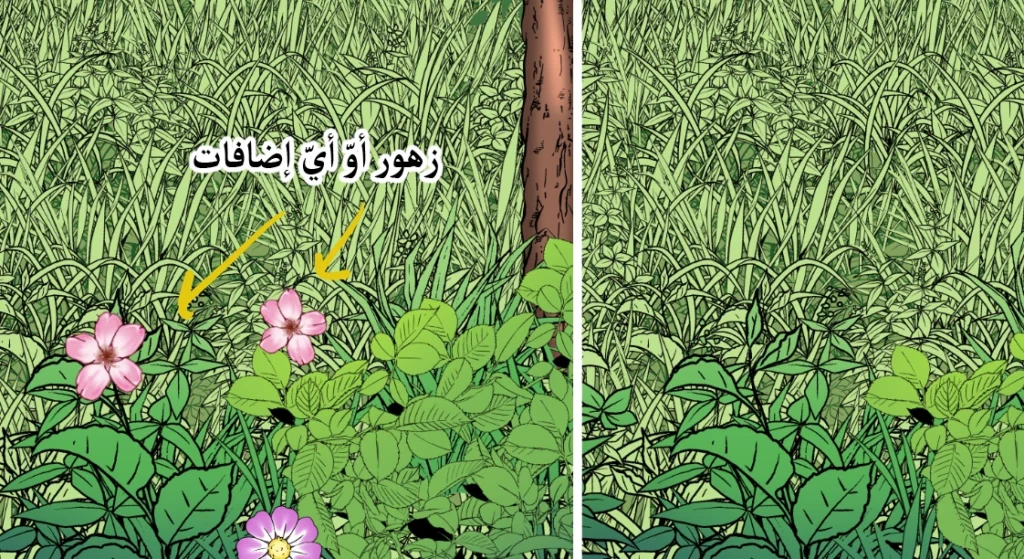
Here we add some ready-made flowers:
- We are opening the Clip Studio library via Window > Material.
- We go to the flower section.
- We drag the flower directly into the drawing area.
- We adjust its size and position using Object Tool.
Step eight
We choose a natural effects brush from Decoration Tool, then:
- We add stars and glitter randomly and subtly.
- We take care not to exaggerate so as not to spoil the beauty of the painting.
How to hone your anime drawing skills daily
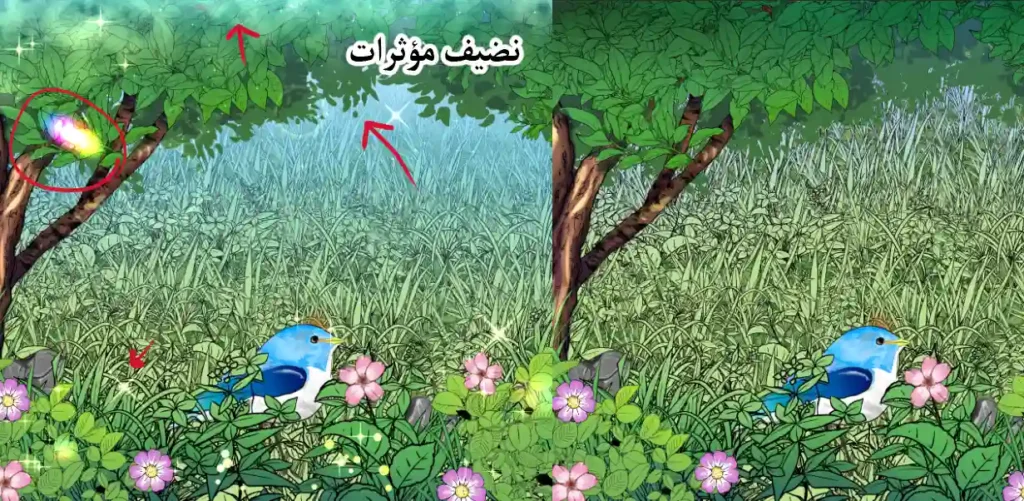
This is the final result of our artwork. I added a gradient blue shade using an airbrush to give some depth and prevent the drawing from looking flat, and I also added a pre-drawn bird to complete the natural scene.
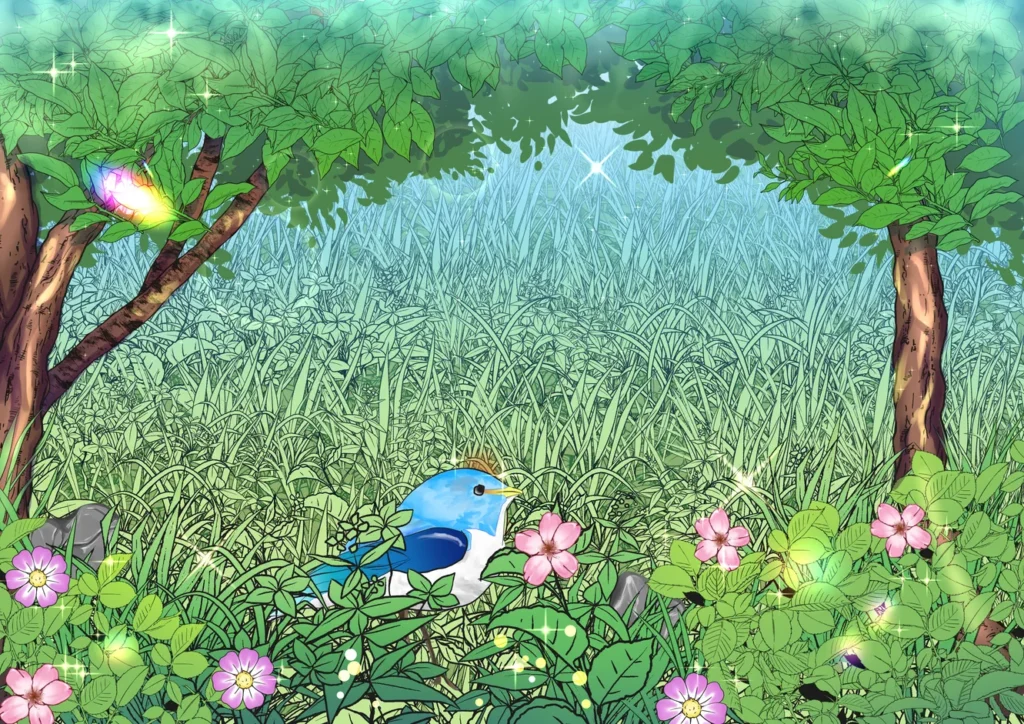
Today's lesson has come to an end, in which we learned how to draw a complete landscape without manually sketching each element. As you may know, I've started using this method myself to save time, and it's ideal for those who aren't skilled at drawing landscapes. Try it, and you'll love the result. I'll see you in future drawing lessons, God willing.