Welcome to a lesson about designing a professional anime background without drawing or coloring. We will be using a 3D model, which will create the background we want to design for anime or manga. So follow along with the lesson carefully, because I will explain in detail with the options and steps. ,
My online store has everything you need as artists
This mansion in the video below was designated as the residence of the main heroine of the manga "What Do I Call You?", and since I started designing a simple animation for it, I used this mansion in it. .
First step
We need to prepare the 3D model that we want to convert into an anime background. You can use any 3D program available to you, such as SketchUp or Blender, the latter of which is free.
To read the manga about this background, click here: What should I call you?
Step two
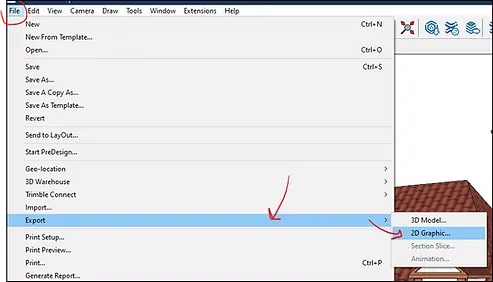
After selecting the shooting angle, we export the scene as an image so that it can later be converted into an anime background, using the following option:
File > Export > 2D graphics
Step three
We add the image to your favorite drawing program, whether it's Photoshop, Clip Studio, or others, via File > Import > Image .
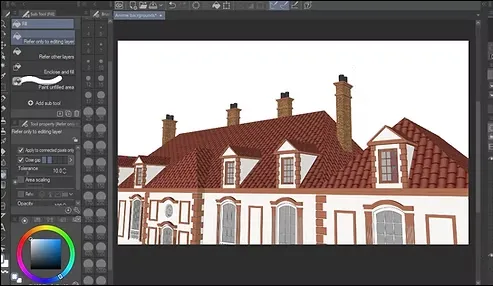
Step four
By right-clicking on the image layer with the mouse, we select the following option:
Convert to lines and tones
And he is the one who will turn the image into an ink drawing.
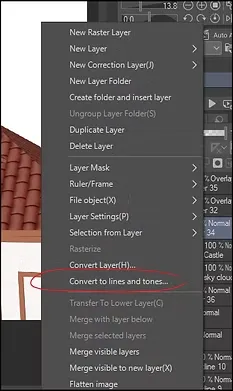
A closer look
A window like this will appear; you can modify the options or leave them as they are.
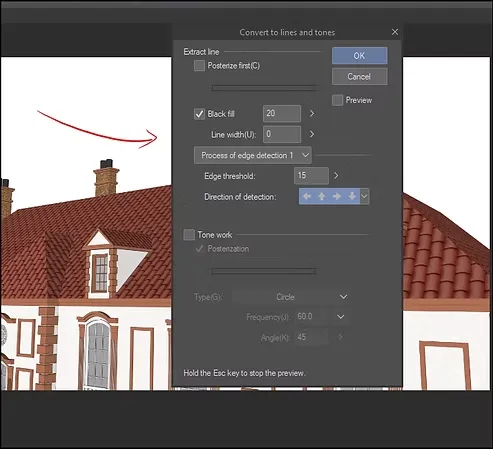
ready-made image
And here the picture has been transformed into a drawing without the need to draw and has become a beautiful anime background! In this way you can start coloring or use the colors of the palace itself, with some modifications.
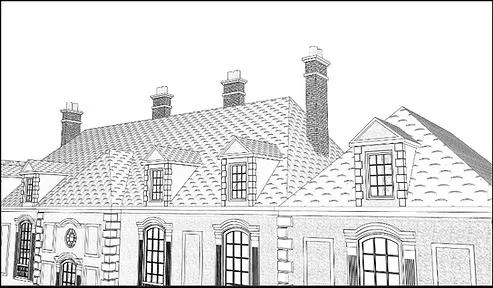
Explanation of the classes
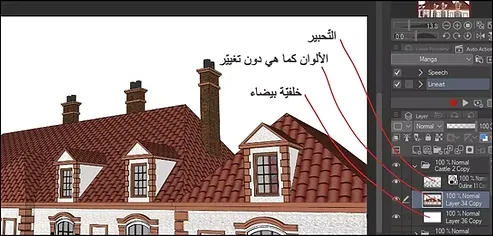
You will find that the drawing is divided into layers; I will explain how:
- Inking: It is as in the previous picture, the entire drawing is in black ink without colors.
- The colors: They are the same as the palace colors, and we have re-placed them under the inking layer and made them visible because we want to use the same colors without change.
- White background: Just a white background, which can be changed later with clouds, for example.
Step five
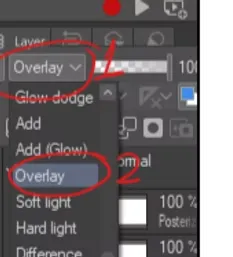
We will now add a new layer above the color layer, and through the option above the top layers, we will find the word Normal We will click on it and choose Overlay.
This option will add an aesthetic effect to the palace, as we will color some parts of the drawing slightly to highlight the color and give the palace a glowing character similar to the style of Japanese anime backgrounds, so don't ignore it!.
Step six
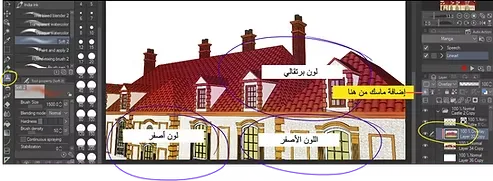
As you can see here, using a soft or airbrush tool, we add a few complementary colors from the palace palette, such as yellow, orange, or even red, each in a separate area without exaggeration, simply to highlight the colors. And don't forget to add a "mask" when you're finished. Clip to layer below .
That is, these colors will be intended to appear on the palace and not the entire drawing. I have added a note at the bottom, and the mark is in red.
Step seven
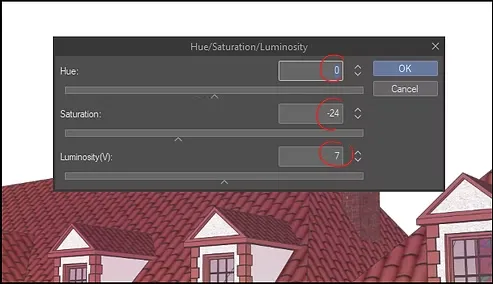
At this stage, we will adjust the color contrast of the anime background in order to achieve the best possible harmony, using the following options:
Layer > New correction layer > Hue/ Saturation / Luminosity
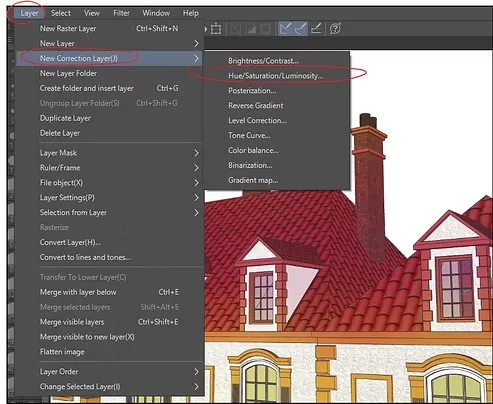
The options that will appear
This window will open in front of us. Edit it as shown in the picture. You can edit it in another way, but these are the options that suited the colors used.
Step eight
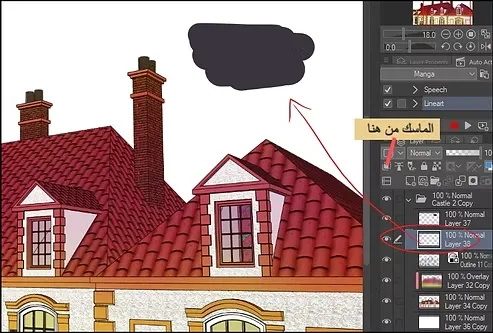
We add a new layer on top of the inking layer, and color it all with this ”dark navy” color, and add a “mask” to the inking layer.
This is an optional step, but it will add aesthetics to your drawing and take it to a higher level. It will not show the sharpness of the black color, but will soften the blackness present in the ink layer.
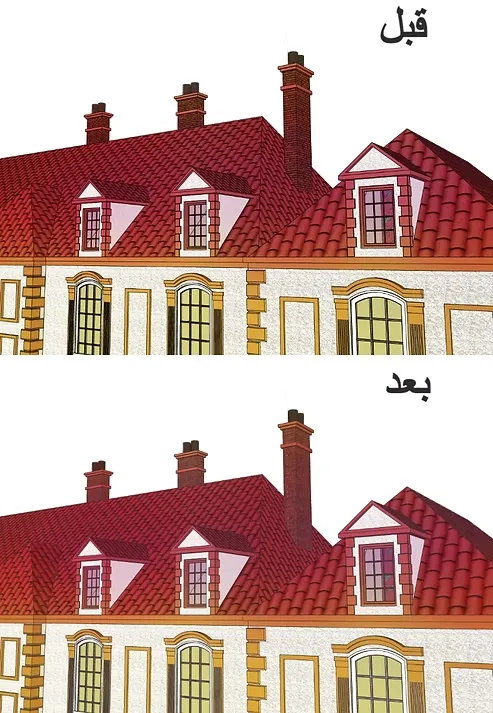
Before and after
See how much more beautiful and similar to Japanese anime backgrounds the drawing looks when we changed the ink color from black to navy blue.
Step nine
The final step is to add a blue sky background, either by drawing it yourself, or by adding a ready-made drawing from the library and dragging it towards the canvas.
How to color an anime background from a ready-made 3D model
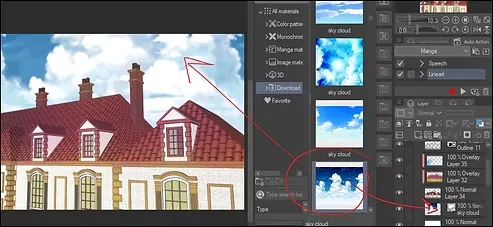
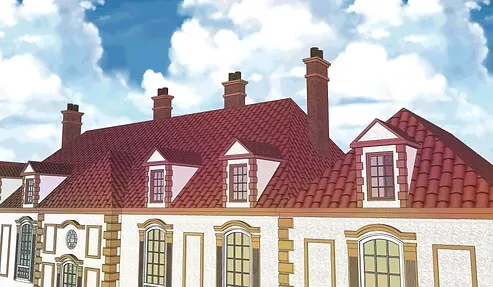
Final result
And here is the final result: we designed a unique anime background. We created a background for our anime with minimal effort, and without even needing to draw. This is an effective method for those who are not good at drawing, or for those who want to save time.
And so the lesson on designing an anime background has ended with absolute ease and practical steps that you can immediately apply within your manga or anime projects.
I will see you soon, God willing.