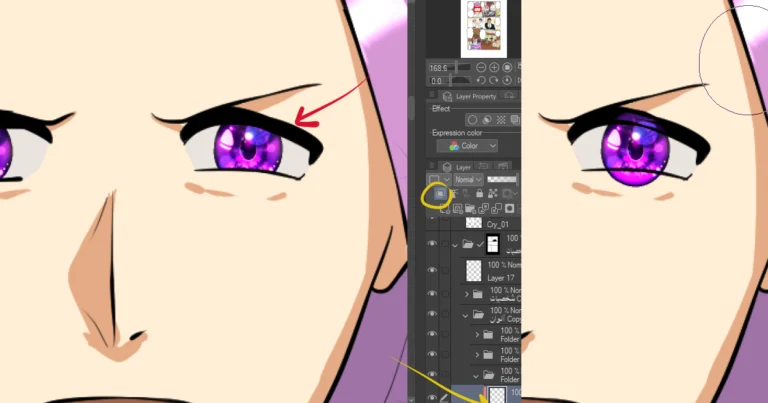
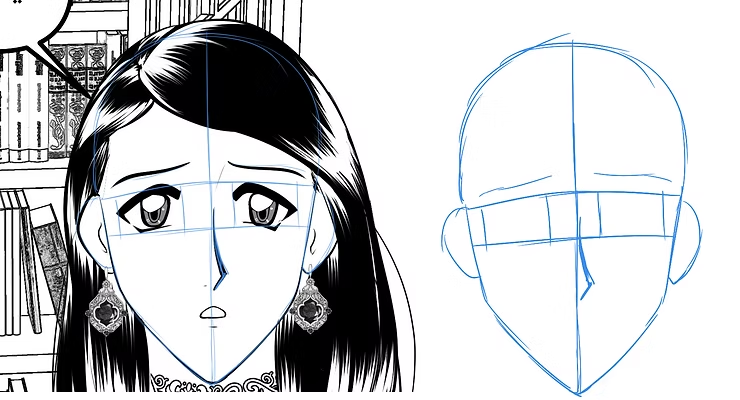
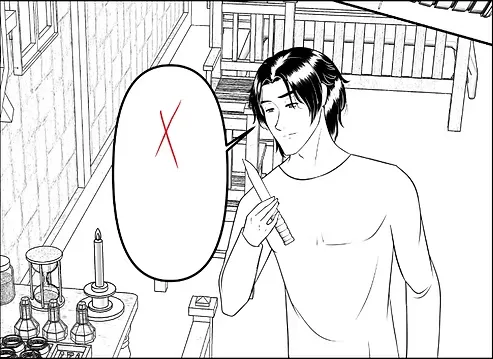
Today we continue our series on designing Arabic manga, and we'll discuss one of the easiest and most enjoyable steps in manga creation: adding speech bubbles, or what are known as dialogue balloons. These bubbles are balloons of various shapes that we add to manga scenes so that characters can speak through them and express their thoughts clearly and concisely.
The program I used here is Clip Studio, which has many features related to manga, anime and animation as well, and it is available for computers.
My online store has everything you need as artists
First step
Before you start drawing, it is necessary to write the dialogue in any program you want. As we learned previously in the manga design series, we first write the story and script before starting to draw the pages.
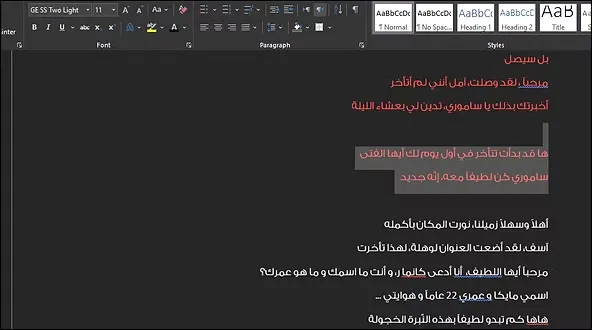
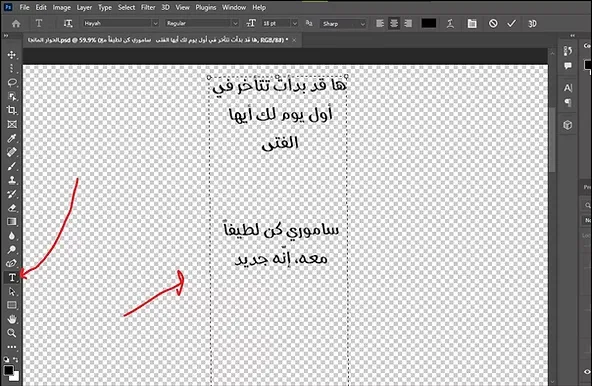
Next, we copy the required dialogues, as you can see in the image below, using Microsoft Word. WordThen we add it to Photoshop or any text design program that is convenient for you, and we choose the appropriate font that reflects the atmosphere of manga.
Step two
After adding the sentences to Adobe Photoshop, we select the entire page and copy the text, taking care that there are no backgrounds or additional elements on the page before transferring the text to the manga design program we are using.
I am taking this step because the program I use to draw manga does not yet support writing in Arabic, and this is a practical way to make the process of adding texts easy and organized.
Step three
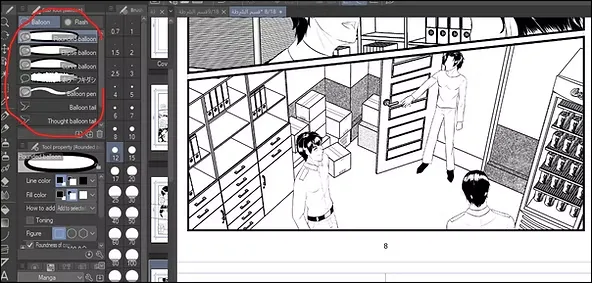
After adding the text, we now move on to adding speech bubbles (dialogue balloons) to each sentence in the manga scene. It's very important to know that each situation and dialogue has a bubble that expresses the manga character's feelings at that moment; we can't use the same bubble shape in every scene.
Here I am not talking about the general shape of the bubble that you use in designing your manga, but rather I mean the shape of expressive balloons such as the shock, anger, whisper, and other balloons.
On this page that I am working on, I have used ordinary bubbles for everyday conversation between characters without exaggeration.
Step four
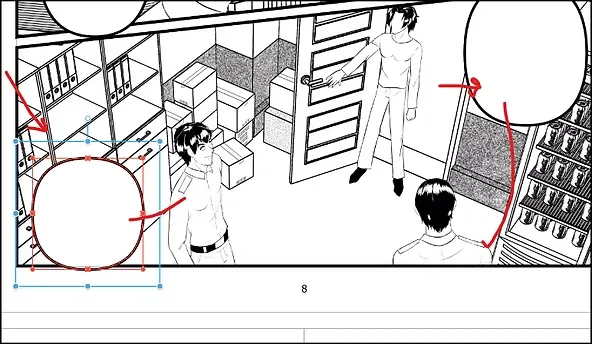
In the next step, we modify the added balloons, especially in important scenes that express certain situations for the characters.
We select the bubble shape that suits the phrase and the scene's condition, then we drag the balloon and add it to a new layer and adjust its size to fit the text, which is a necessary step in mastering manga design professionally.
Step five
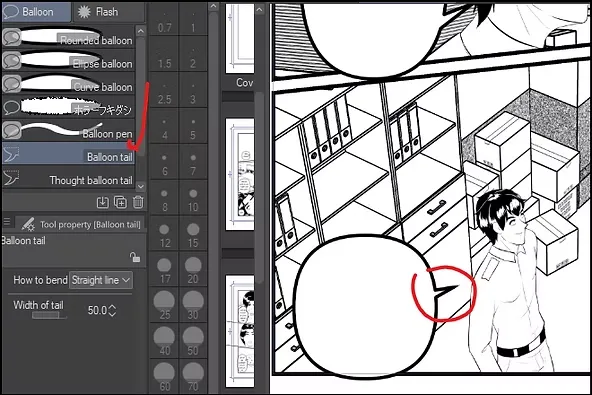
The final step in adding speech bubbles is to add a pointing arrow that indicates who is saying the phrase clearly to the reader.
From the left menu, we select the arrow tool and set the starting point to be close to the character's mouth, then we point the arrow towards it neatly.
Step six
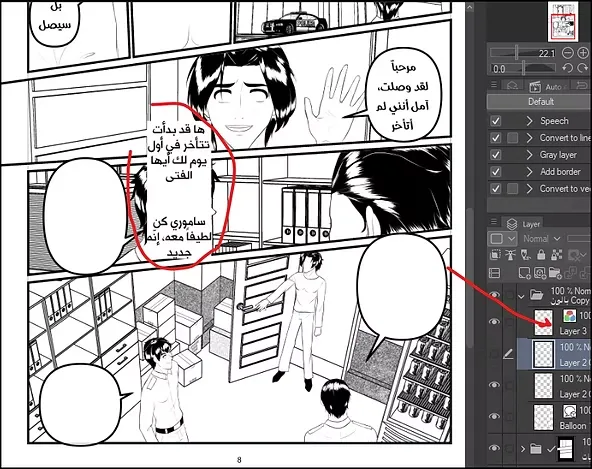
Now we return to the program Manga design What we are working on, and we are pasting the texts that we copied previously, and as you can see in the attached image, the text appears in front of us inside the project.
Step seven
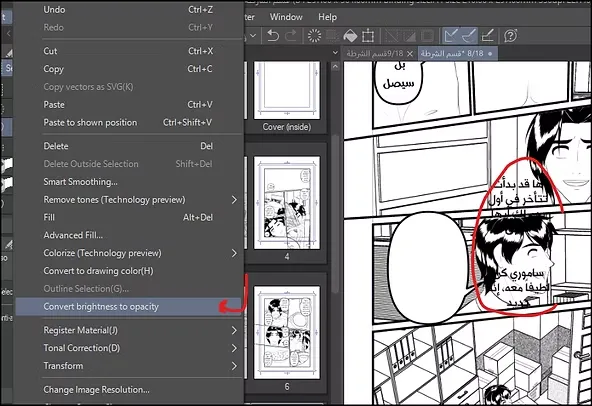
But the text usually has a white background, which you can remove in a second. We go to: Edit > Convert brightness to opacity
In this way the white background disappears and only the text remains in front of us, and we can then easily drag and move the text towards its own bubble.
Step eight
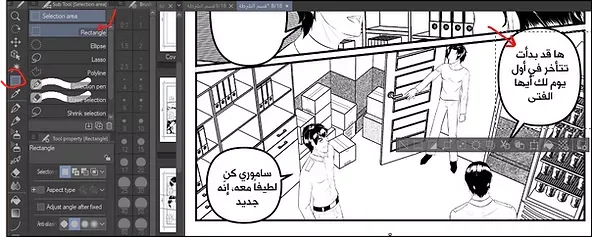
On the left side of the program, you will find several selection tools; we will choose the following tool:
Selection area > Rectangle
Next, we select the required phrase, then drag the sentence towards its designated balloon, so that the texts inside the balloon are arranged.
We continue in this manner when we add the characters’ dialogues within the chapter, and select, copy and paste the dialogue from Photoshop to Clip Studio, and so on.
Manga balloons: Avoid these mistakes when drawing manga
And so today we have learned a new step in manga design, which is adding dialogue bubbles easily and professionally. This step did not take much effort from us, but it adds a lot to the aesthetics of the pages and the organization of dialogues within the story.
You can play with bubble shapes and design them to suit your manga story, and experiment with adding visual effects around the bubbles to make your scenes more attractive to the reader.
I hope this lesson was helpful to creative mangaka like yourselves. There are more manga lessons on my website, so search for what you want to learn. Now I leave you and I hope to see you soon, God willing.