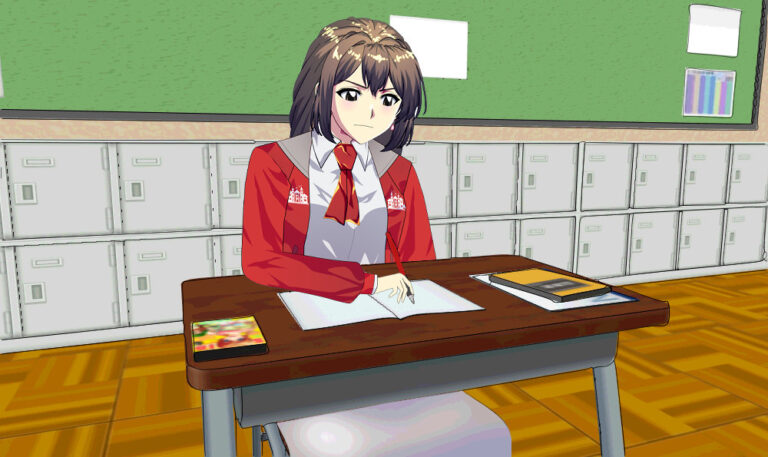
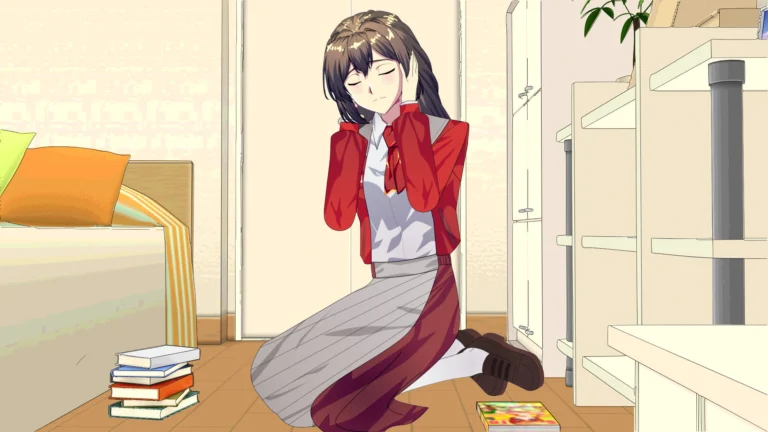
Hello to all my creative friends! In this lesson, we'll learn how to design glitter and stars surrounding anime characters. These sparkling elements appear around characters in calm, emotional, or happy scenes. No anime is complete without these bright, shining stars, as they add emotional depth and enhance the dramatic impact of the scene, which is exactly what we'll be doing today.
The program used is Adobe After Effects و Clip Studio Paint On the computer.
Let's go together!
My online store has everything you need as artists
First step
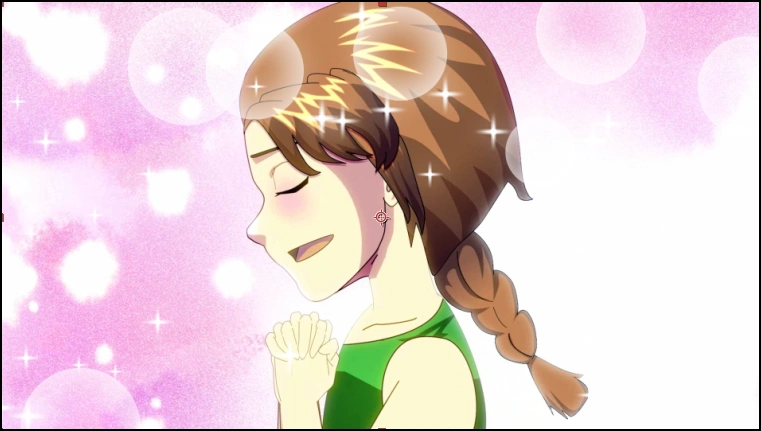
- We open the program Clip Studio Paint.
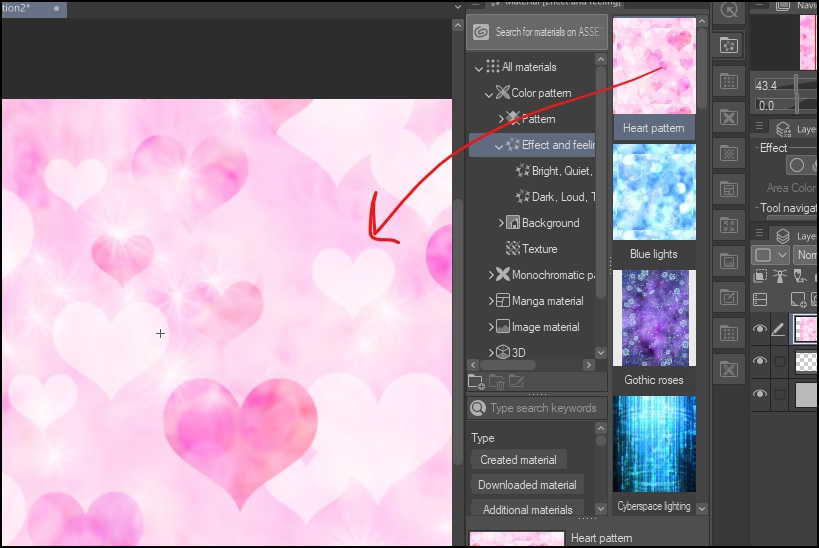
- from Backgrounds section“ In the program Clip Studio Paint We choose a bright background that suits the scene.
- We insert the background into the workspace.
- We export it as an image via the option Export (Single Layer) or Export as PNG To obtain the highest quality.
Step two
After opening the program Adobe After Effects For the first time or when starting a new project, an empty project interface appears automatically.
If it doesn't appear, we can create a new project via: File → New → New Project
Then we move directly to creating the composition in which we will work.
To create a new composition, we go to the top and select:
Composition → New Composition
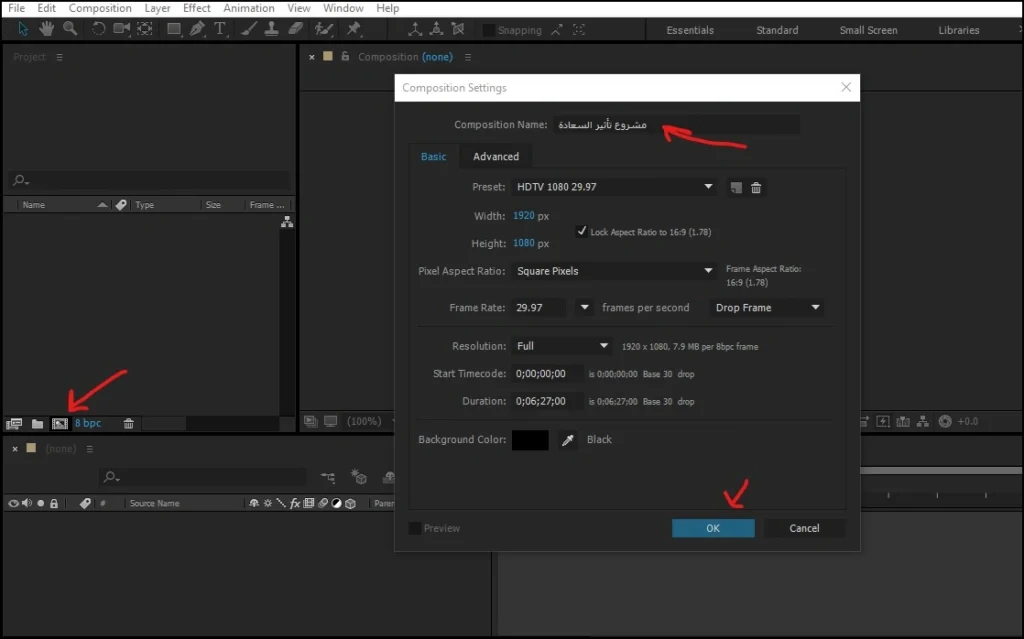
A window will appear. Composition SettingsAnd through it we determine:
- NameComposition name
- PresetFor example, 1080p 24fps or 30fps
- DurationScene duration
- Background ColorMain background color
Then press OK Let's start working on the new composition, which is the space where we will place all the effects.
Step three
- We open the program Adobe After Effects.
- We insert the image or background that we just exported.
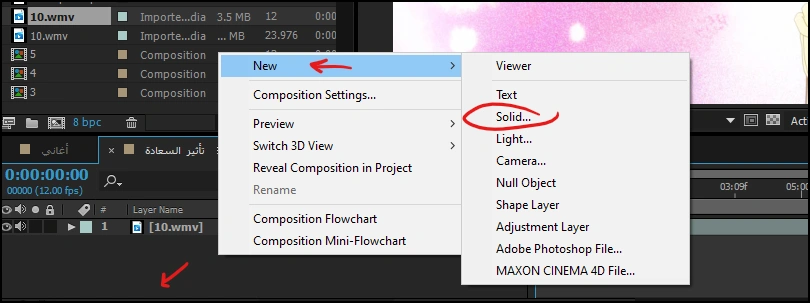
- From the left section, we click on New Project To add the project.
- Below, we right-click and select New → Solid To add a new layer.
Step four
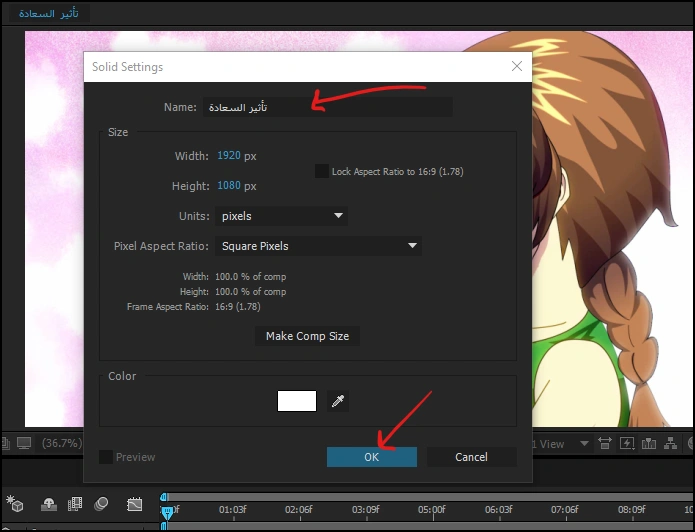
- A layer list will appear. Solid.
- We rename it appropriately (preferably: Particles Base).
- We determine the desired background color (white is preferred for the effect to be clearly visible).
- We press OK.
Step five
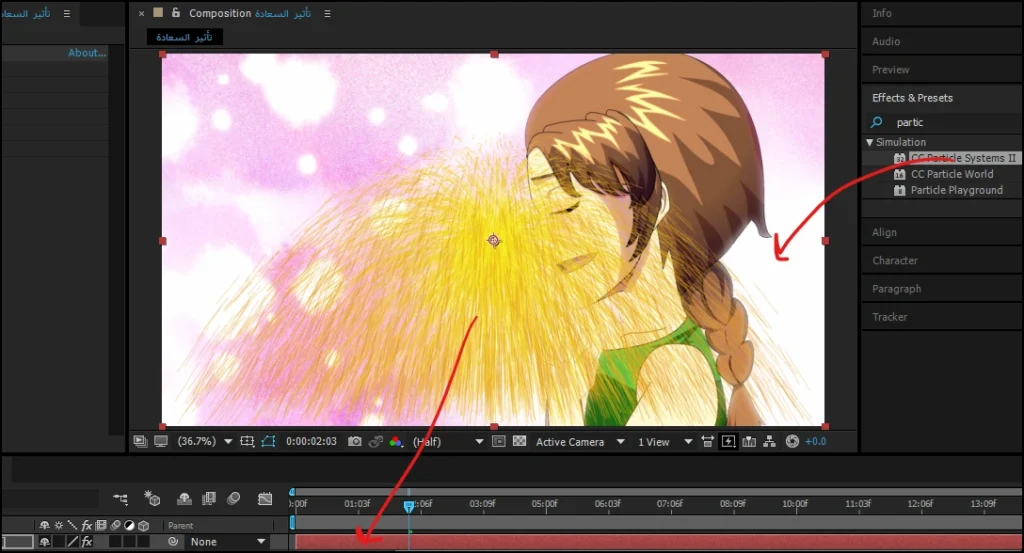
- Open a menu Effects & Presets.
- We withdraw the effect CC Particle System II To the scene.
Step six
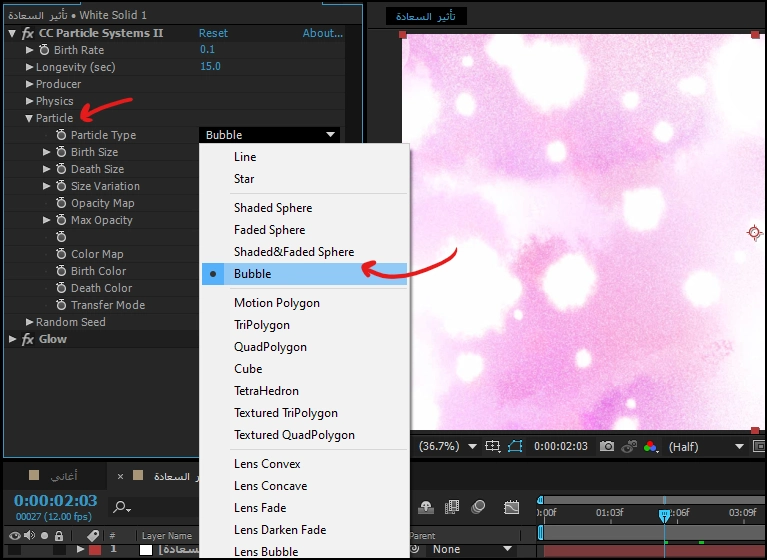
- We go to the layer of CC Particle System II.
- from Particle Type We choose a type Bubble To obtain a bubble shape.
Step seven
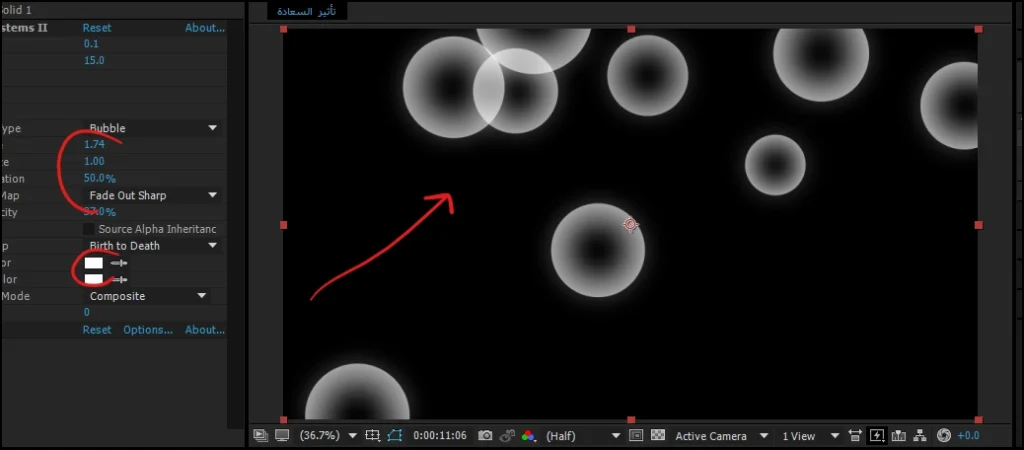
- We disable the image layer to get a clear black background.
- We adjust the following settings to obtain empty white bubbles inside:
- Birth Size: 1.74
- Death Size: 1.00
- Size Variation: 50.0
- Max Opacity: 37.0
- Birth Color: White
- Death Color: White
These values give us light, soft white bubbles that add a dreamy touch to the scene.
Step eight
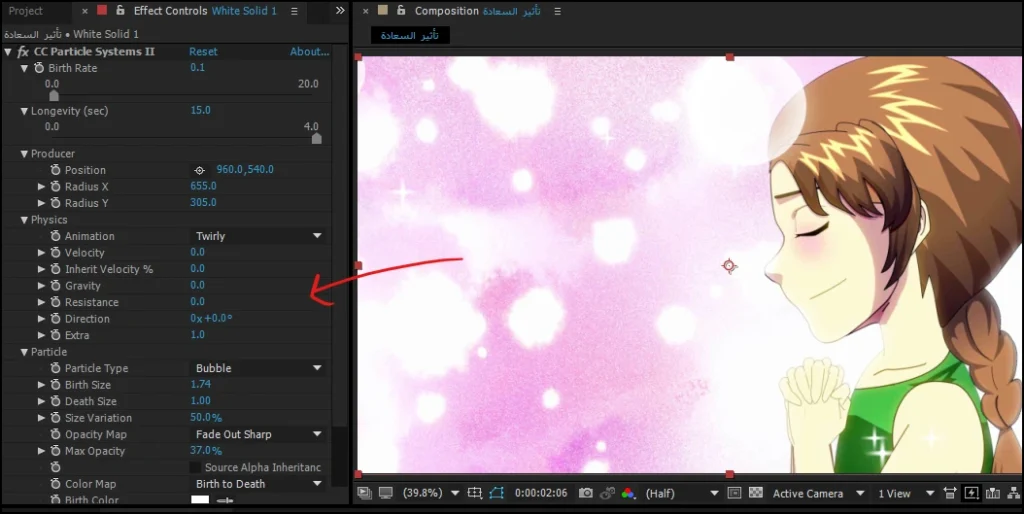
- These values (as in the attached image) will give you a slight movement of the bubbles to the left.
- This is done by modifying the value Velocity و Direction:
- We make the Low velocity To move slowly.
- We adjust Direction At a slight angle to the left (e.g., 190°).
Step nine
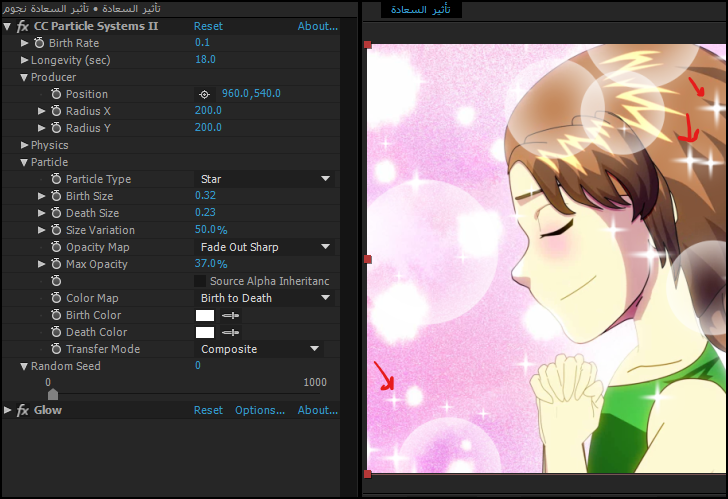
- Add a layer Solid New.
- We replicate the same effect CC Particle System II.
- But this time from Particle Type We choose Star To get the shape of the stars.
- We adjust the values as shown in the picture I mentioned (while maintaining a high gloss).
- To move the screen from appearing to disappearing without horizontal movement:
- reduce Velocity To 0.
- We adjust Opacity Map To achieve a beautiful dimming and shimmering effect.
- Activate Opacity Over Life For a smooth fade.
Layer arrangement
The attached image shows the layer arrangement as follows:
- Below: Background layer or anime character video.
- In the middle: A layer of gently moving bubbles.
- At the top: A layer of twinkling stars that gives a magical sparkle to the scene.
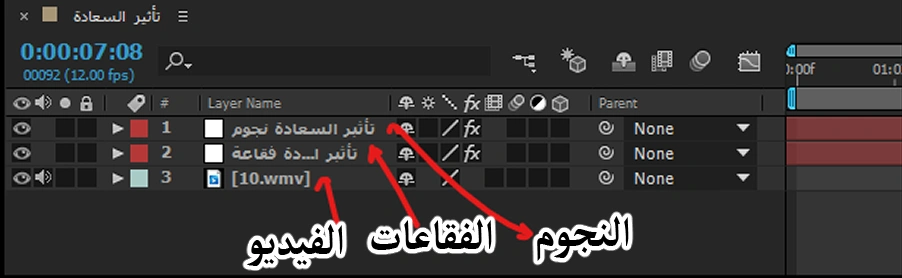
Explanation of the attached image
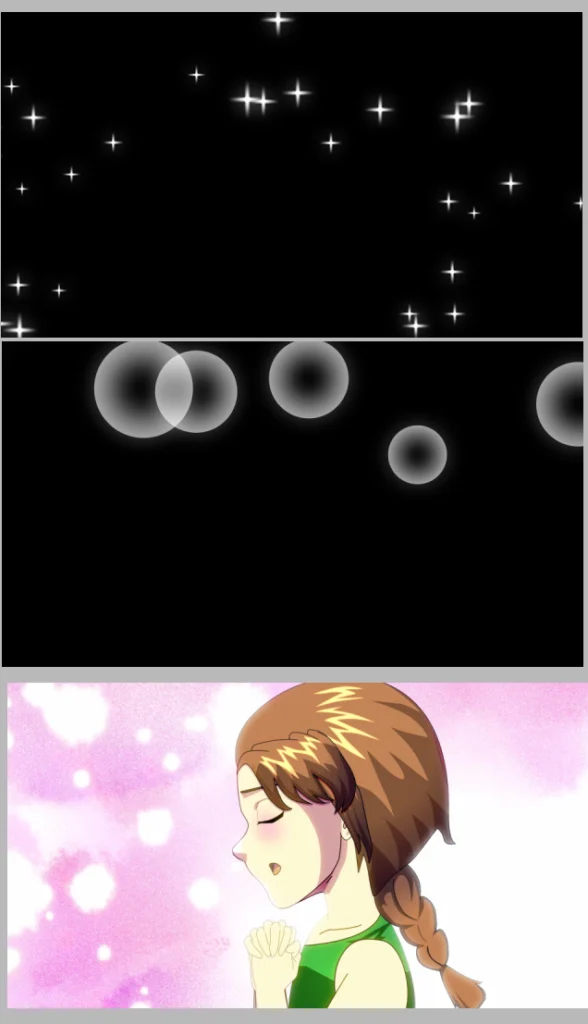
Here you can see the three layers arranged on top of each other.
We see the girl singing with her eyes closed in complete tranquility, and above her appear soft white bubbles and then shining stars, adding another dimension to the scene and making the moment more poetic.
How to design action backgrounds for anime scenes using After Effects
Final video
This is the final video showing the result we achieved after applying the effects.
And with that, today’s lesson, which talked about designing the glitter surrounding anime characters in dreamy and emotional scenes, has come to an end.
Personally, I stopped buying expensive ready-made effects and started designing them myself because I have complete freedom to control the details to suit each scene. I can also design this type of effect once and save it on the computer to use in any scene when needed.
Try my unique method; it's completely different from the tutorials you'll find online. In fact, I assure you that you may not find another tutorial that explains how to create sparkle effects in anime scenes this way, making this tutorial the first of its kind.
Thank you for following the lesson closely, and we will meet again in other lessons, God willing.