Welcome to the first lesson on drawing anime faces on my website. From now on, there will be endless lessons on drawing anime, cartoon, and manga characters. Let's start today with a lesson on drawing faces. The face is one of the most important parts of the body, and it is the first thing we see when we meet someone. Through it, we can learn about the characteristics of the person in front of us. It may reveal to us that he is arrogant or kind, so we must focus on drawing it in order to give a glimpse into the character traits of the person we are drawing.
My online store has everything you need as artists
The first step in drawing an anime face
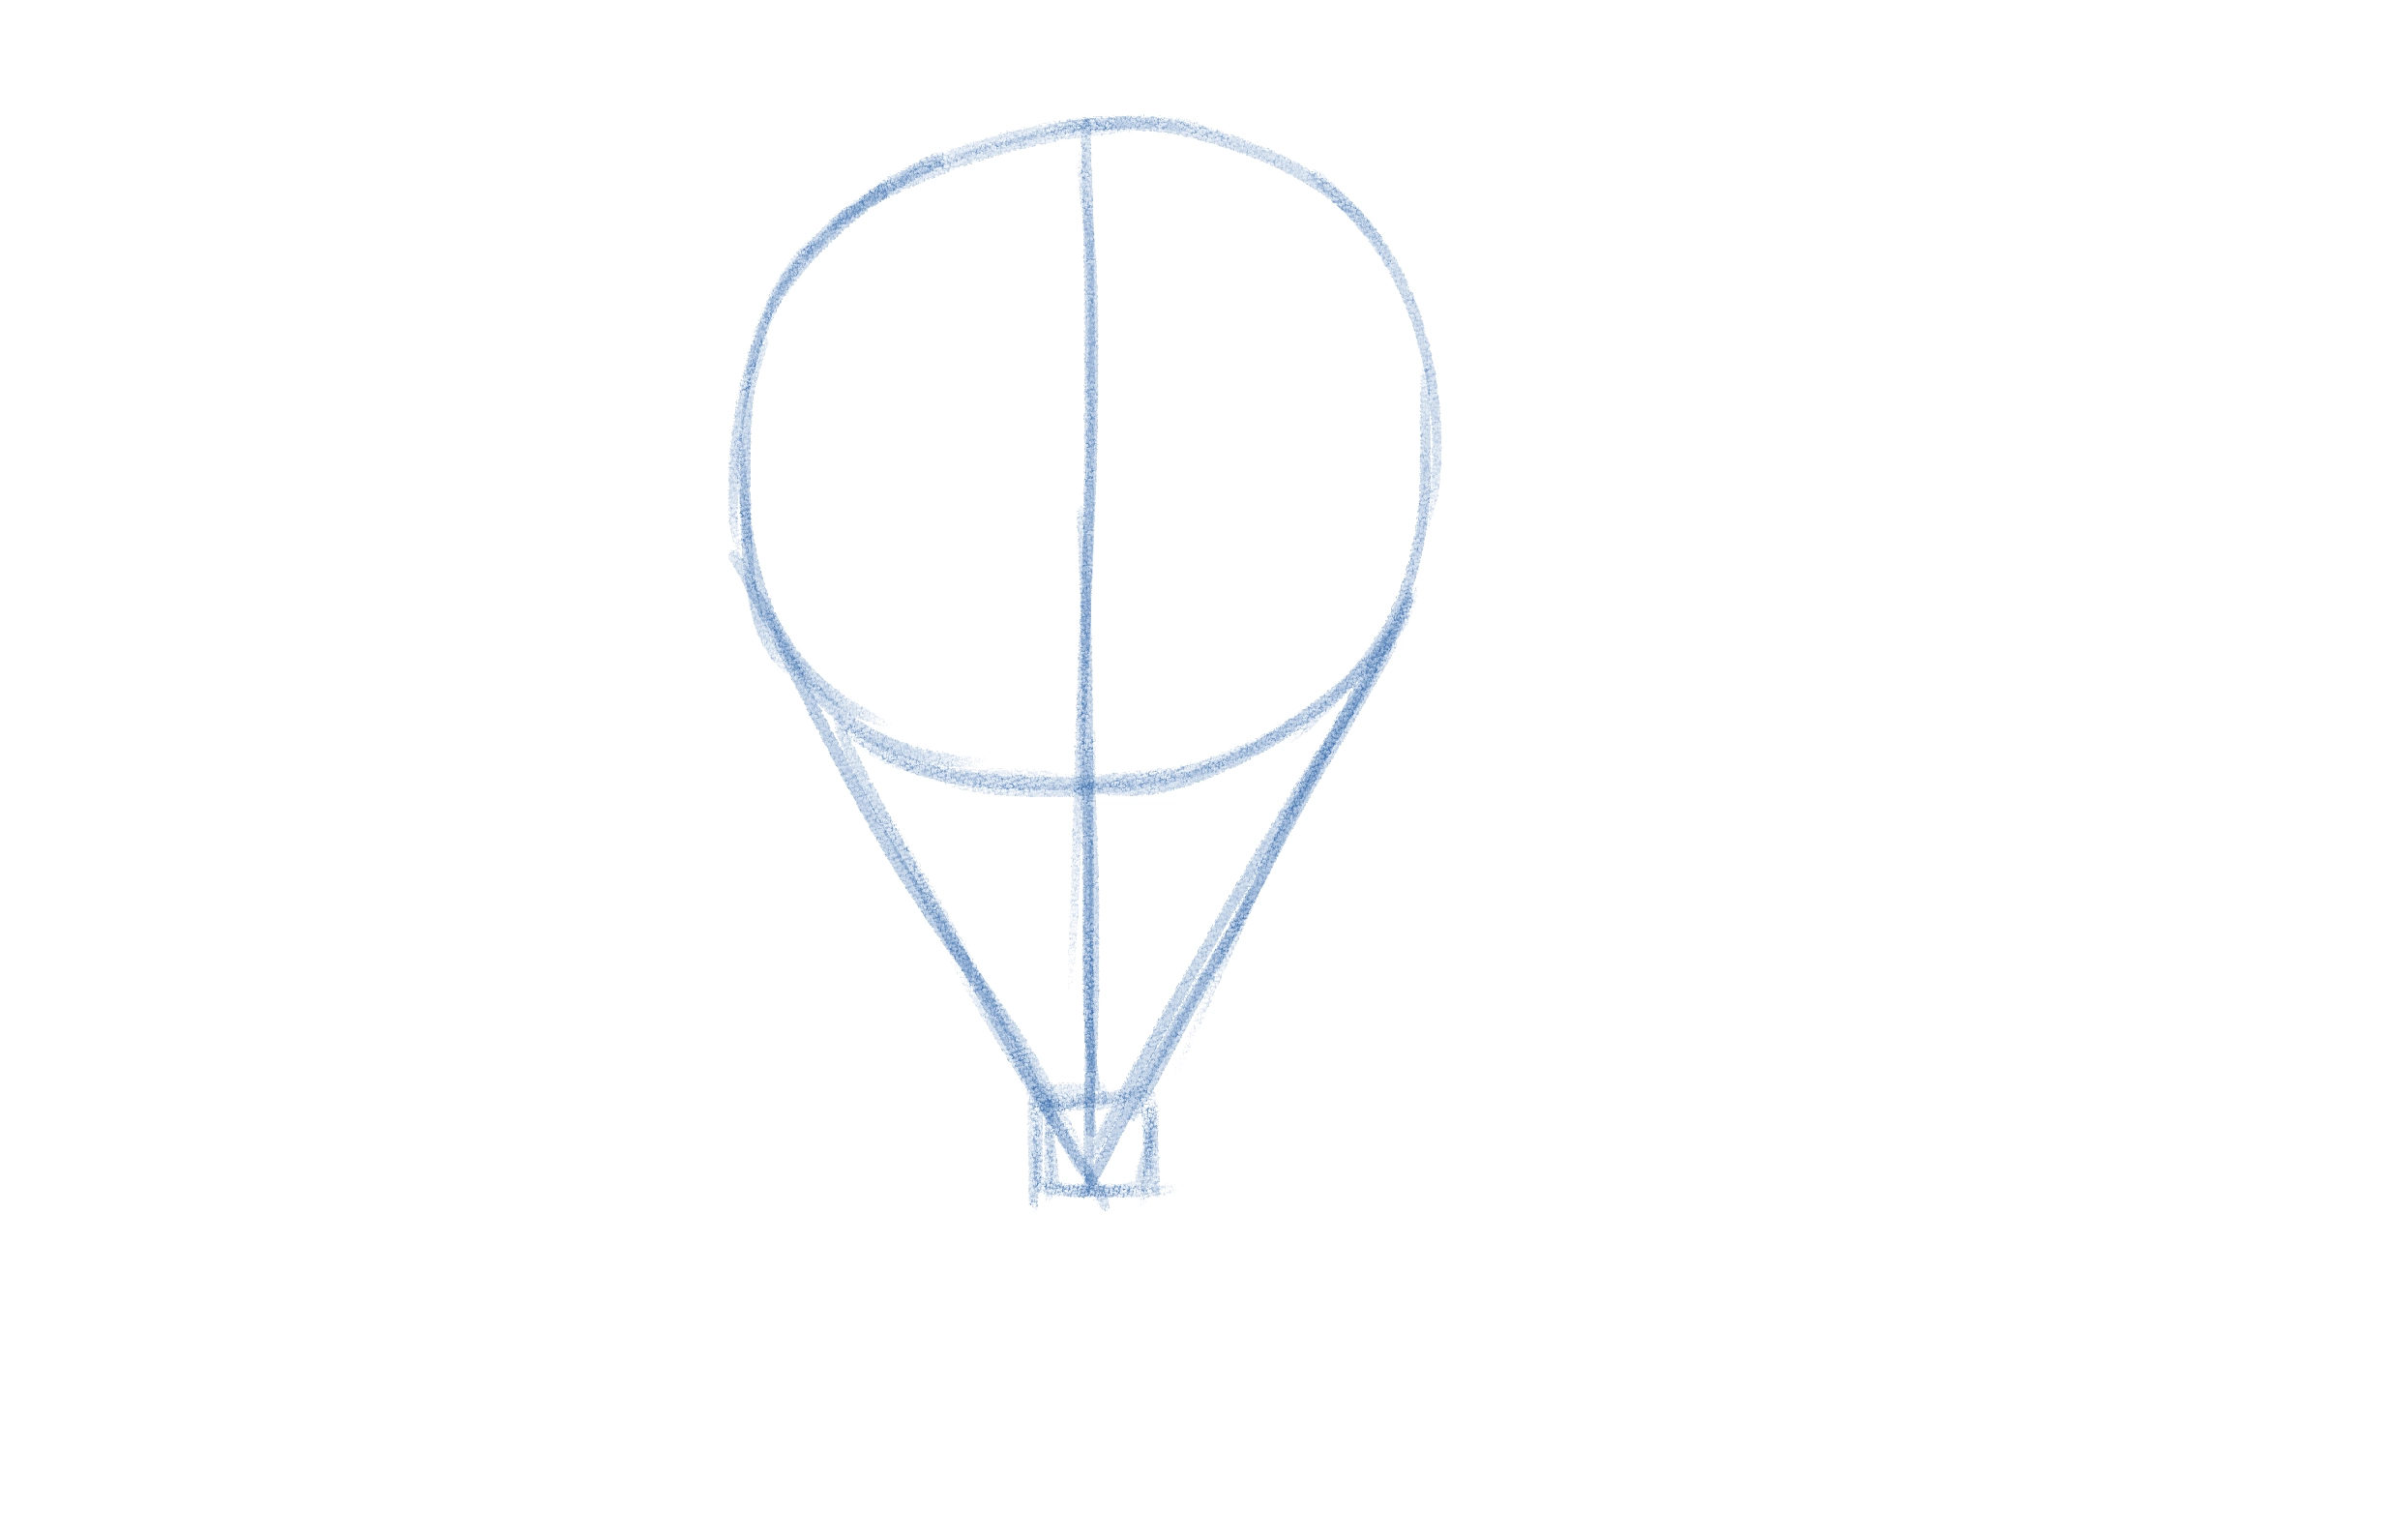
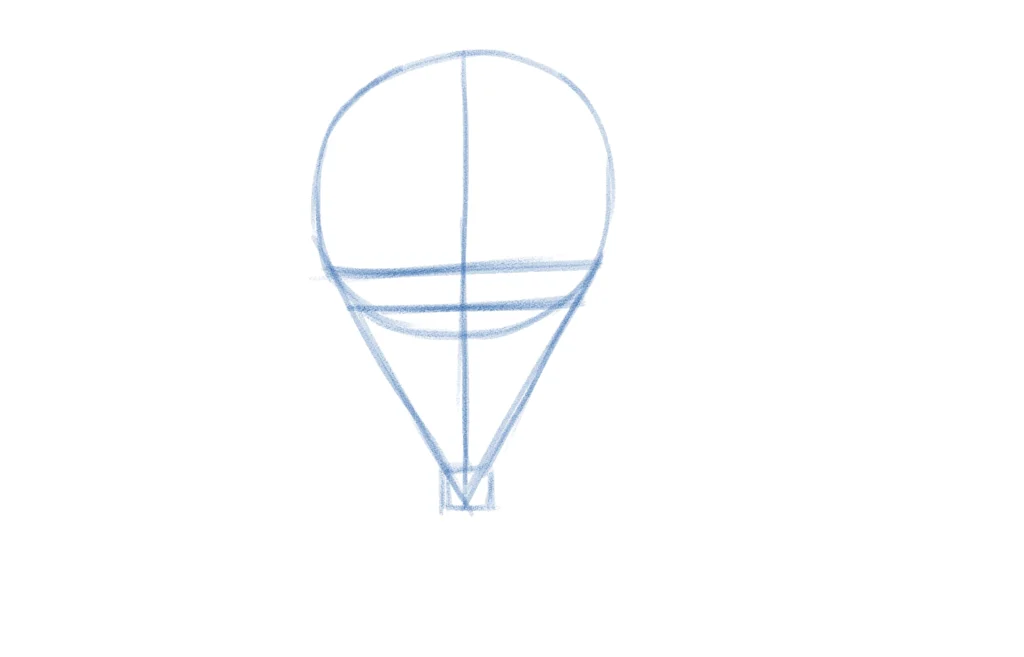
The first thing we do is draw the basic lines, or what is known as the sketch. “If you are drawing with paper and pen, use a blue or red color, and do not press hard on the pen, but draw the lines gently.” These lines will help us draw the structure of the face, and we start by drawing an oval shape.
Note: The younger the character we are drawing, the larger the size should be, and vice versa.

Step two
We move on to drawing a line that starts from the upper half of the face and goes down to the bottom. It is important to focus here. If you want to draw a young man, you should make the line a little longer, ”the chin or face should be longer.“ If you want to draw a child, make the line shorter.
Then start drawing a line from the middle of the circle towards the chin. We do this in the other section as well, until we form an inverted triangle pointing upwards.
Step three
Now we draw two horizontal lines in the middle of the circle, and these two lines will help us to accurately determine the location of the eyes.
If you want to draw thin eyes, make the area of the lines smaller.
Step four
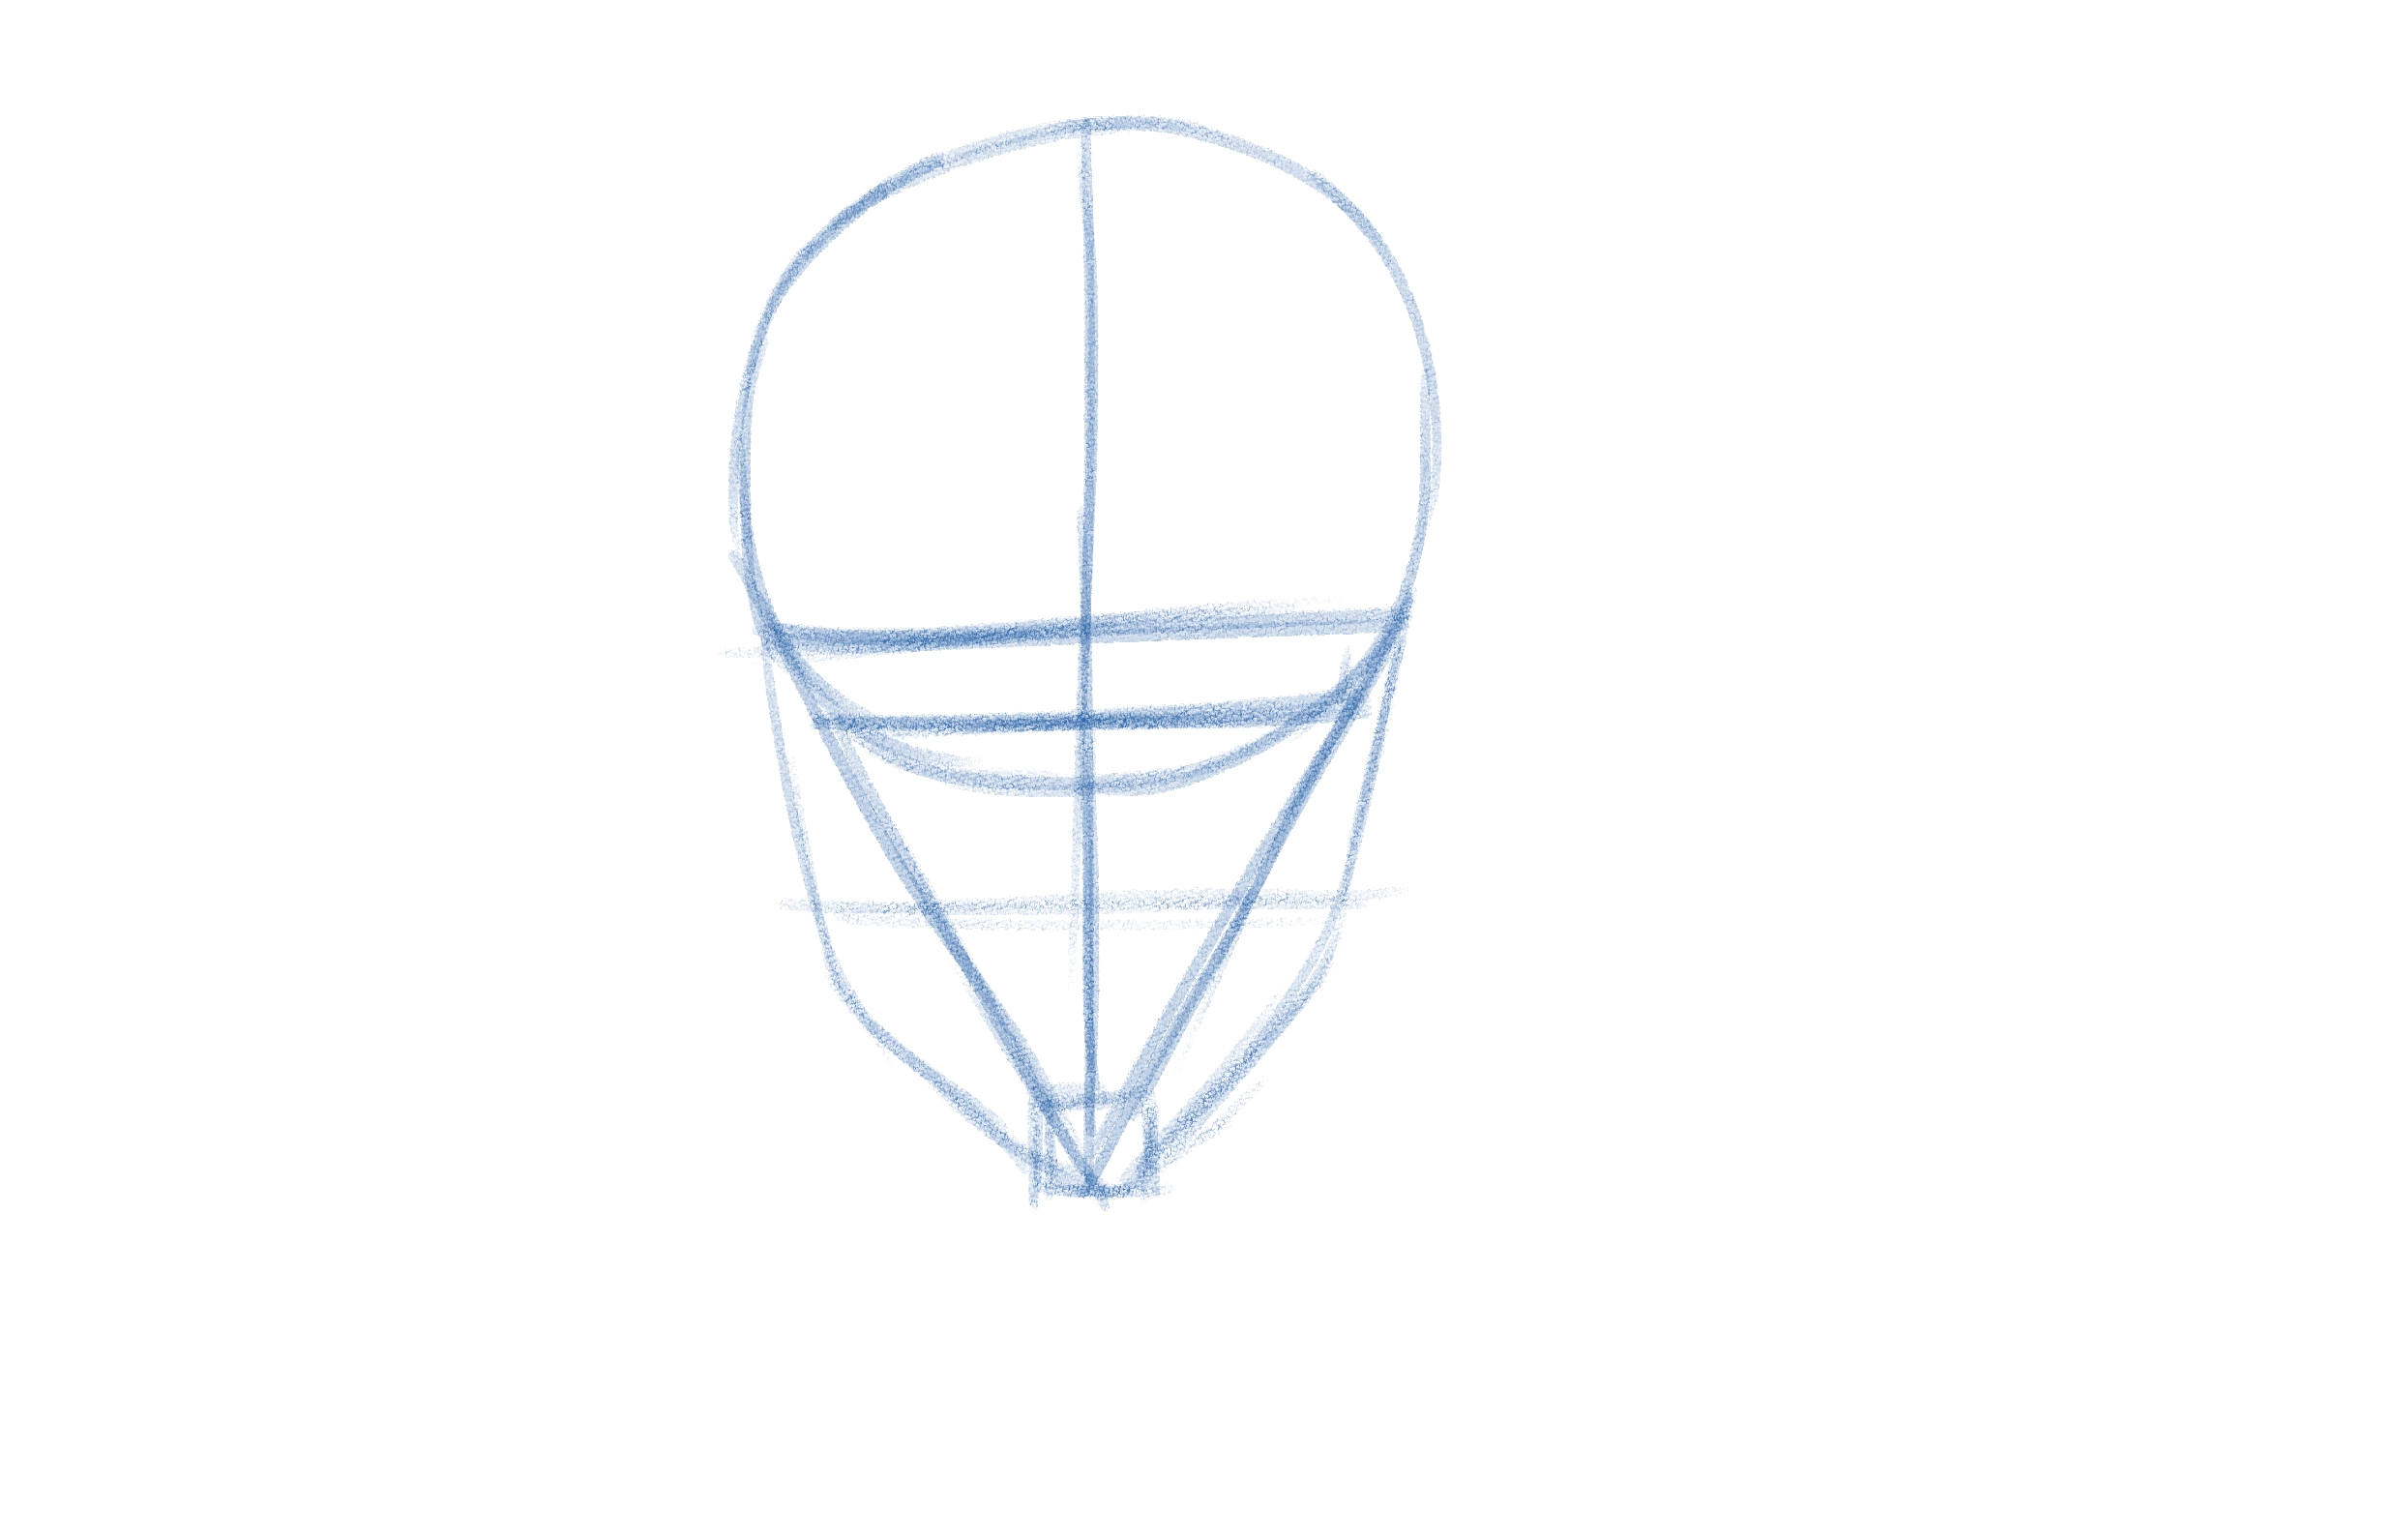
The next step is to add the chin area. We define the jaw well, using the line that defines the eye area, and start from there and stop at an angle. After that, we draw a line from the jaw crease and connect it towards the middle of the chin.
Step five
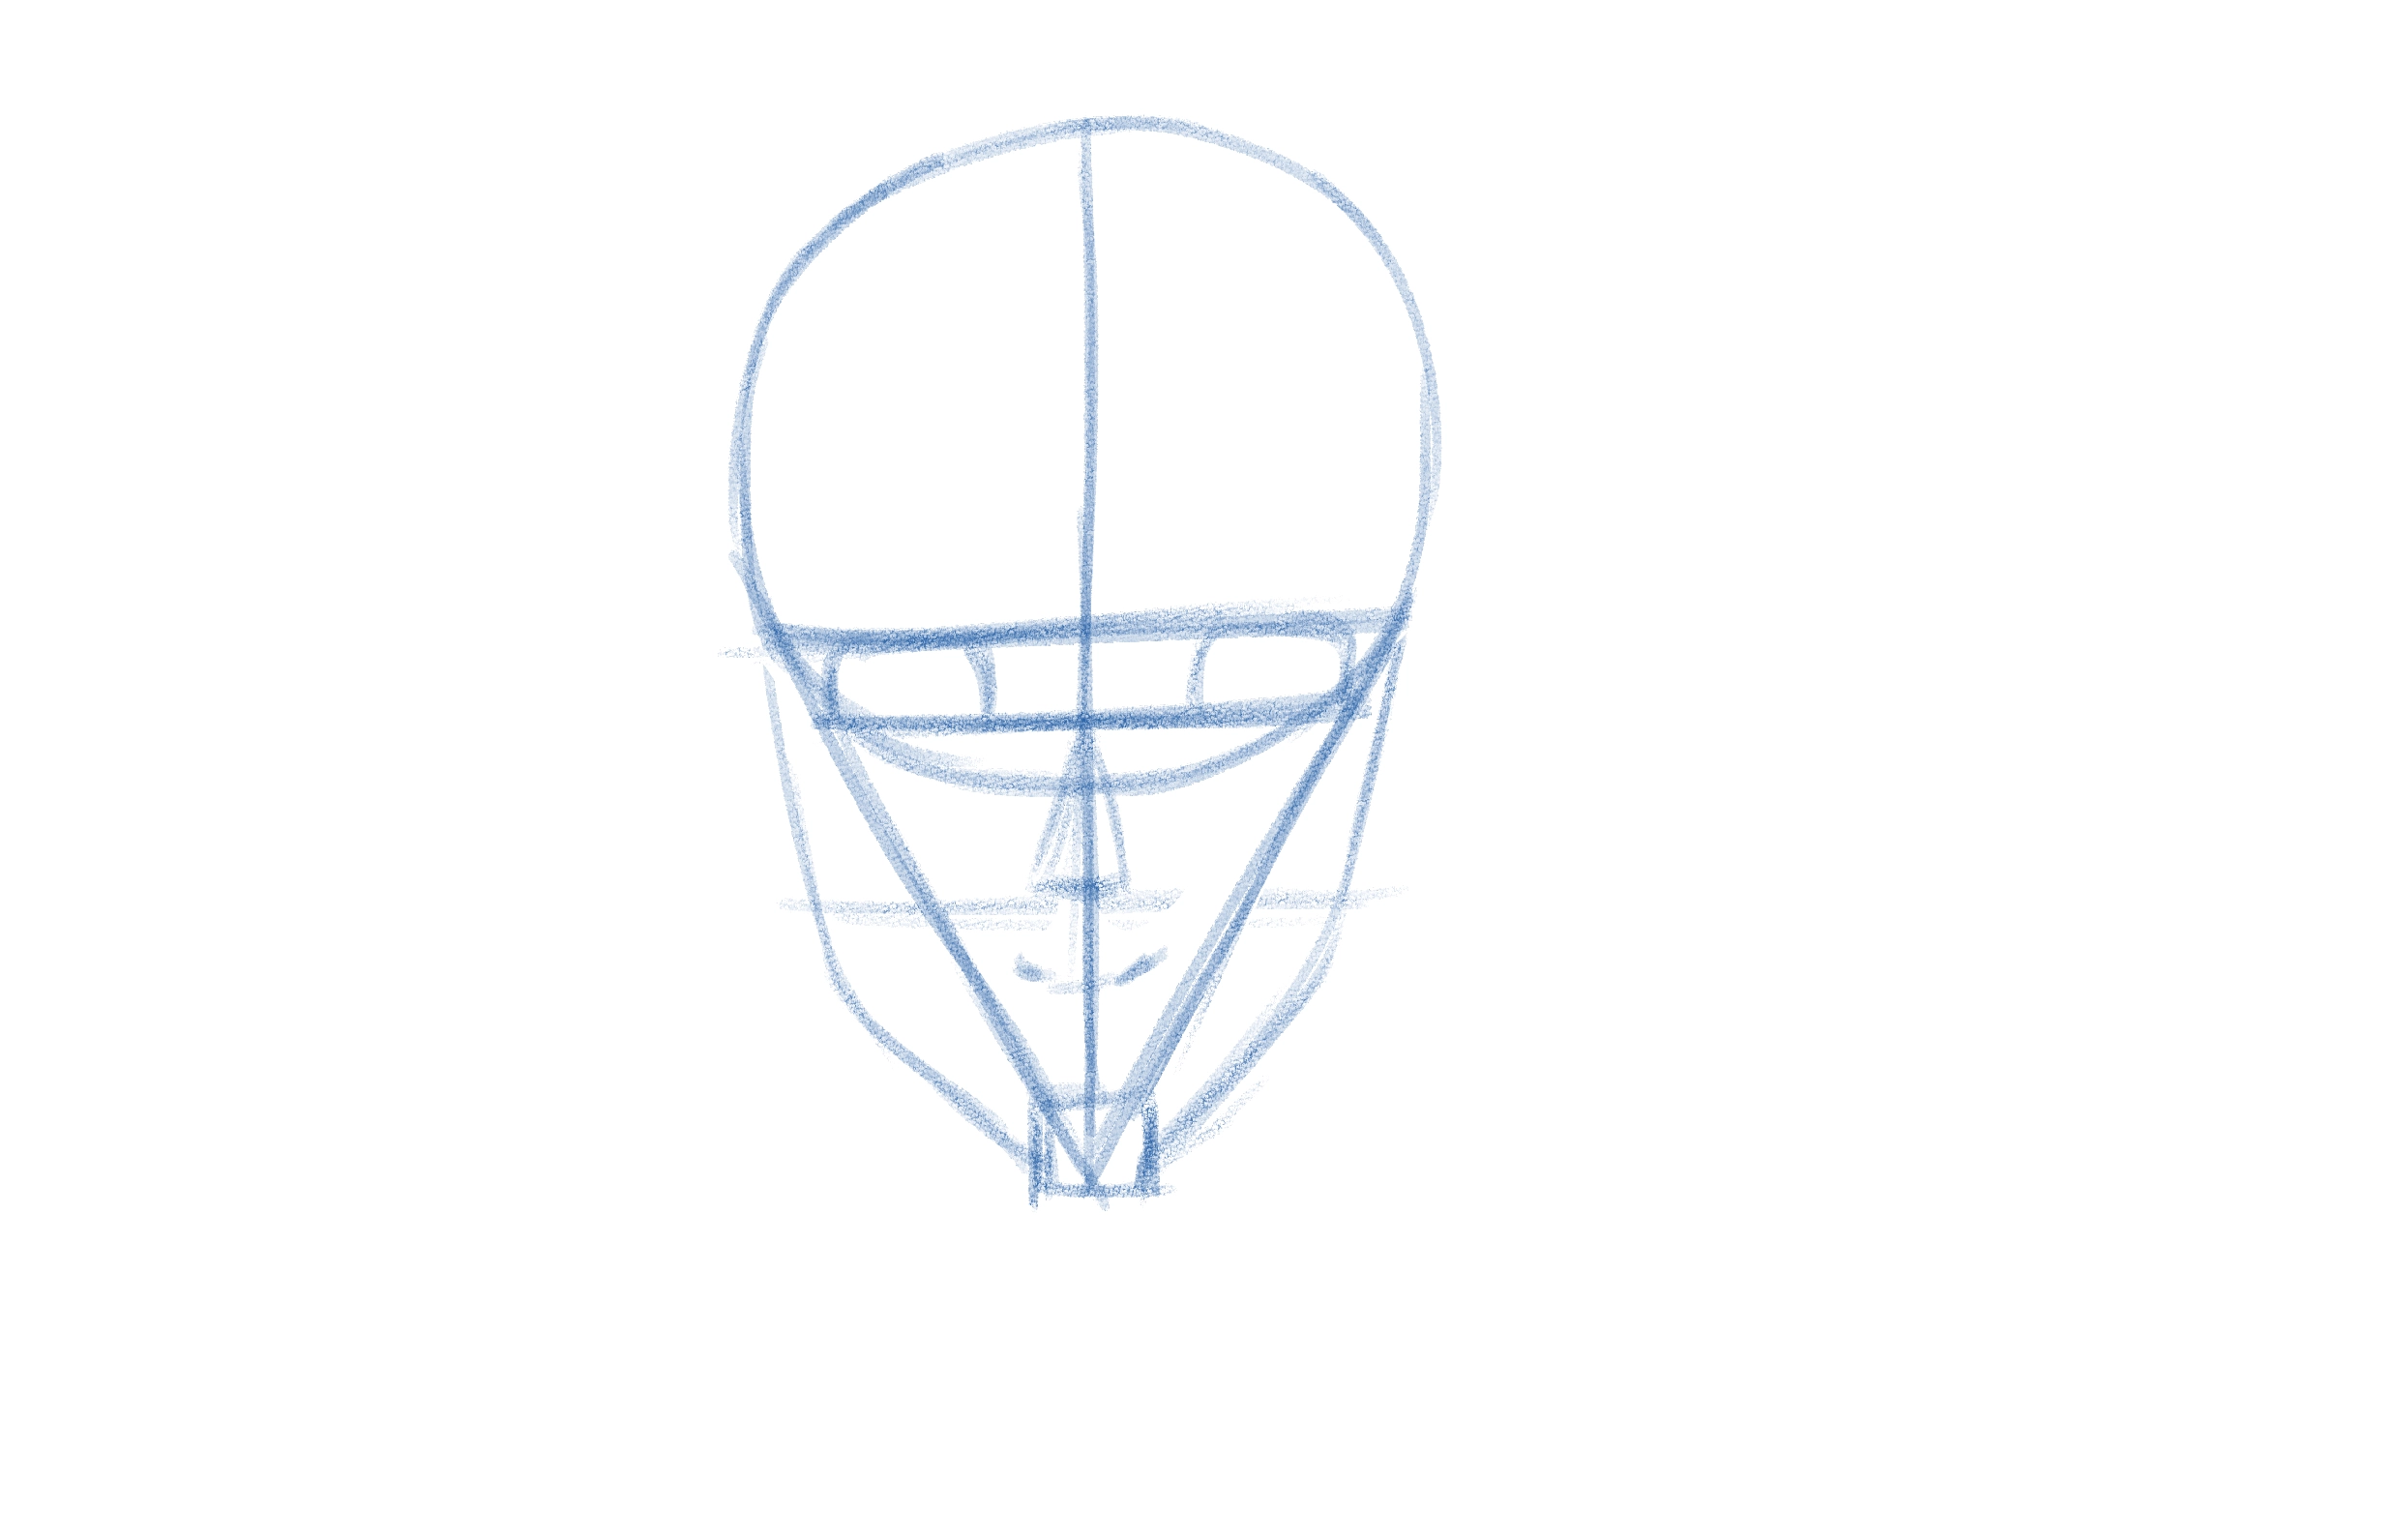
Now we draw the features of the anime character’s face, such as the eyes, mouth, nose, and ears, and the character will become a little clearer. We can make adjustments as we wish at this stage.
Step six
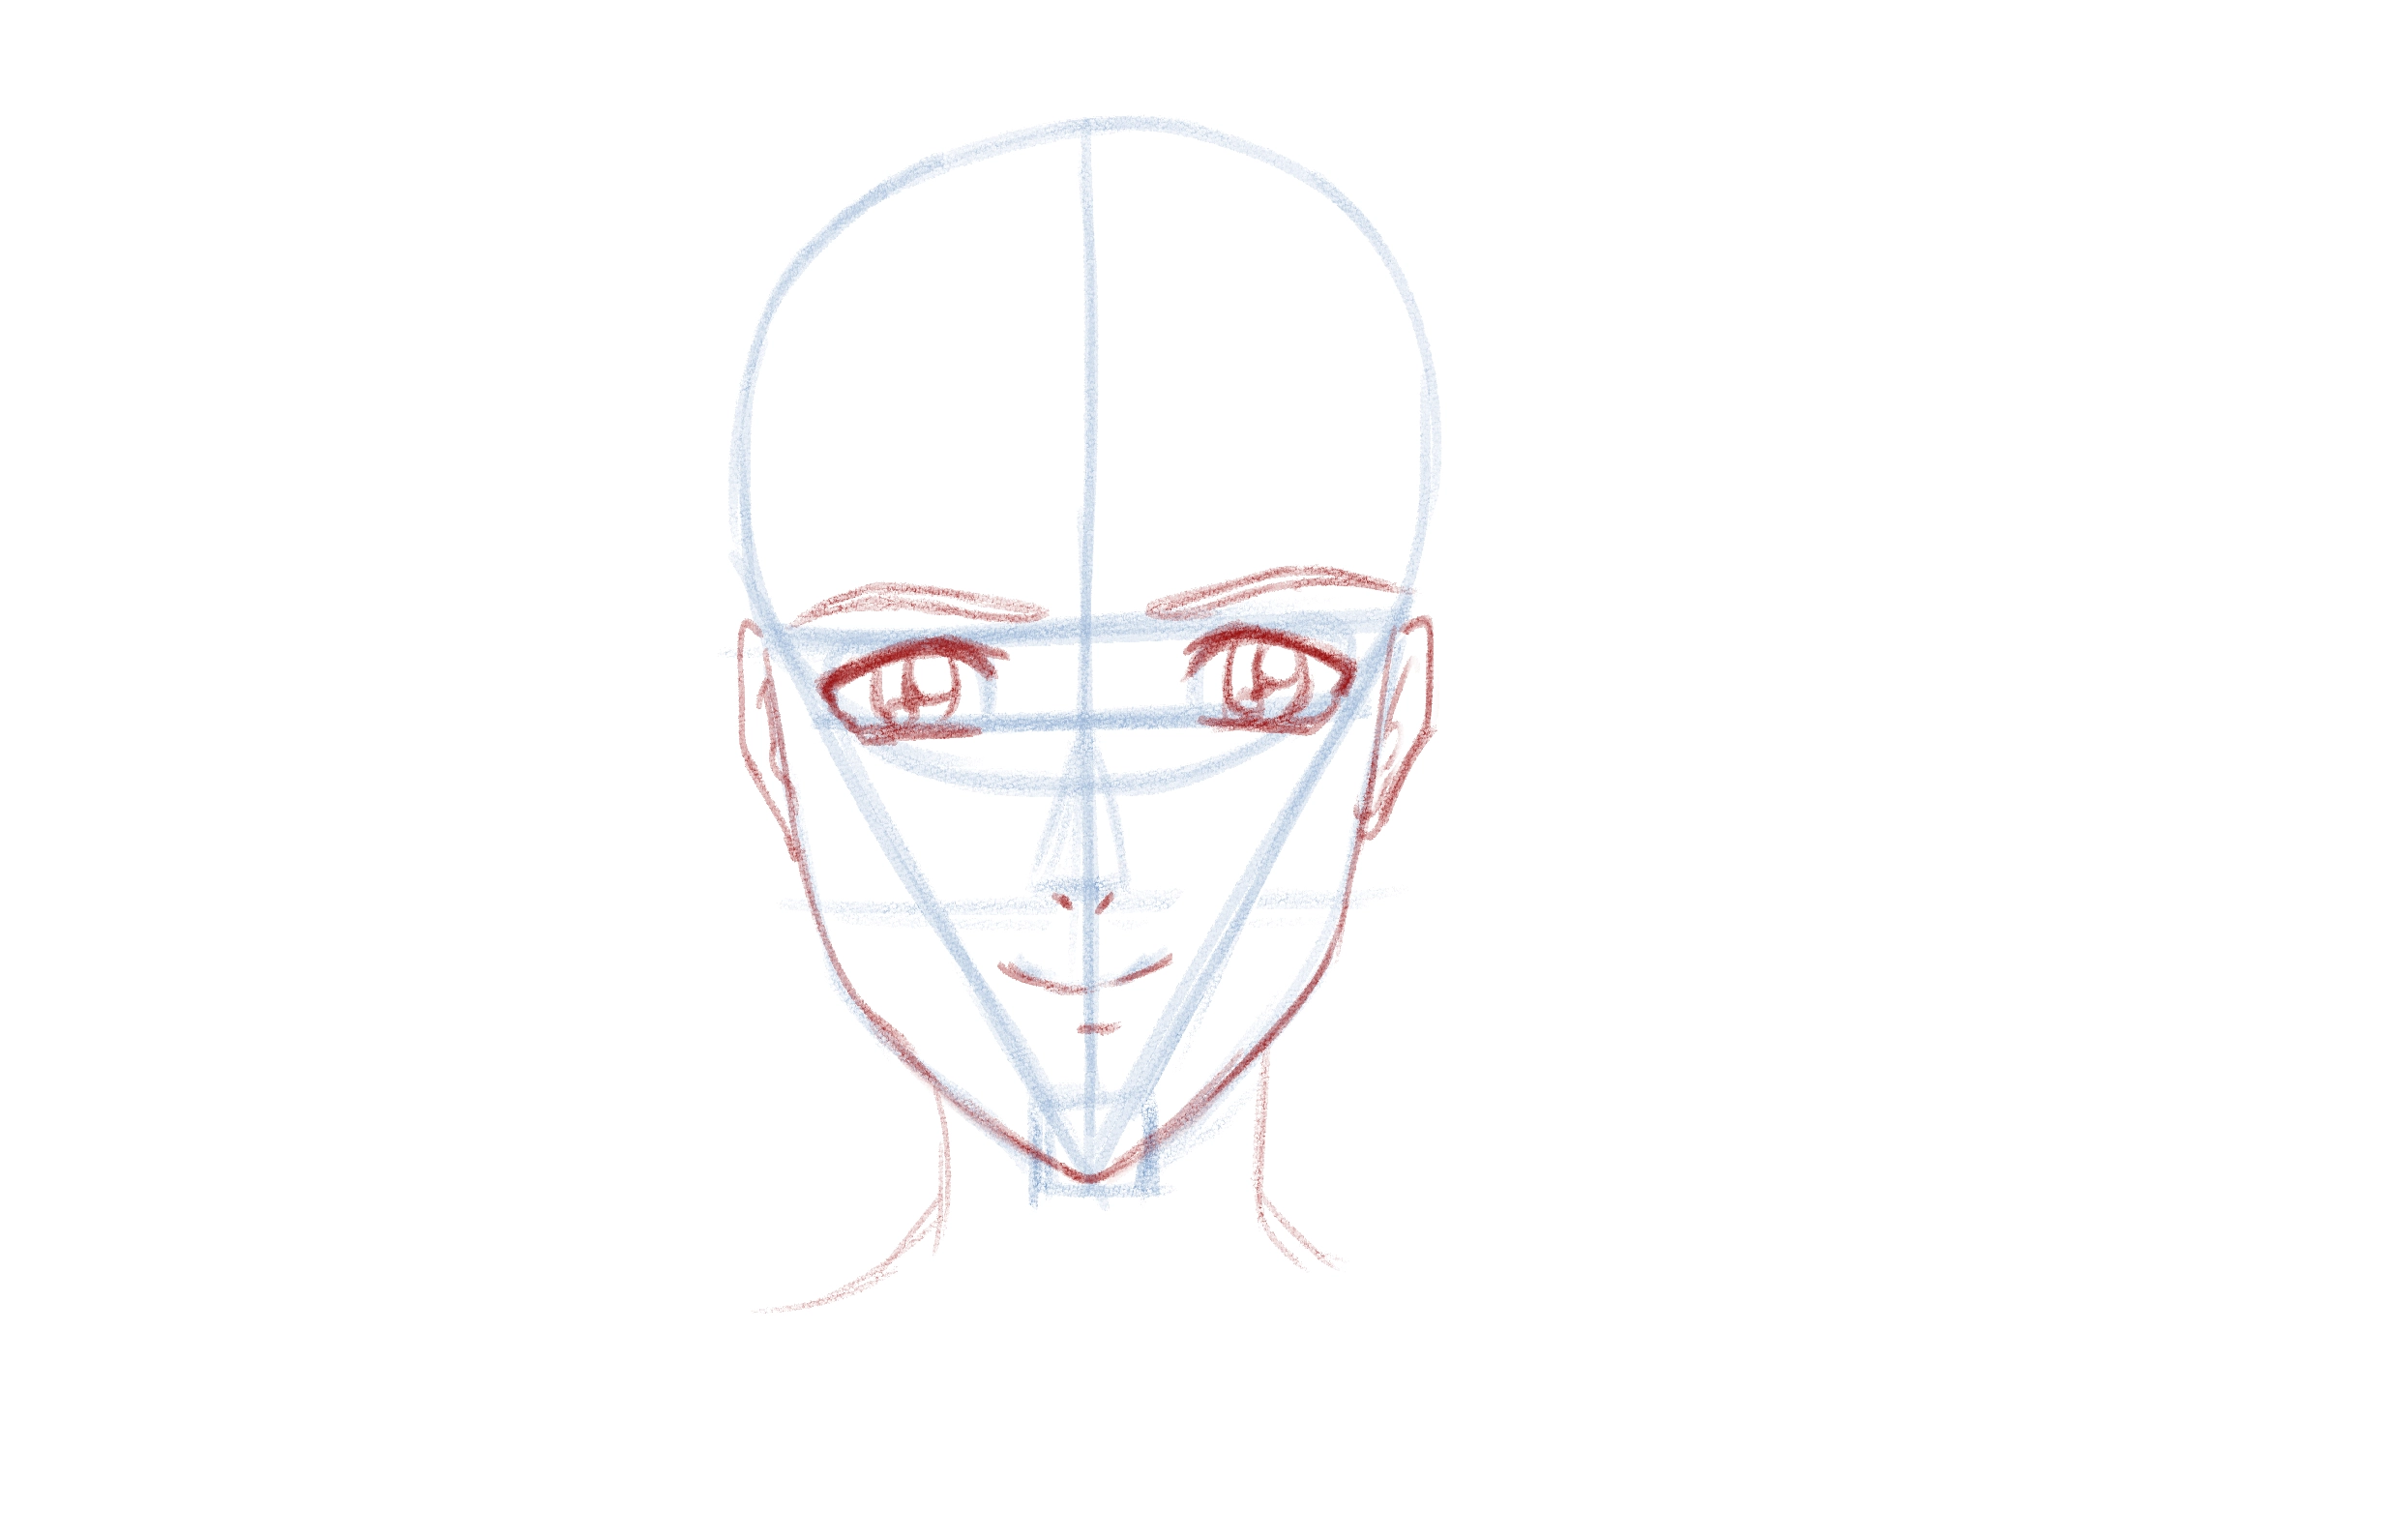
The final stage of the initial drawing process begins with drawing the eyes first, based on the previous drawing, in a way that suits the character. If she is arrogant, give her swept-back eyes, and if she has an innocent appearance, give her soft eyes, and so on.
Now let's move on to drawing the nose. It should be simple, as is typical in anime; it can be just a dot or a small line. As for the mouth, draw a curved line, like a smile.
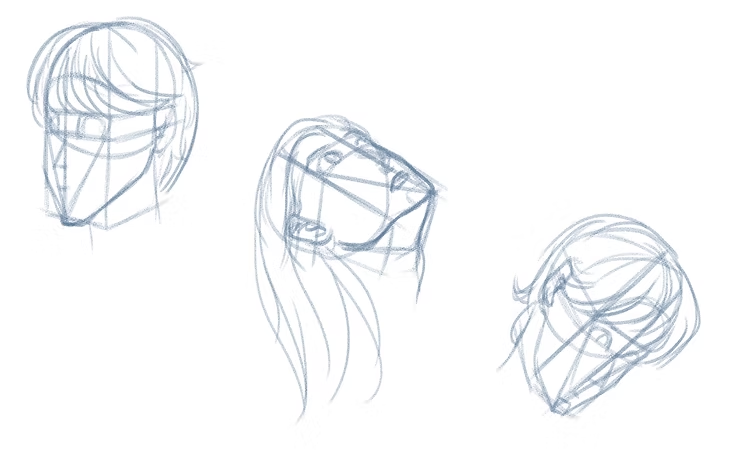
Drawing a manga face: the best way to draw a bottom perspective
We can use a different color, such as red, to distinguish between the sketch and the details.
Step seven
We add the hair completely, and as we can see, the circle that accurately determined the head size has helped us.
We don't necessarily have to draw the hair on the edges of the circle; it's enough to go outside the circle's boundaries in order to get thick anime hair. The line in the middle determines the hair's division, and through it, we can draw anime hair divided into two halves.
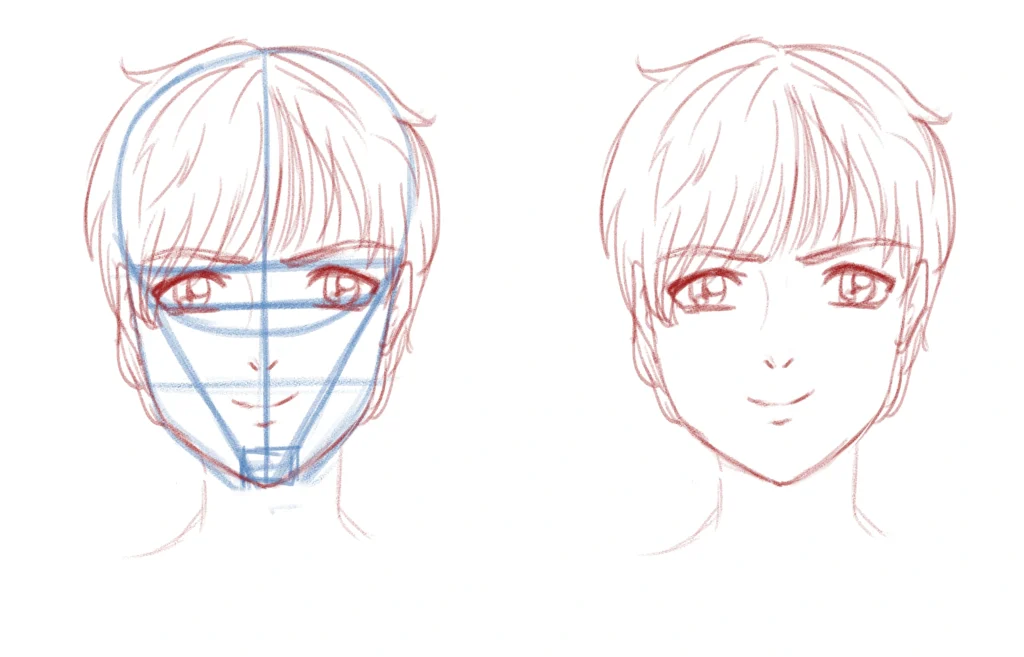
We have now finished drawing the anime face easily, with clear and precise steps. Try my style on your notebook, computer, or even phone, and use the guiding images that I have provided you through this lesson so that you can draw in a similar way.
Your training may include some difficulty and challenges, and this is normal. I also faced this problem in my career in the world of drawing, but I did not stop at it. Rather, I turned the page and started again with greater determination. Thank you for following the lesson, and I will meet you soon, God willing.