Welcome, my dear friends! Today we'll learn together how to draw a low-angle perspective in manga, one of the angles that many artists find difficult and complex. Drawing a character from below requires precision and an understanding of perspective, because proportions change, and the parts closest to the camera appear larger.
My online store has everything you need as artists
But don't worry, I'll share the method I personally use in my drawings. It's a simple and quick technique that suits the manga style and will help you develop your skills without any complications. Let's start step by step and learn together how to make your bottom-down perspective drawing look professional and distinctive.
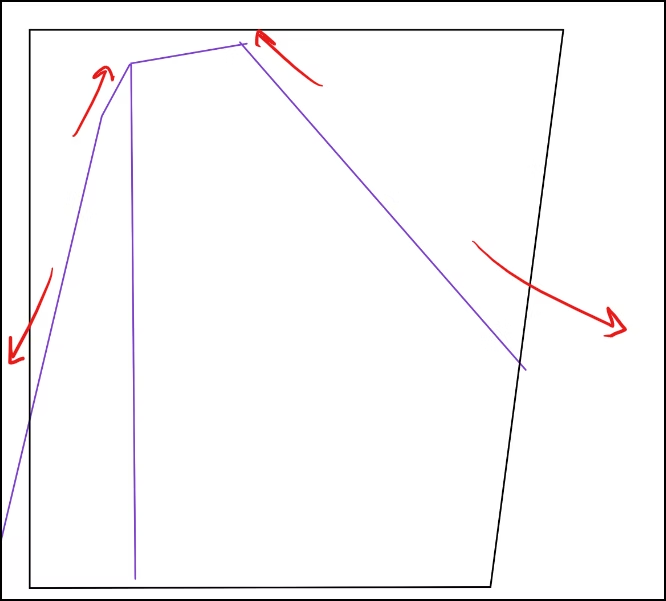
The first step is the basic rectangle in drawing bottom perspective.
As we know, the farthest part is smaller, and the nearest part is larger.
- So we start by drawing a rectangle vertically, so that the top section – where the head is – is narrow because it is far from the camera.
- The lower section will be wider because it is closest to the camera.
In the illustration, the red arrows at the top indicate the location of the head, and the arrows at the bottom indicate the lower part of the body.
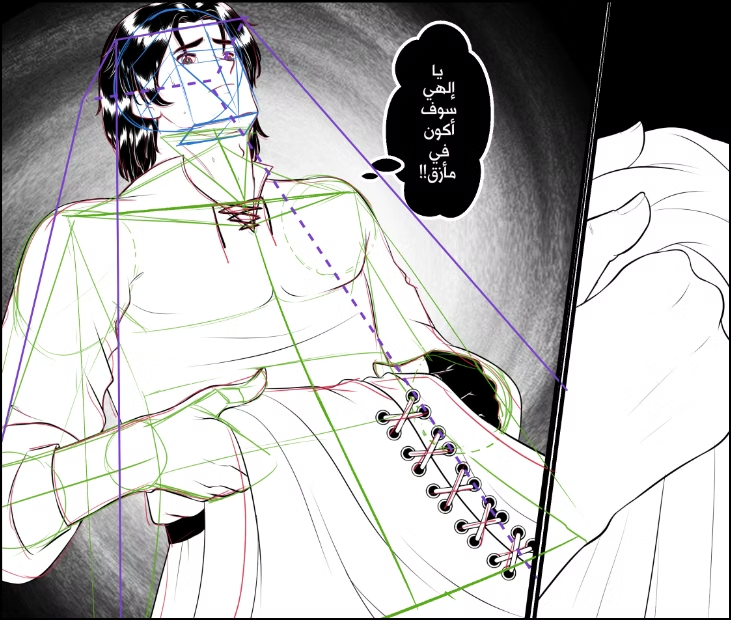
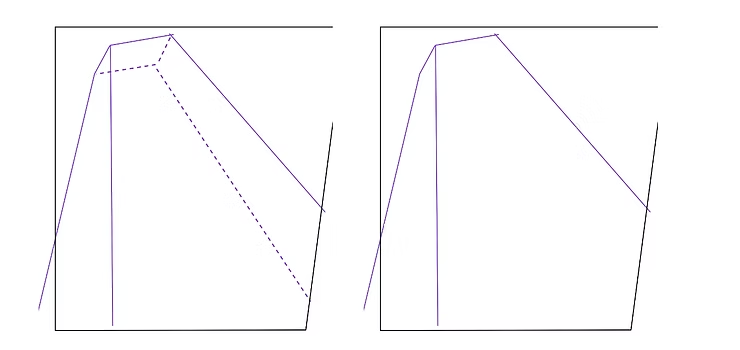
The second step is to convert the rectangle into a three-dimensional cube.
After completing the rectangle, we begin adding lines to reveal the interior, as shown in the image on the left. We draw these interior lines diagonally so that the rectangle transforms into something resembling a cube or a three-dimensional box. This cube represents the base of the object from a lower angle, which is essential when drawing a bottom-down perspective of characters.
Step three: Drawing the head in bottom perspective
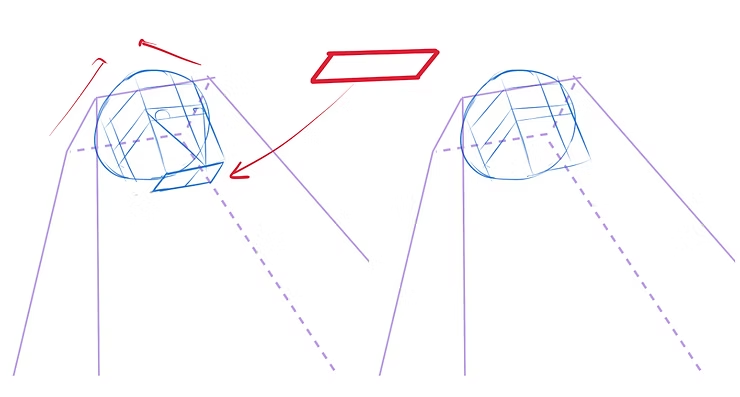
- We begin by drawing the head of the manga character inside the upper section of the cube.
- We must consider the direction of the rectangle when drawing the head, that is, the lines should be aligned with the angle of the cube itself.
- In the left picture, you will notice that the arrow points towards the chin, and the chin should be protruding slightly forward, because we are looking from a lower angle.
Step four: Building the upper body in blocks
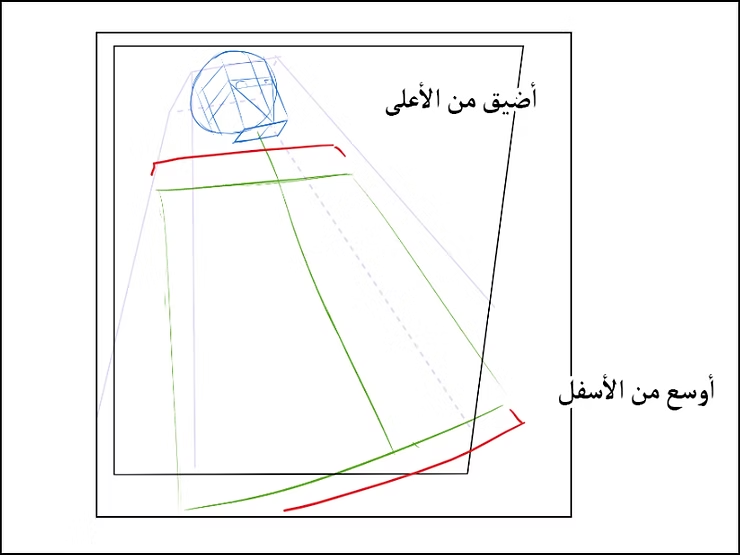
- We draw a long line from the bottom of the chin to the end of the cube, to divide the body into two halves.
- Then we draw a horizontal line at the shoulders, and add two side lines to form a rectangle that represents the upper part of the body.
note: It is very important that the shoulders are slightly narrow, while the pelvis is wider, because the camera is closer to it.
Step five: Facial features in low perspective
When drawing from a lower perspective, the features look slightly different; I'll explain how:
- The nose appears high and protruding upwards.
- The chin is more prominent than it is at the front corner.
- All the features are tilted upwards, due to the camera's position.
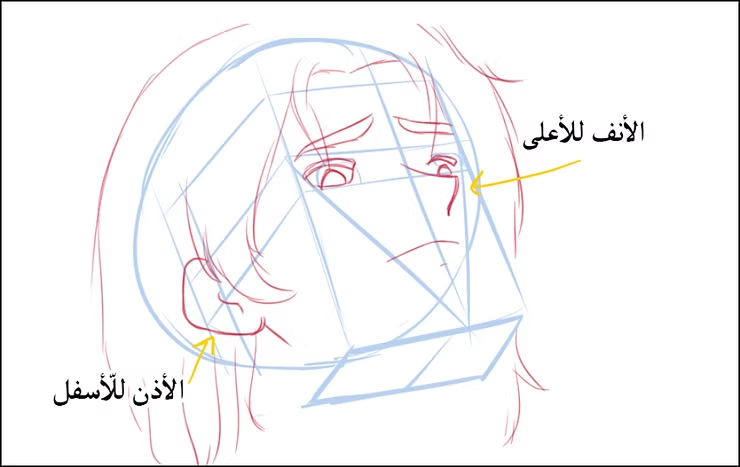
Step six: Head and hair details
We draw the ears so that they point downwards, and we take care to show less hair on the forehead, while the lower part of the head has more visible hair.
Regarding the eyes:
- The eye closest to the camera looks bigger.
- The other eye is smaller because the head is tilted.
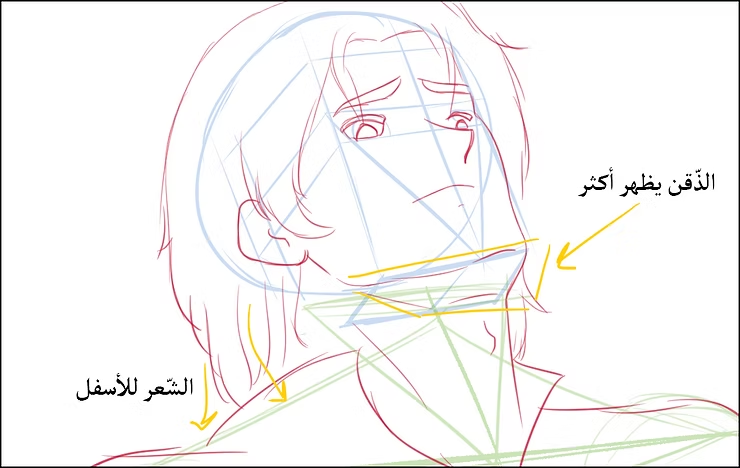
Step seven: Drawing the body and hands from the bottom
We draw the rest of the body details, such as clothes and hands, according to the scenario you are working on in the manga.
An important point: the head appears smaller because it is far from the camera, while the hands appear larger because they are closer to the lens, and this is a key point in drawing bottom perspective.
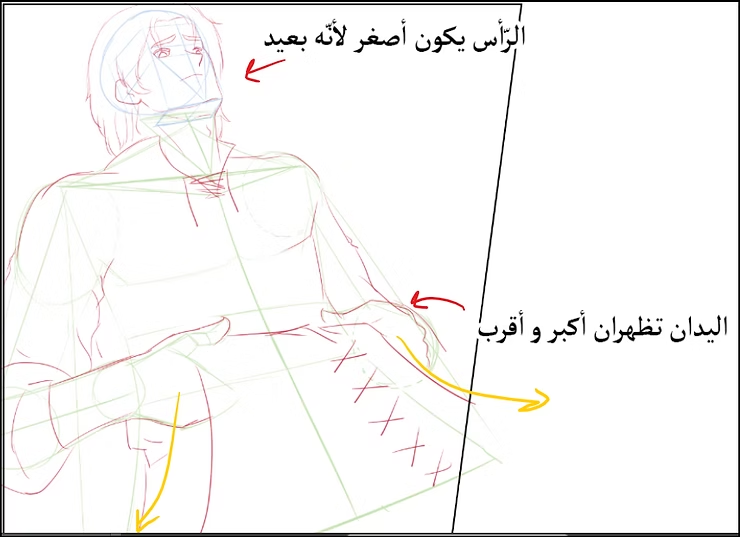
Step eight: Full inking of the manga character
Now we move on to inking, by creating a new layer above the drawing layer, through:
- Click on “New Raster Layer”.
- Select the “Pen Tool”.
- You can use multiple types such as G-Pen or Mapping Pen depending on your style.
Start by inking the outlines first, then the finer details such as the hair and eyes.
How to add toons to manga and webtoons for clothing
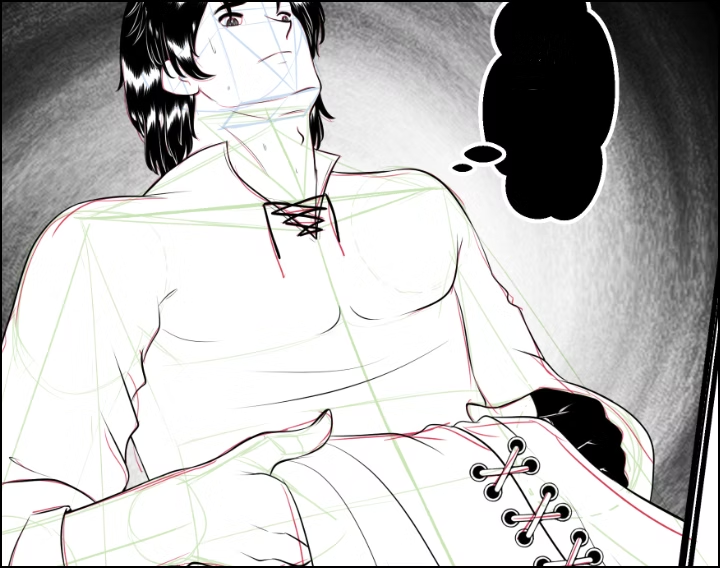
Final result
After inking, you'll notice how the low-angle perspective adds power to the scene. In the attached example, we see a young man holding his coat and looking at it from a low angle, as if the camera were at ground level.
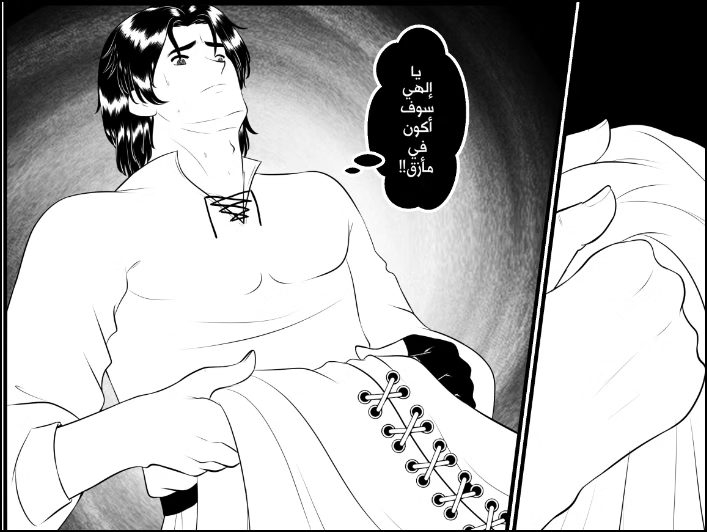
This is how we've learned to draw a low-angle perspective for manga or even webtoon characters. I think you'll love my method because it relies on a deep understanding of perspective. This angle might seem complex at first, but it's a skill worth acquiring with time and practice.
Don't be afraid of experimentation and mistakes. I made mistakes myself and then corrected them. Every attempt brings you closer to mastery, so there's no need to panic. Share your experiences with me, and I'll be waiting for you in a future lesson, God willing.