Hello my dear friends, in this lesson today we will learn how to create scene panels for webtoons and manga in the right way, and how to cut the rectangle in several ways that suit the drawn scenes.
My online store has everything you need as artists
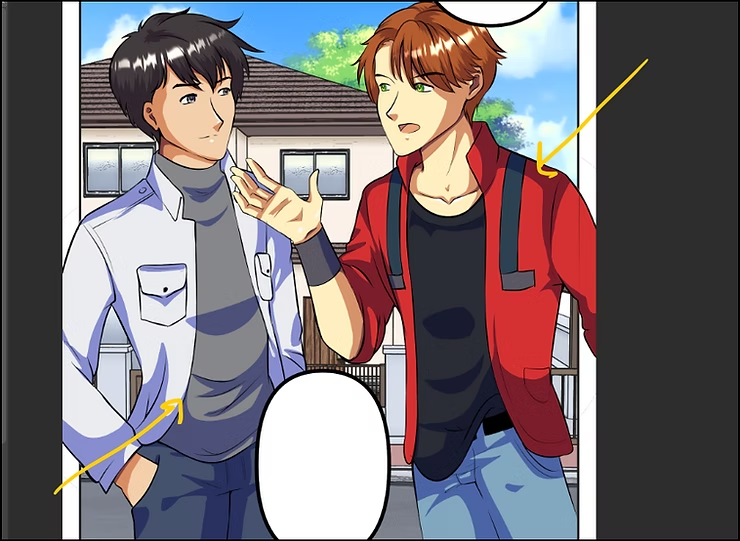
We know that these rectangles come in different sizes for each scene, and they represent what is happening in it. Dramatic scenes that are close to the characters are medium-sized and very close to the characters' faces, while large rectangles are often used for scenes of a wide city, while small rectangles focus on very close-up scenes such as an eye, a hair, a tear, and so on.
First step
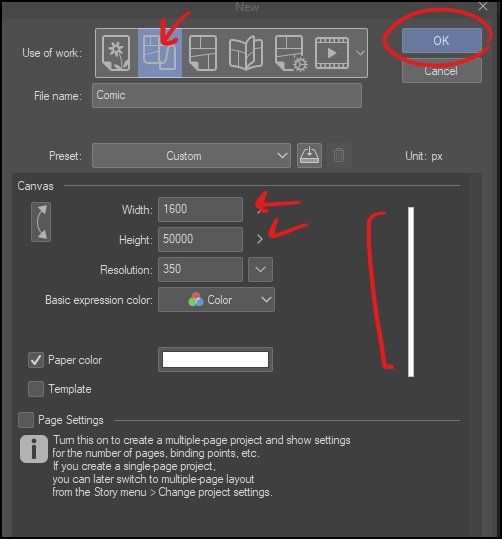
- We open the Clip Studio Paint program, and open a new file for the webtoon using the option
- New file (New) Then select the project type Webtoon.
- height Height, the offer WidthAccuracy Resolution.
- After configuring the settings, click OK. OK.
Step two
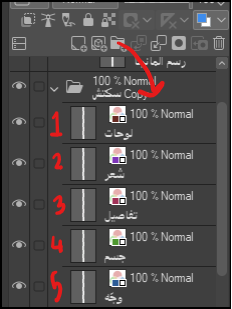
Now we begin the Layers arrangement phase, which, as you can see in the image, is as follows:
- First layer: Scene drawings, which are dedicated to drawing the size and shape of the scene rectangles.
- The second layer: hair, which is where we will draw the hair of all the characters.
- The third layer: details, which is dedicated to drawing the characters in all their details after the initial sketch.
- The fourth layer: the body, which is for drawing the body of webtoon characters.
- Fifth layer: Here we draw the facial structure of the characters.
Step three
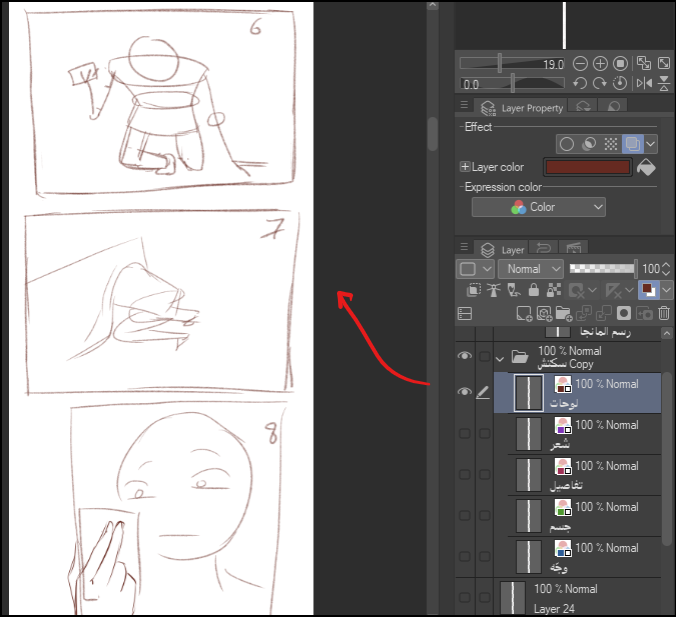
In the layer dedicated to scene layouts, we will manually draw rectangles to define the size and shape of each scene. The Pen tool can be used. Pen Tool or the brush tool Brush Tool To draw the sketch.
And we must not forget to number the scenes based on the written script.
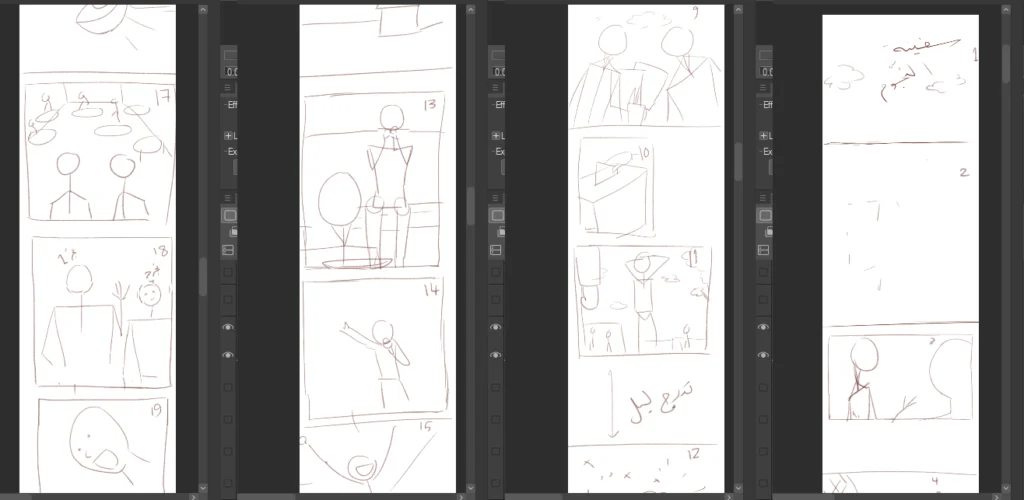
A closer look
In this picture you can see how we finished drawing all the scenes in all the webtoon pages.
Step four
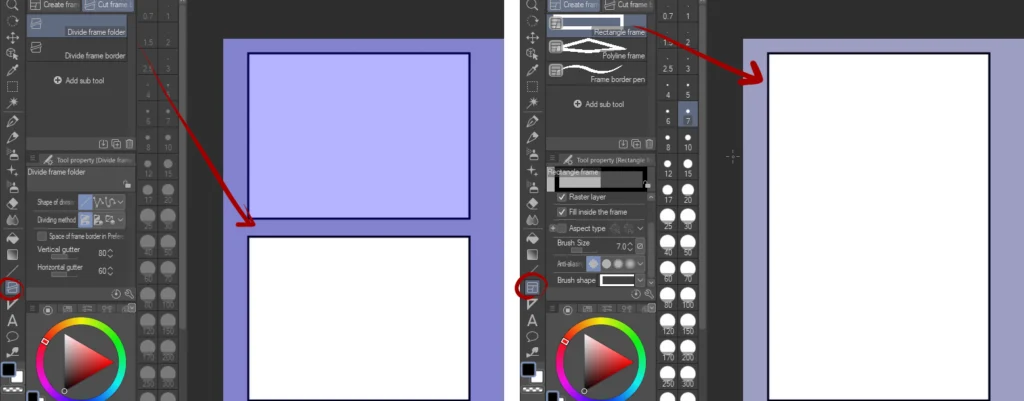
- From the tools menu on the left, select the Manga Frame tool. Frame Border Tool Which is included among the manga tools Comic Frame.
- We add a new layer New Layer.
- We begin by drawing the rectangle based on the previous sketch.
- Next, we select the frame cutting tool. Cut Frame Border Using the same tool, we cut the frame to get more than one rectangle inside the page.
A look at the current step
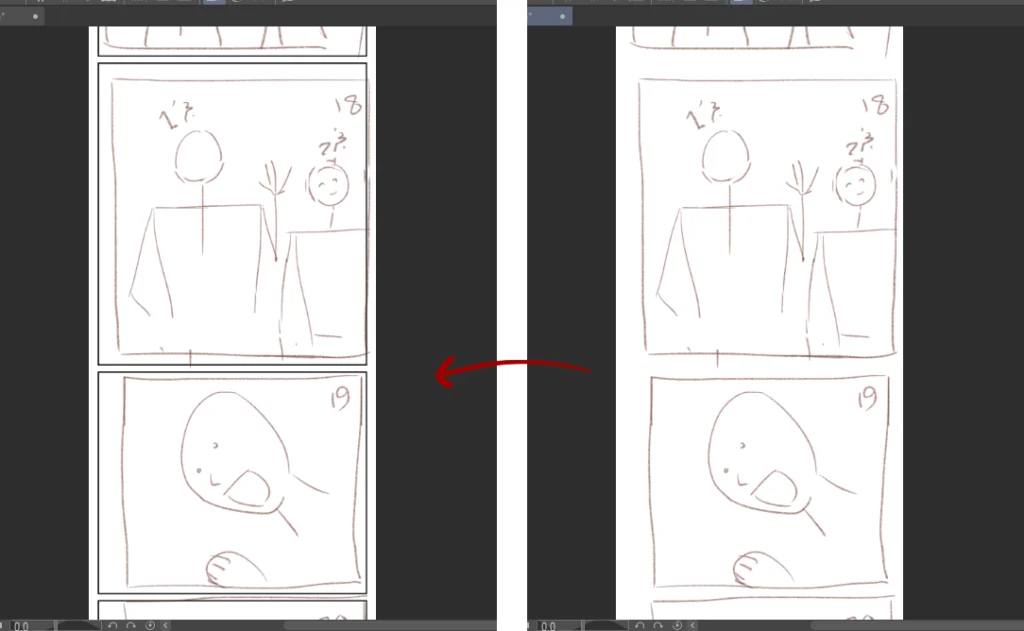
Look at the picture in front of you: on the right is the previous sketch, and on the left is the picture after we added the manga rectangles.
Step five
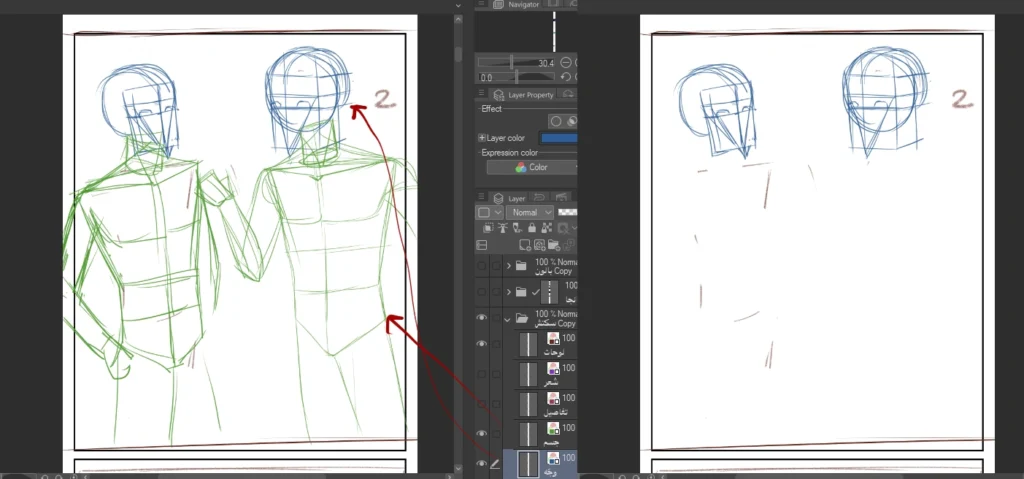
We return to the face drawing layer and begin drawing the webtoon characters' faces.
Then we go to the object drawing layer and draw the objects completely, using drawing tools such as the pen. Pen Tool or pencil Pencil Tool.
Step six
We move to the layer for details and draw the characters in more detail and clarity.
The difference between webtoons and manga: which would you choose as an artist?
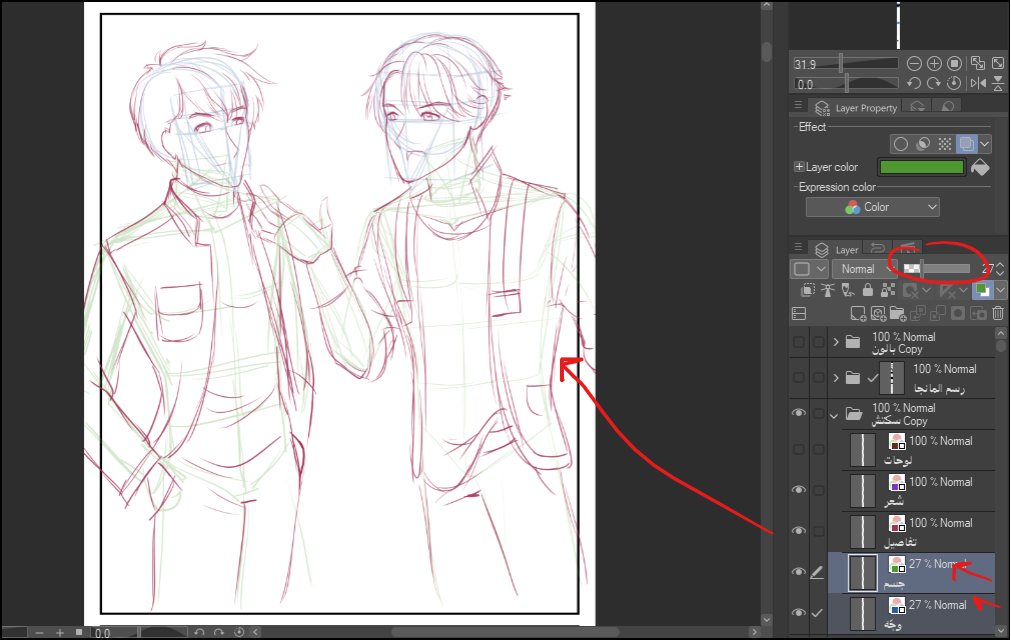
Next, we select the face layer and the details layer, and we reduce the clarity of the sketch by decreasing the layer's transparency. Opacity From the layer panel Layer PaletteThis is to facilitate the inking process later.
drawing step
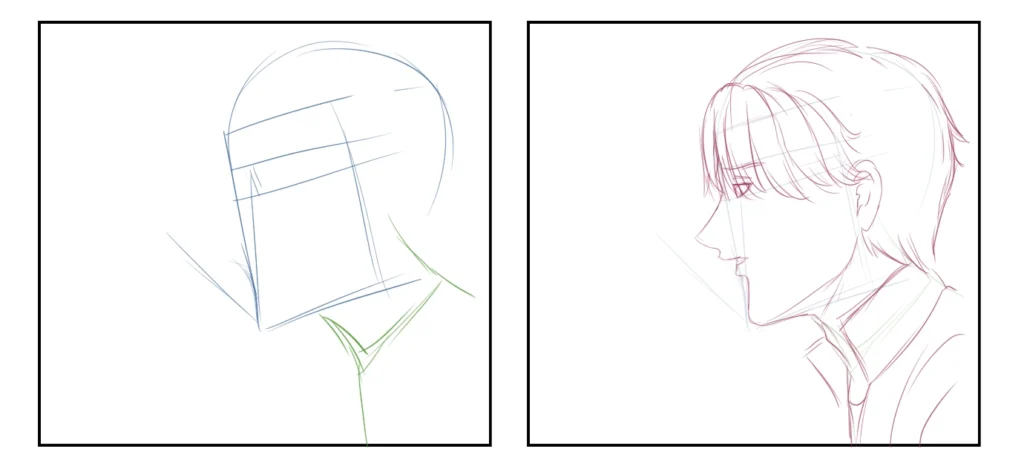
On the left is the layer containing the blue drawing of the facial structure, and above it is the layer of details, which is red, and in it we drew the webtoon character's face more accurately.
Step seven
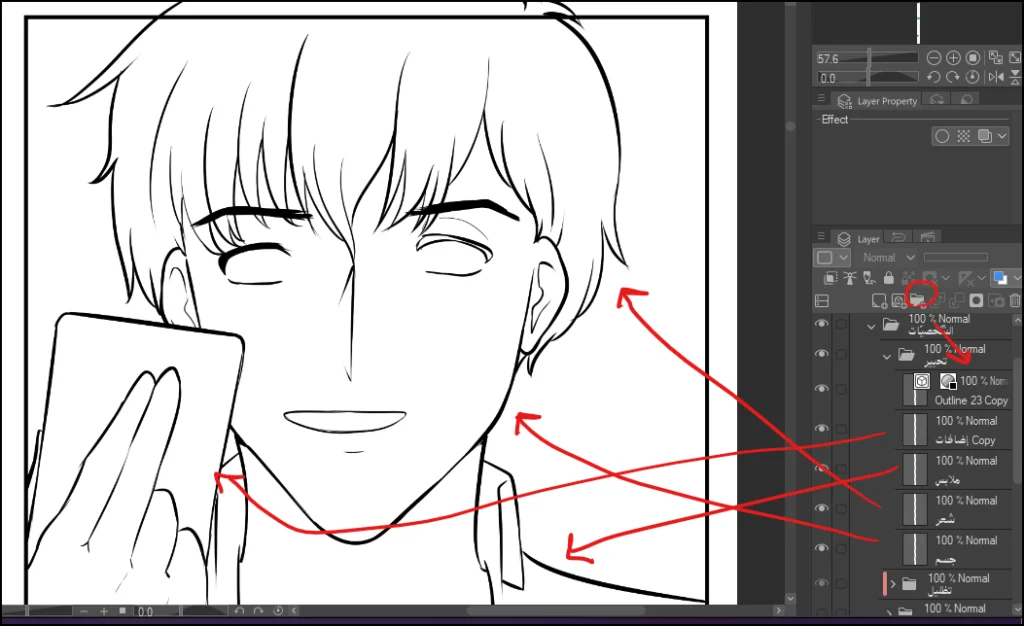
Now we have reached the inking stage InkingIt's very easy, and the method is as follows:
We add a new folder New Folder / Layer Folder.
We divide it into three sections:
- Ink section Inking
- Coloring section Coloring
- Shading section Shading
The inking folder must be above the coloring folder in the layer order.
Inside the coloring folder, we add several layers Layers For colors, such as:
- Body layer
- Hair layer
- layer of clothing
- Layer for add-ons
Next, we select the pen tool. Pen Tool From the tools menu on the left, select the color black. Black Color.
Then we begin the inking process in several layers depending on the element we are inking, whether it is the body, clothing, or hair.
Final glimpse
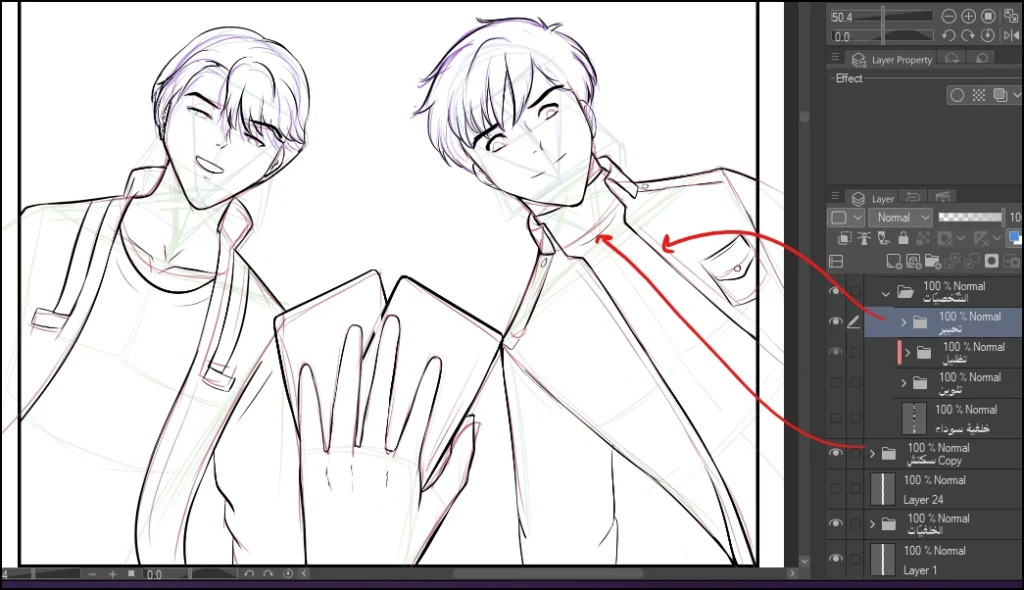
In the image below, we can see how the drawing and sketch layers are divided. At the top, you see a folder named "Characters," and inside it are several folders: the Inking folder, below it the Shading folder, and below that the Coloring folder.
You will also see a layer titled Black Background Black Background LayerThis feature is designed to conceal imperfections in drawing or coloring, and to hide areas where color is missing. We turn it off now and will turn it back on when we have completely finished the drawing.
Below is the backgrounds folder. Backgrounds Folder.
This was our lesson for today, in which we discussed formatting and drawing rectangles for webtoon scenes—an essential step before starting to draw. Follow my steps, and you'll see satisfying results.
Thank you for reading, and I will meet you in future lessons, God willing.