Hello everyone! Today in this post, I'll explain in detail how to animate an anime character's hand. I've chosen to animate Gon's arm from "Hunter x Hunter," a character I've always loved. You can animate any character you've previously designed using my favorite program. Toon Boom Harmony.
My Patreon account where you can find a detailed screenshot of the animation
Toon Boom Harmony It is a program for animating anime and cartoon characters in several different styles, such as Cut-Out or Frame-by-Frame Classic animation, as well as bone rigging. Today, in our Gon animation lesson, we will undoubtedly use these tools. The program is available for computers, and there are many tutorials about it on my blog, "Summer Art.".
The drawing :
First, make sure you draw the character before anything else. If the character is stationary during the shot, you can draw them on a single layer, and draw the part you want to animate on a separate layer. Since we'll be animating Gon's arm, I drew the arm on one layer and the hand on another.
- We insert a new layer (Add > Drawing Layer).
- We draw Gon's body in a layer.
- We draw the face on a separate layer and link it to the body layer.Peg).
- We draw the entire arm in a separate layer and connect it to the body.
- We draw the hand alone in a separate layer and connect it to Big Gunn's arm.
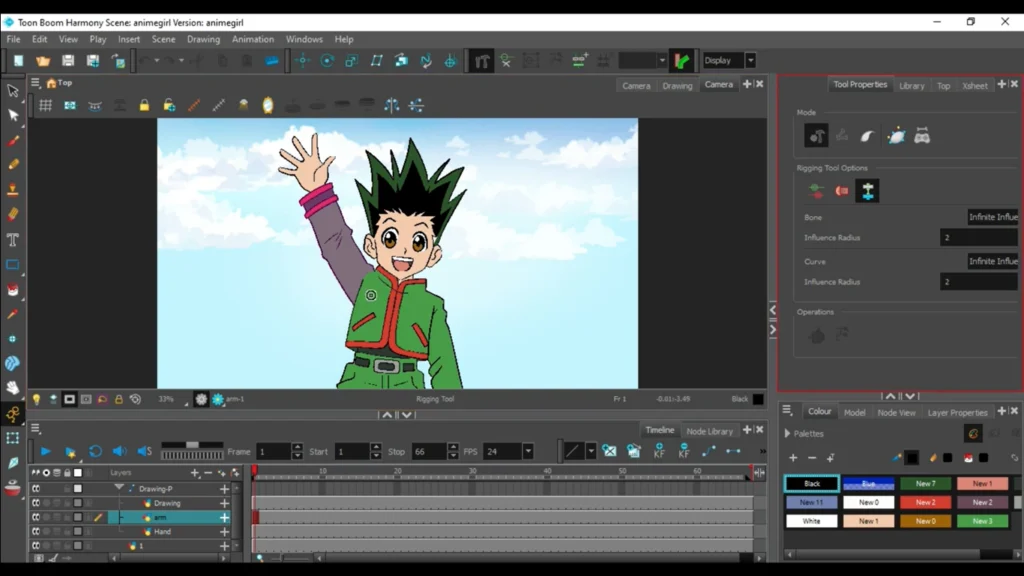
Preparation:
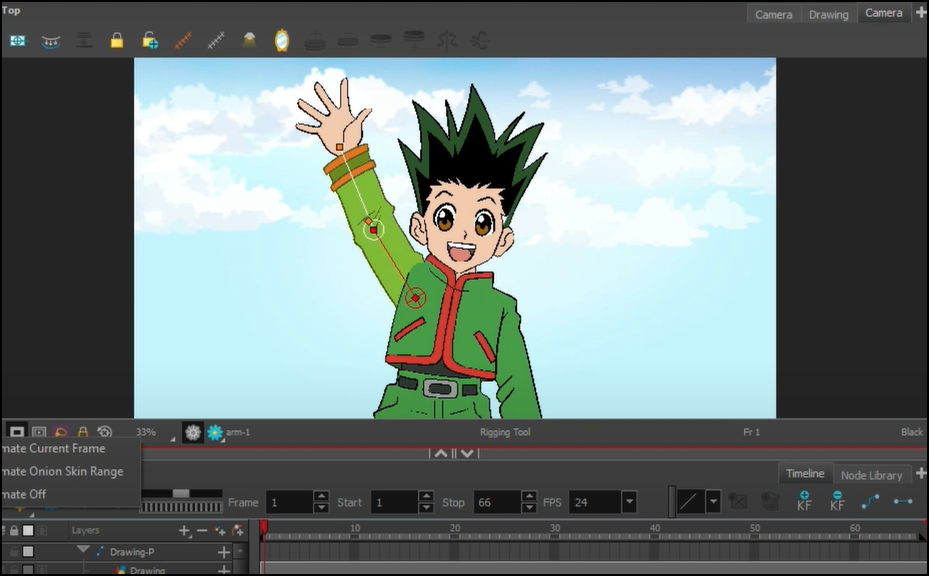
And now to my favorite part: moving things. This time we'll be using the bone tool called Bone Deform or Skeleton Deformation (Deform / Bone Deformer). This tool allows you to add bones to the arm for movement without having to draw between frames. Click on the arm layer, then add bones starting from the armpit to the hand, keeping the hand on its own layer.
- We define the Gon arm layer.
- We select a tool Deform > Bone Deform (or Skeleton Tool / Bone Tool).
- We list the bones from the top of the arm to the bottom, adding a bone at the elbow and a bone at the end of the arm.
If we want to place the hand behind the arm, we adjust the depth by:
Layer Properties → Depth Then we assign a negative value (for example -0.01To move the hand backward.
There's no need to move your hand, because we've already tied it. Hand Peg with Arm PegThis means that the hand will move automatically with the movement of the arm, regardless of its direction.
From the Timeline:
We drag the Arm Layer behind or in front of the Body Layer to change the visual arrangement.
Layer Properties:
If we want the arm to appear in the front, we adjust the depth value (Depth) on 0.001 (Front).
If we want it behind the object, we change the value to 0.001 (Back) Or we use negative values such as -0.01 To obtain the appropriate depth.
Animation:
Then we go to the toolbar and select Transform Tool (Transform) To move the bones and the animate. We see the bones attached to the arm and we can start moving them right and left to create a waving motion.
Animating an anime character walking from the front
We can start moving right and left, because Gon's character is waving. Then we go down to Timeline, click on the bone layer, open it, and delay some frames a little, in order for the movement to be more fluid. The black dots that appear to you are the key frame, which is the point where the movement will start and end.
- We move on to Timeline.
- We open the bone layer (Bone Layer / Deform Layer).
- We add Keyframes (The black dots appear as Keyframes) for the required frames.
- We delay some frames (offset) to achieve a smoother motion (follow-through / overlap).
After the animation is complete, we will move on to adding the final touches and exporting the video, like this:
- We insert an image to be the background (File > Import > Images).
- We add an effect Bloom or Glow From the effects library (Node Library > FX > Bloom/GlowWe drag it into the scene or link it to the Composite element.
- We release the video via File > Export > Movie (Or Export > QuickTime / MP4 depending on the settings).
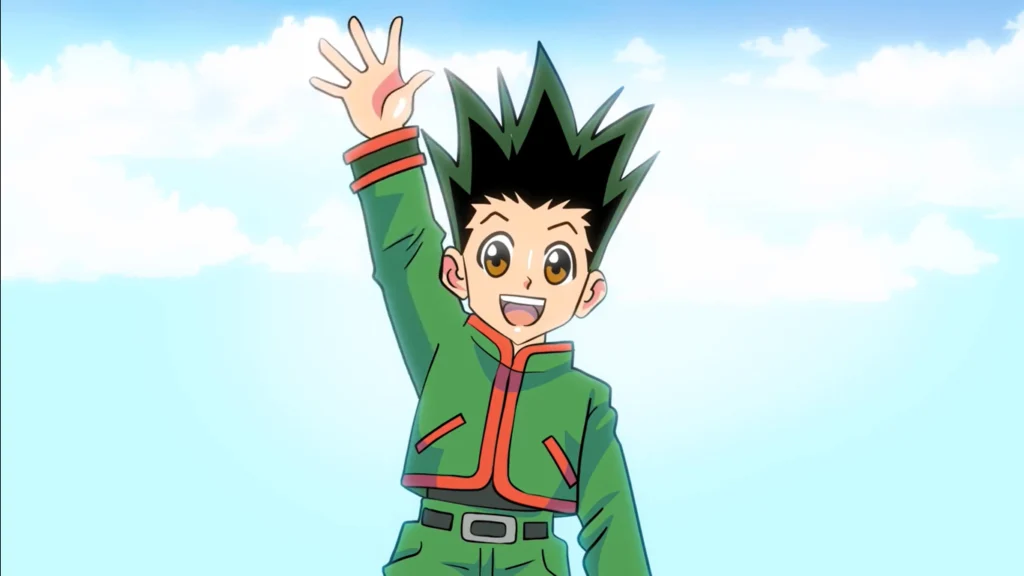
And that's how we finished animating the anime protagonist Gon from "Hunter x Hunter" as he waves his hand and arm. We saved the video after animating it using the animation bones. Toon Boom Harmony. I promise you more explanations, especially those related to bones (Bone Rigs).
If you don't understand any part, read the lesson again and open the program while following the steps until everything becomes clear. If you encounter any difficulties, contact me through the contact form or my social media accounts listed on the website.
Thank you, and I will meet you soon, God willing.