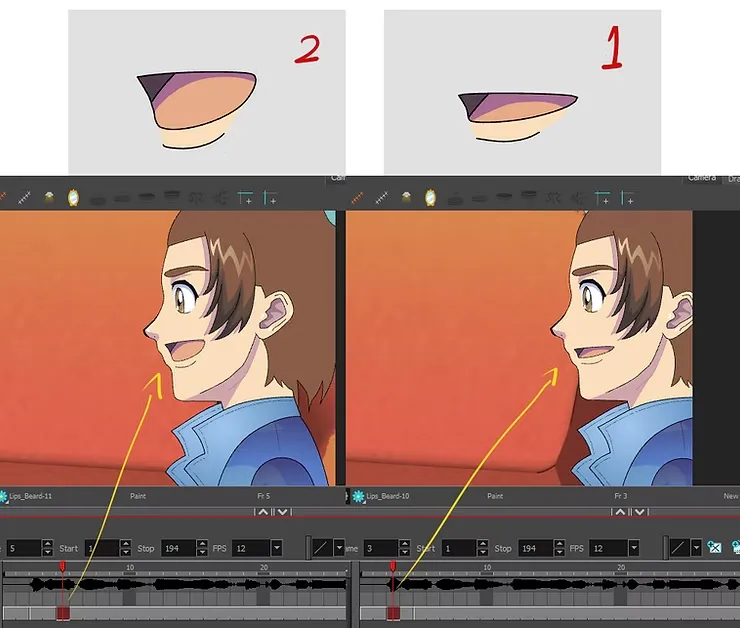
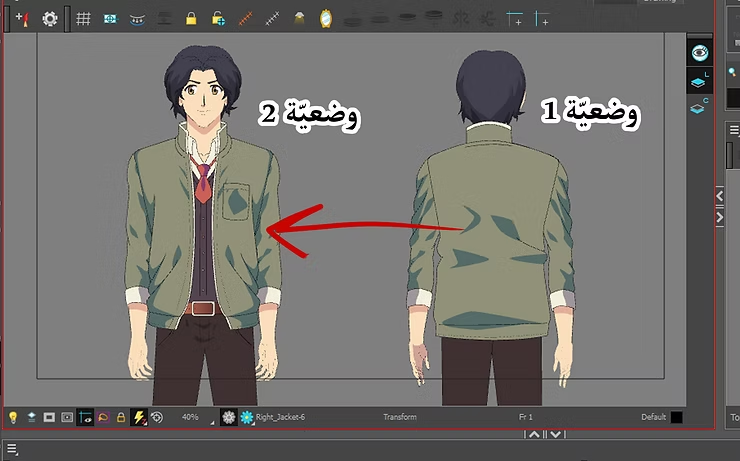
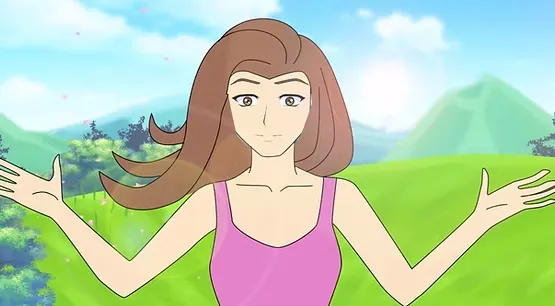
Welcome to a special tutorial on animating a young anime character using frame-by-frame animation. It's been a while since I've posted animation tutorials, but here I am! I'll show you how to animate one of the scenes I'm working on, a short anime project featuring a character from my manga, "What Do I Call You?" You can read the full manga here: What should I call you?
First step
When we open the Toon Boom Harmony program, we go to the option at the top, and we will insert the image of the anime character that we want to animate.
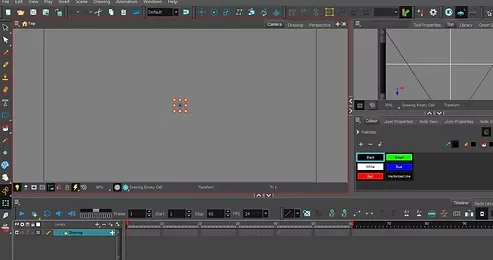
Step two
From the top menu, we select:
Insert > Image
Or from the layer list (Layers) Right-click and then select:
New Layer > Image
A file selection window will appear; select the image from your device and then click Open.
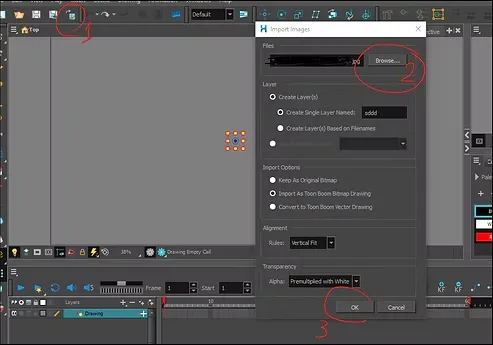
Step three
To save time, we include a picture we previously drew of the young man from the side, in order to animate an anime young man.
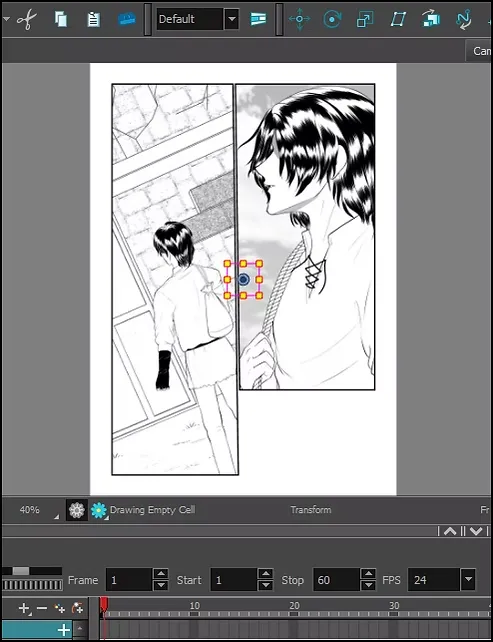
Step four
We begin by changing the image's transparency; double-click the layer name to open it. Layer Properties To change transparency. .
We then immediately begin drawing in order to reach the step of animating an anime boy in a little while, in a separate layer, since it is not possible to draw directly on the pictures, so we draw the face in a separate layer from the hair, eyes, etc.
You have several options for drawing, whether it's a pen, a brush, or a drawing tool, and I prefer using the latter because it's easier and gives a cleaner drawing.
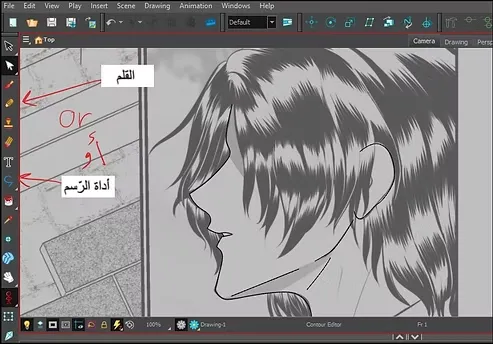
Step five
We add a special eye layer, via the option Timeline > Add > DrawingOr directly by pressing the button Add Drawing Layer From the Timeline.
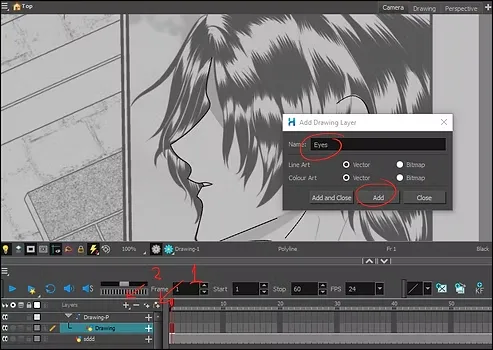
A closer look
Notice how the layers are distributed. It's not that complicated, just look at the picture and you will see that for every part we drew, there is a layer of its own.
What is displayed in the right-hand menu, “Nod View”, is the same as what is in the ”Timeline”, i.e., the distribution of layers on top of each other.
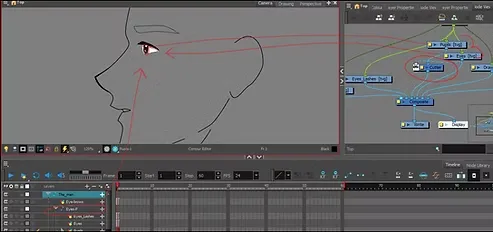
Step six
Here we draw the hair in the first frame, and a separate “layer” or layer while moving an anime boy. .
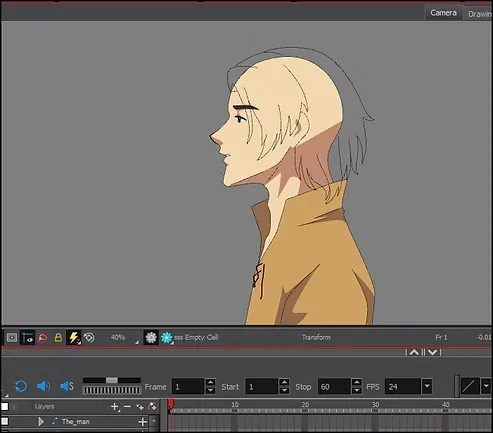
Step seven
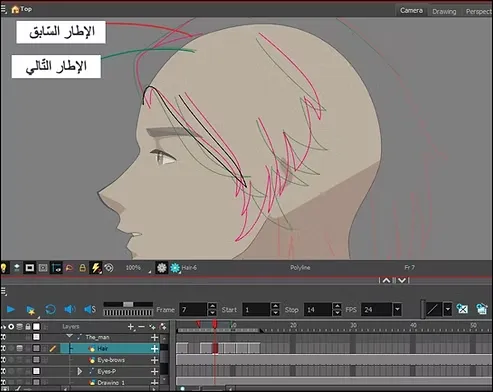
When we finish drawing the first frame for the hair, we are amazed and draw the hair in another frame with a different movement, in order to show the hair as it flies with the air.
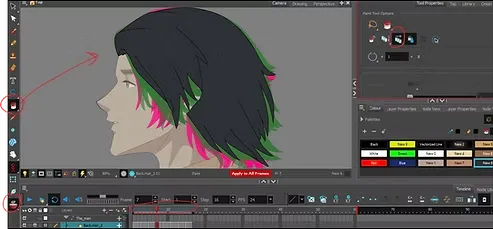
What you see below is the “In Between” framework, and through the “Onion Skin” tool, as it is called, or “Onion Skin”.” Onion skin We can see the hair in the previous and subsequent frames.
The red one is the previous drawing, and the green one is the next drawing. This makes the animation much easier for us, and it is an indispensable tool for us.
trick
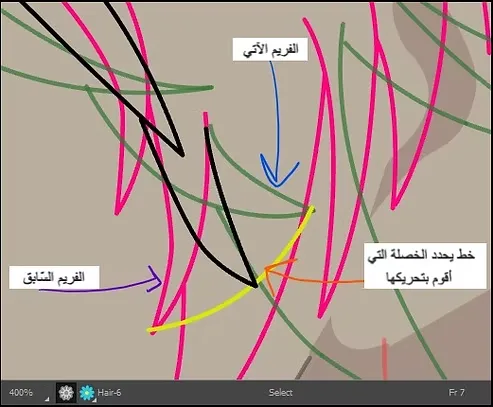
Animating anime hair is a real challenge for me! And I won't lie, it's almost as complicated when animating a young anime boy.
When I am in a predicament like this, such as not knowing which strand I am animating, the presence of a large number of hair strands is very confusing, and I may make a mistake during animation. At that time, I follow a simple trick, which is to draw a line between the two strands, the previous red one and the next green one, and thus I make sure that I am animating the same strand without making a mistake or getting caught in a crowd of flying hairs.
Step eight
We color the hair using the fill tool shown in the picture. When we finish animating an anime boy, we color.
Step nine
Now that we have finished animating the anime's hair, it is time to animate the eye as it blinks.
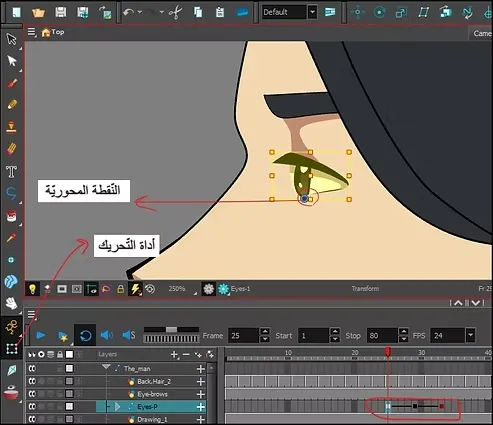
Moving the eye here will be the easiest, as we will be using the movement tool. Transform Tool Notice in the picture, we drew the eye, and inside it the pupil, in a separate layer; we join them by peg We place the focal point below the eye, because when the eye blinks, it closes downwards.
Step ten
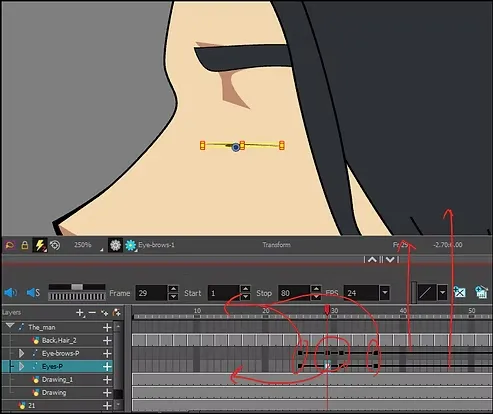
Then, with the help of the moving tool, we hold the yellow dot in the middle and pull the eye downwards, and thus the eye is closed and in place. .
It may look a little strange, or it may be flat, and that's okay, the movement will be quick and no one will notice it.
Step eleven
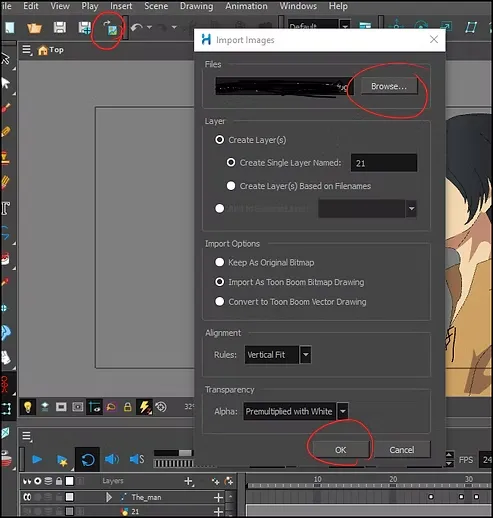
Now we add a ready-made background that we previously drew using: Insert > Image
Or from the layer list (Layers) Right-click and then select:
New Layer > Image
A closer look
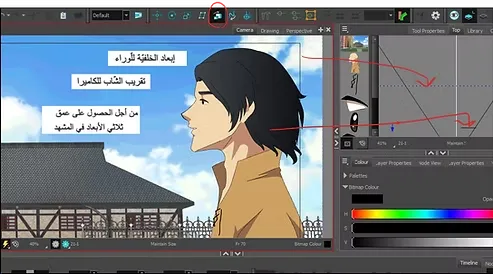
As you can see, I wanted to show you how I arranged the layers one after the other, with the background at the back and then the young man at the front (i.e., close to the camera).
Step Twelve
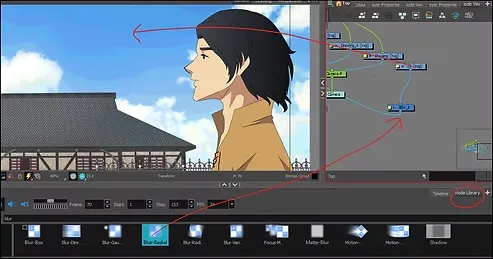
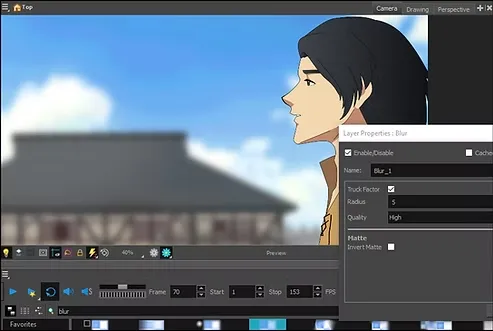
Now we come to a distinctive step, which will make the scene look more beautiful, namely adding a blur to the background. Blur It is true that it is optional, but it will make the viewer focus on the character.
From the effects section at the bottom, we select Blur box We drag it towards the ”Nude View” directly to the right, and stick it on the background exclusively, and the picture is a good example.
A closer look
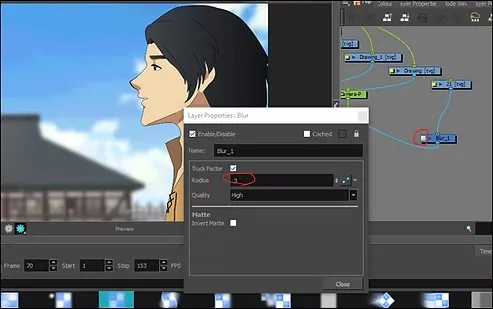
We can choose how blurred the background is while moving an anime boy. The higher the number, the greater the blurring. Here it is number 3, and notice how the palace is slightly blurred.
Higher fog
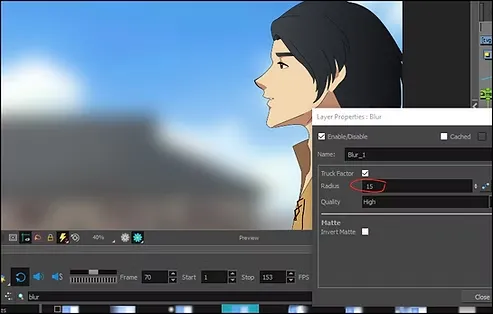
Here the settings are set to number 15, and the background is almost invisible.
Less blurriness
I decided to make it number 5, which would be suitable for a scene of moving an anime boy.
The sun
This step is optional; it involves adding sunlight to the scene, as we did previously. From the location of the effects, we search for... Lens flare Then we drag it towards the ”Nude View” and stick it this time on the same scene.
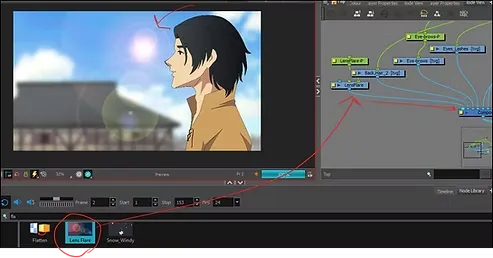
The final scene
Full video: https://youtu.be/4pdMq3MZn1Q
This concludes today's lesson on animating an anime boy using frame-by-frame animation. I hope you enjoyed the lesson. See you soon, God willing.