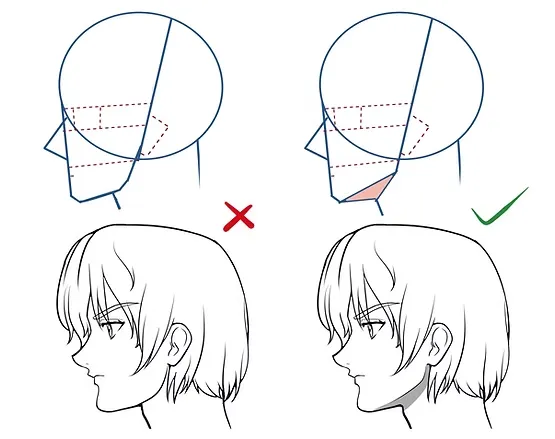
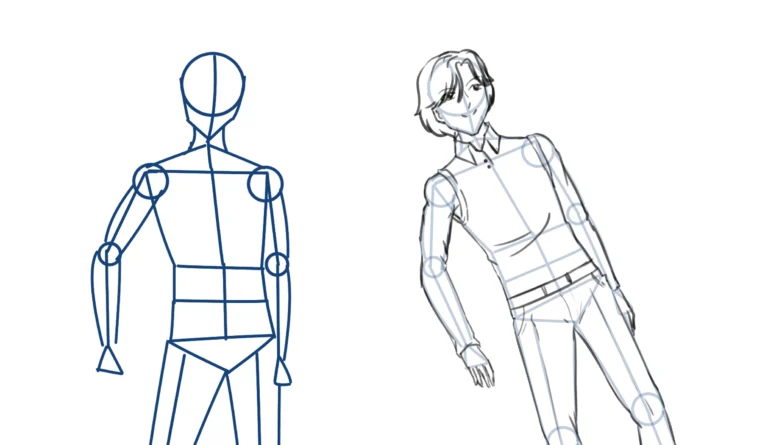
Welcome, my dear friends, to this comprehensive explanation about drawing the body from different angles. This is an important lesson for every manga artist or anime illustrator who wants to master drawing the body from angles, whether from the front, side, top perspective, or bottom perspective, in a simple and professional style at the same time.
My online store has everything you need as artists
This lesson will give you the confidence to build the body correctly while maintaining symmetry and volume in all positions and angles, so let's start drawing the body from multiple angles.
First step
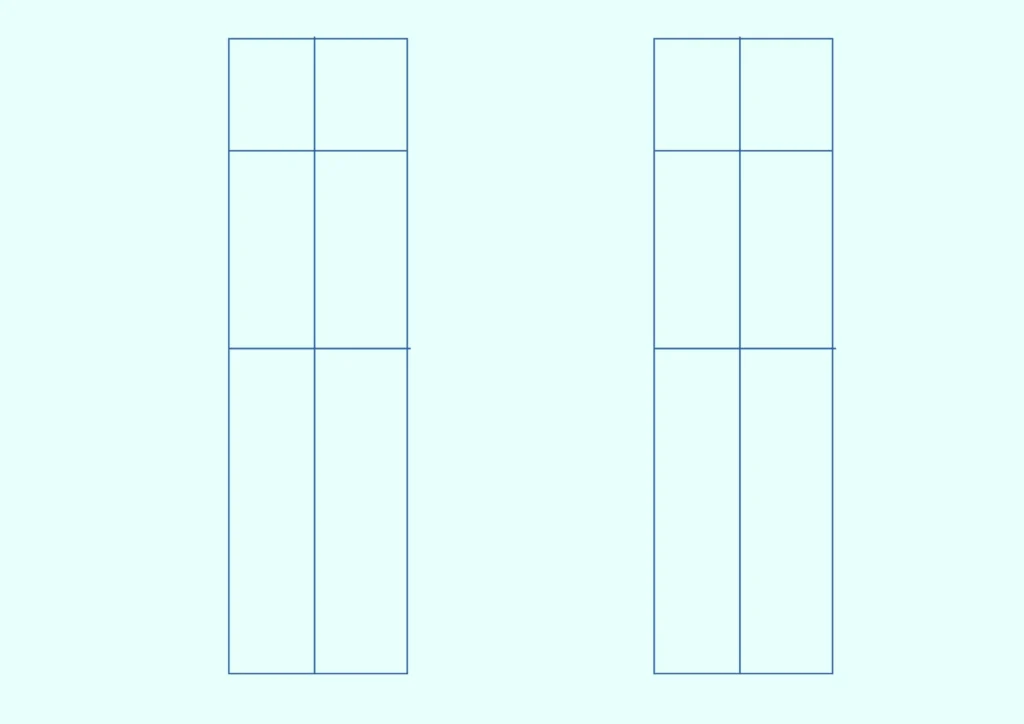
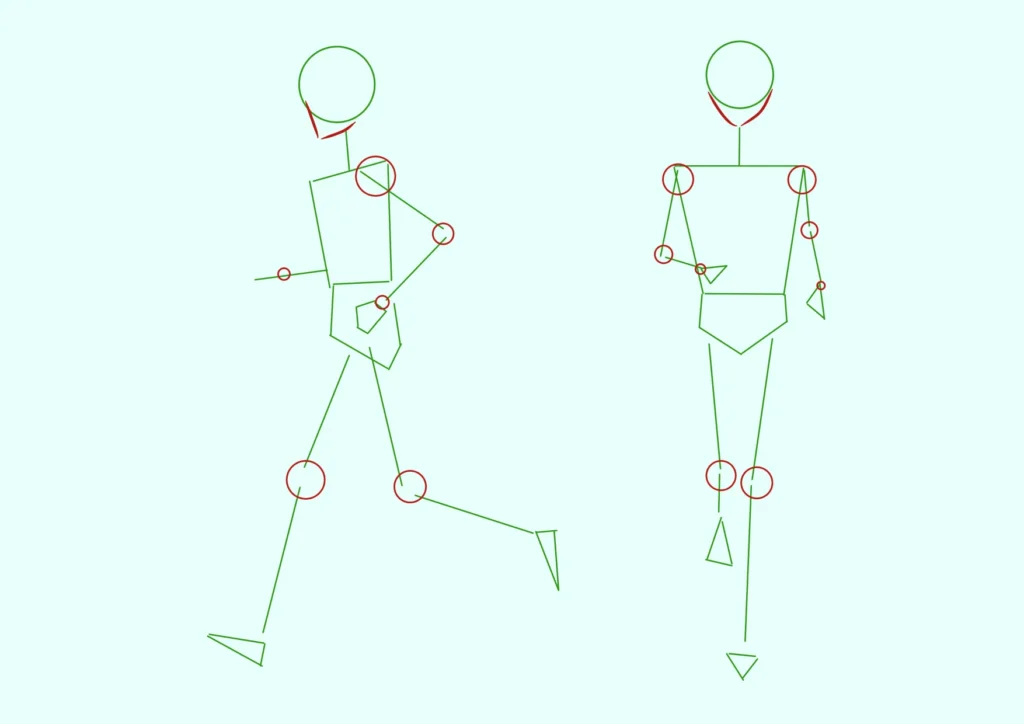
We draw a rectangle representing the length and width of the body, and divide it in half with a vertical line to create two equal sides—this is the essential step, especially in the frontal pose. Next, we draw two horizontal lines: one to define the shoulders, and the other to define the hips and legs.
Step two
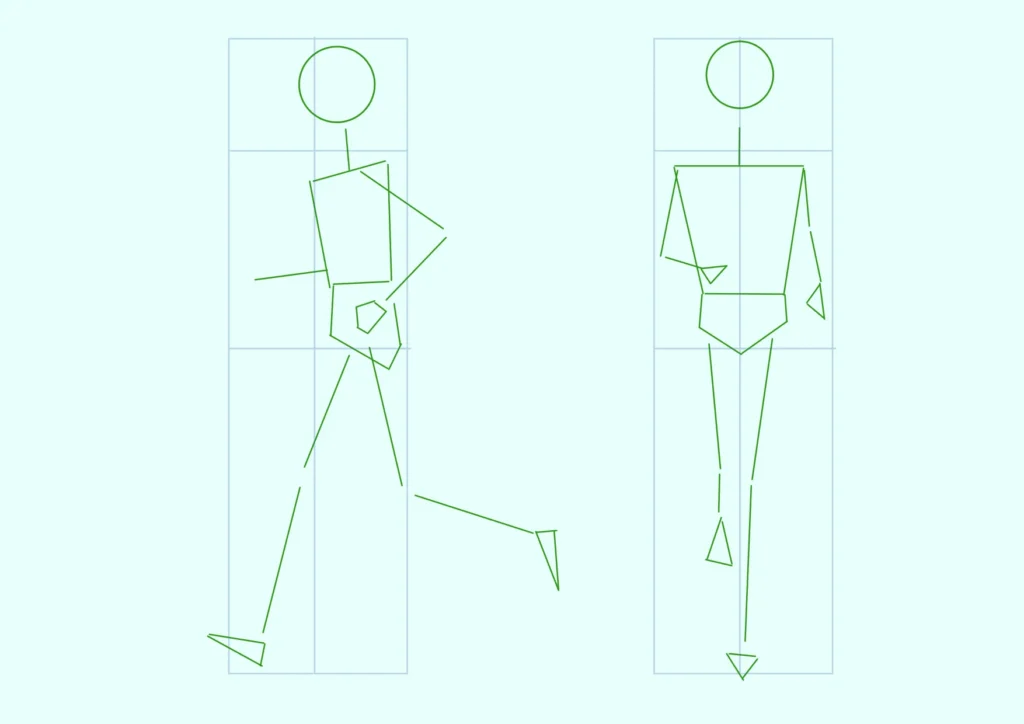
We draw a circle to represent the head at the top of the rectangle, then add two squares: one to form the chest and upper body, and the other to represent the abdomen and pelvis. Next, we draw the neckline that connects the head to the body, and draw lines for the arms and legs. We add triangles at the ends of the limbs to define the shape of the hands and feet, which helps to establish the overall structure of the body.
Step three
We draw small circles on important joints such as the shoulders, elbows, wrists, hips, knees, and ankles. This step makes it easier for us to adjust the curves and flexibility of the body's movement later on while drawing. .
Step four
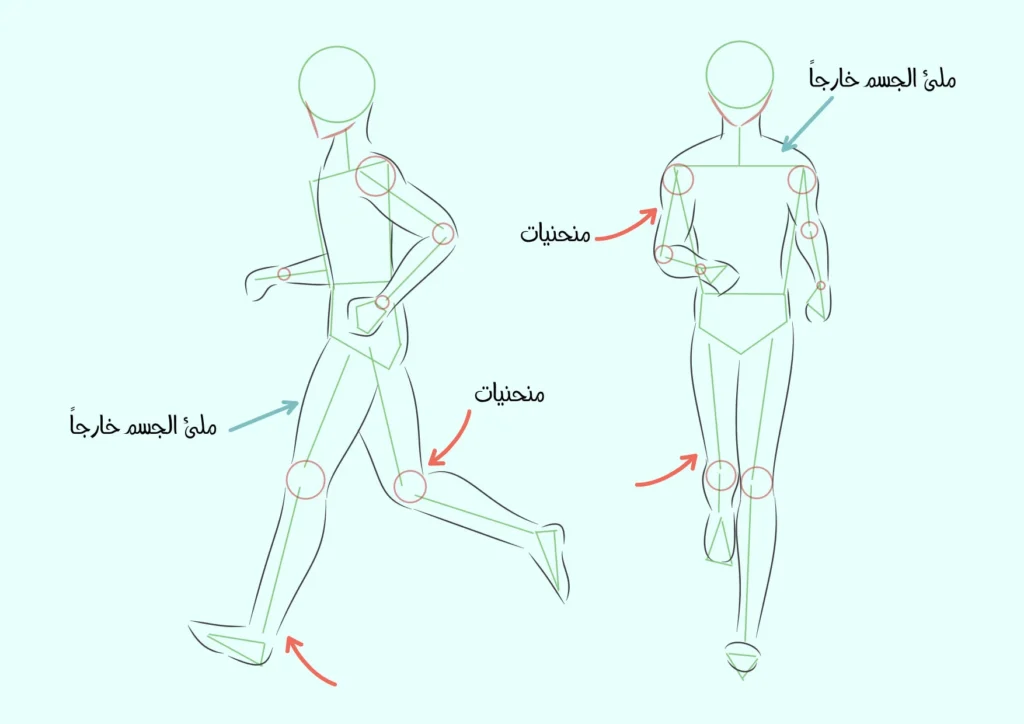
We fill in the body's muscle mass using the previous lines and schematic shapes, and we maintain the body's natural curves, especially in the waist, arms, and legs, so that the details of the muscles and joints appear correctly and in a balanced way.
Step five
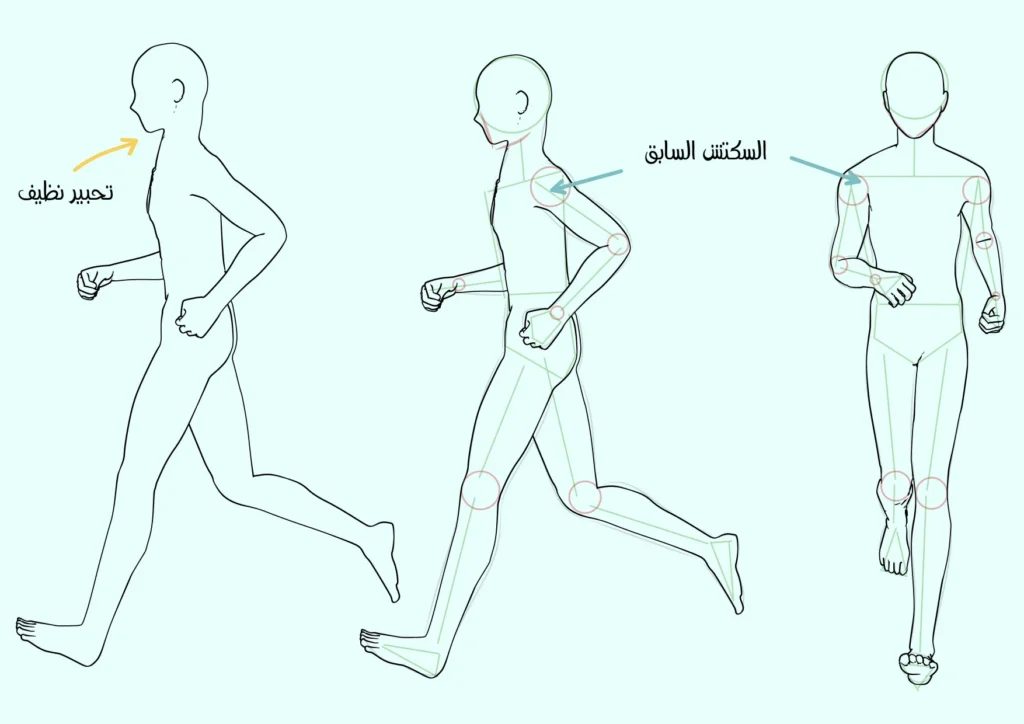
We lighten the sketch layer until it's faded, then begin inking the drawing using your preferred ink pen, paying close attention to defining the body lines and preserving the details of the final figure. You can add details such as clothing or facial expressions after the inking is complete.
Drawing the body from a top and bottom perspective
Top view:
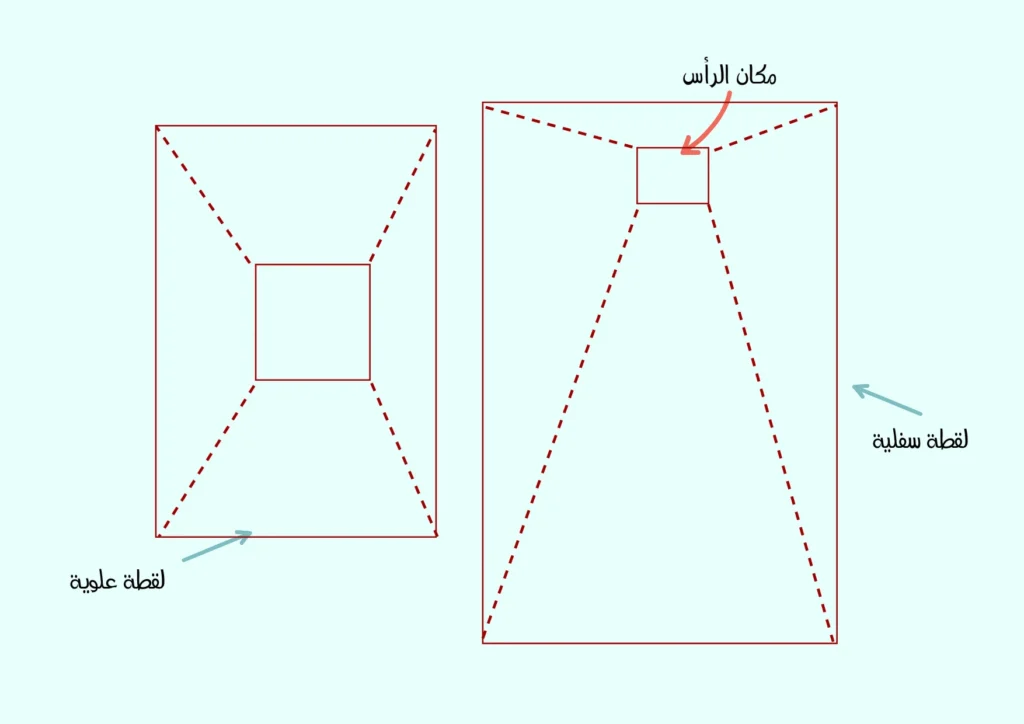
We draw a large square for the head at the bottom of the page this time so that it is close to the camera, then we draw a small square for the feet at the top of the page so that they are far from the camera, while gradually drawing the lines, arms and legs to make the limbs smaller as they get further away from the camera.
Lower perspective:
We begin by drawing a small square at the top of the page to represent the head, which will be furthest from the camera. Then, we draw a larger square at the bottom of the page to represent the feet, which will be closer to the camera, making the legs and feet appear much larger due to perspective. Next, we draw the body lines connecting the head and feet, paying attention to the gradual increase in thickness and size.
Building up details while drawing the body from various angles:
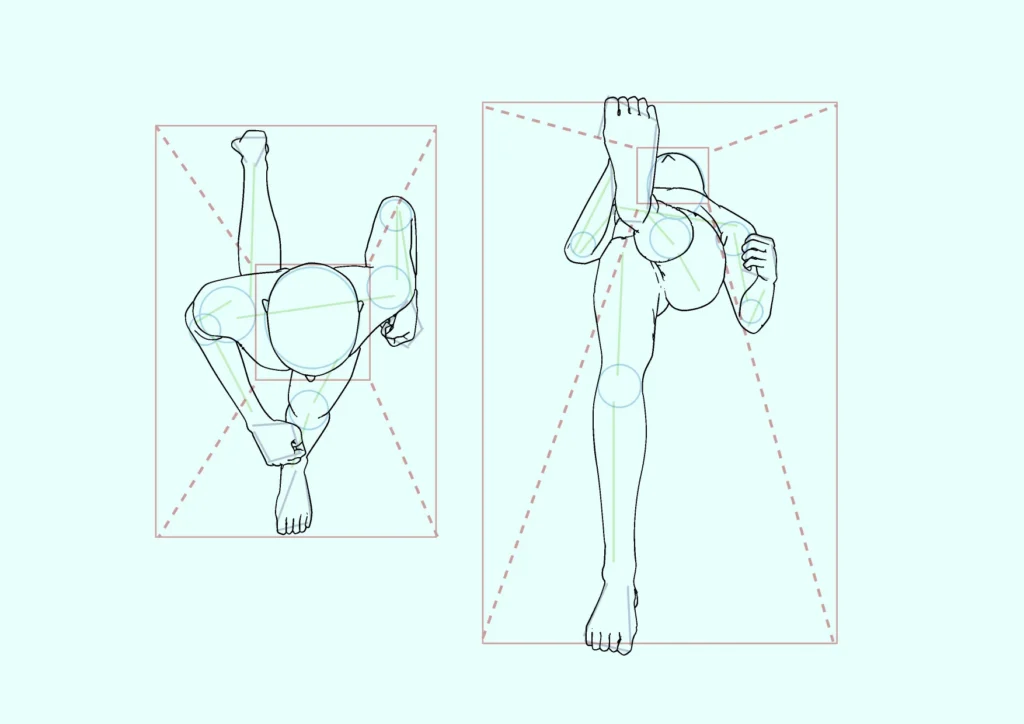
As we discussed earlier, we draw lines, circles, and triangles to define the joints, hands, and feet, maintaining proportions according to the perspective used. Then we thin the sketch layer and begin inking the drawing, keeping in mind that the lines closest to the camera should be thicker than those farther away to add depth to the drawing.
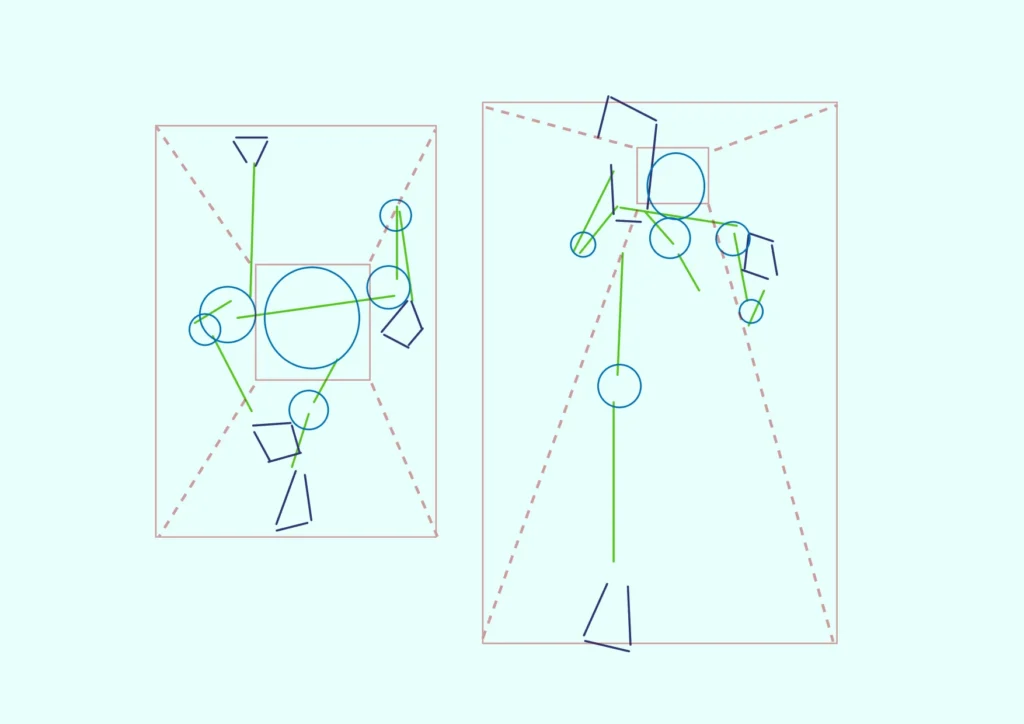
Inking stage for the top and bottom corners
During the inking process, be sure to highlight the details of the clothing, hair lines, and features carefully. You can add some light lines that show the folds of the clothing or the curves of the muscles to give more realism and professionalism.
After the inking is complete, the drawing of the body from the top and bottom corners will be ready for coloring or adding tones depending on how you use it in manga or anime.
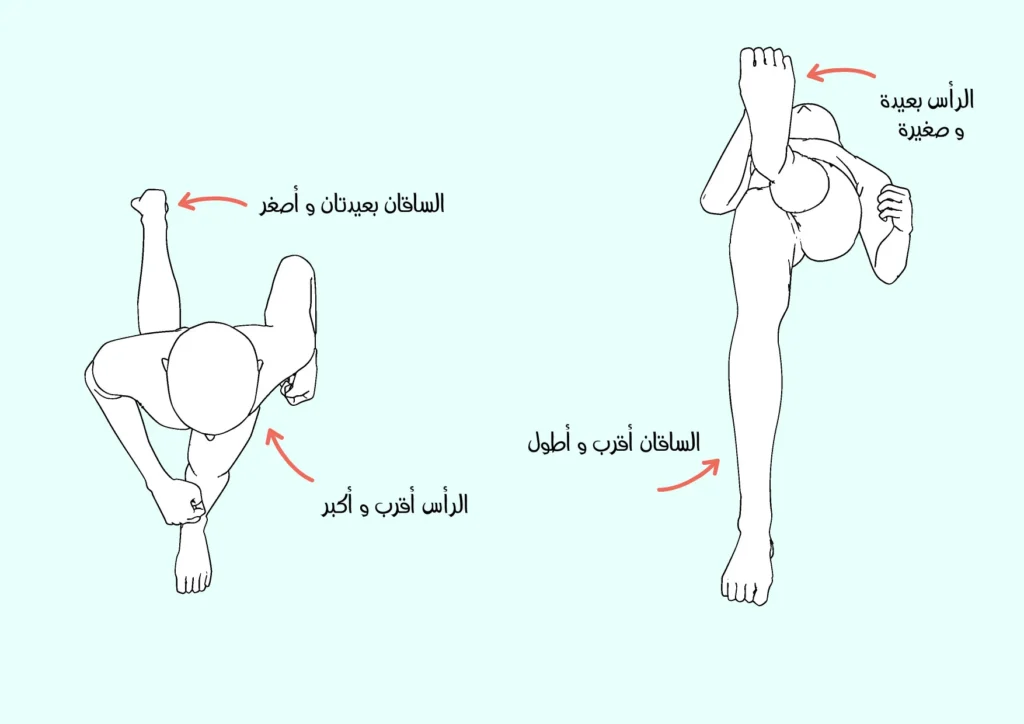
Important notes when drawing the object from multiple angles:
- Look at the picture, how it is The head appears small in the lower perspective, while the legs are large and close to the camera..
- In the upper corner, it is The head appears large and close to the camera, while the legs appear small and far away..
- Maintaining proportion is essential to obtain Drawing an object from correct angles And prevent distortion in the final shape.
Final result
With these steps you will get four professional angles when drawing the body from multiple angles: front, side, top and bottom, allowing you to diversify your drawings in manga and anime, and add professional scenes that show your ability to control the characters smoothly in all situations.
How to draw a male body in anime: A body drawing lesson
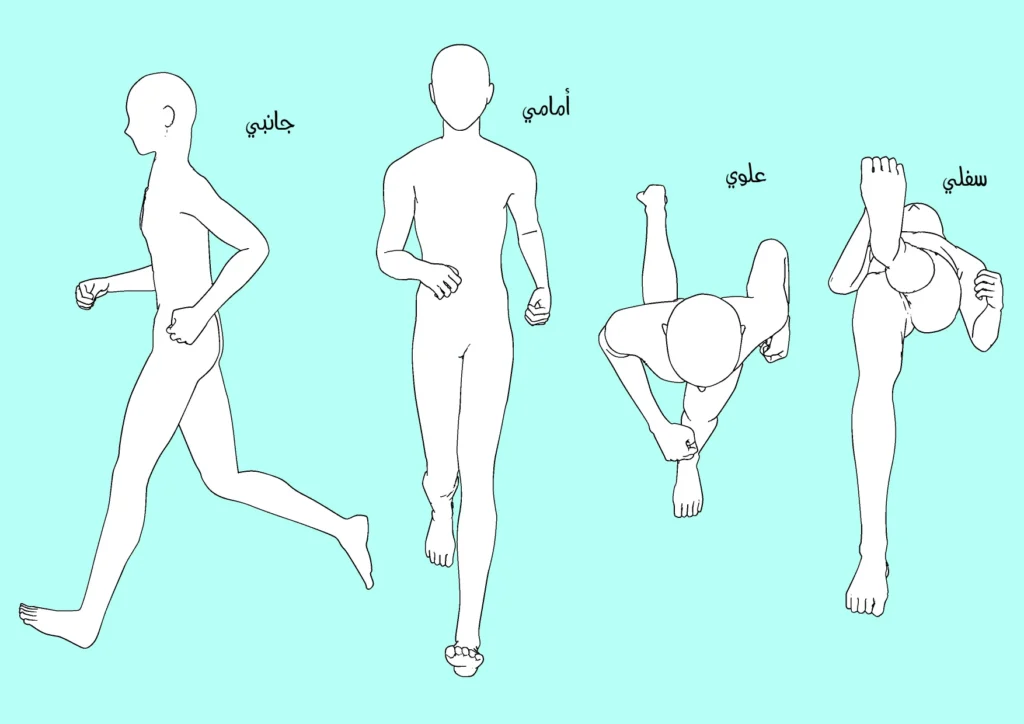
With this, we have finished explaining how to draw the body from different angles in simple and professional steps, using geometric divisions, lines and circles that make it easy for any artist to control the angles and movement of characters with ease.
If you don't master it from the beginning, that's okay, just watch the lesson more than once, and each time apply the steps.
Thank you, and I will see you soon, God willing.