Welcome to this new lesson! Today, we'll learn how to color anime hair professionally yet easily. This is the technique I always use in my work, and it gives me amazing results, whether you're a beginner or a pro. Good hair coloring can significantly enhance the quality of an artwork, making the character more attractive and stand out.
My online store has everything you need as artists
First step
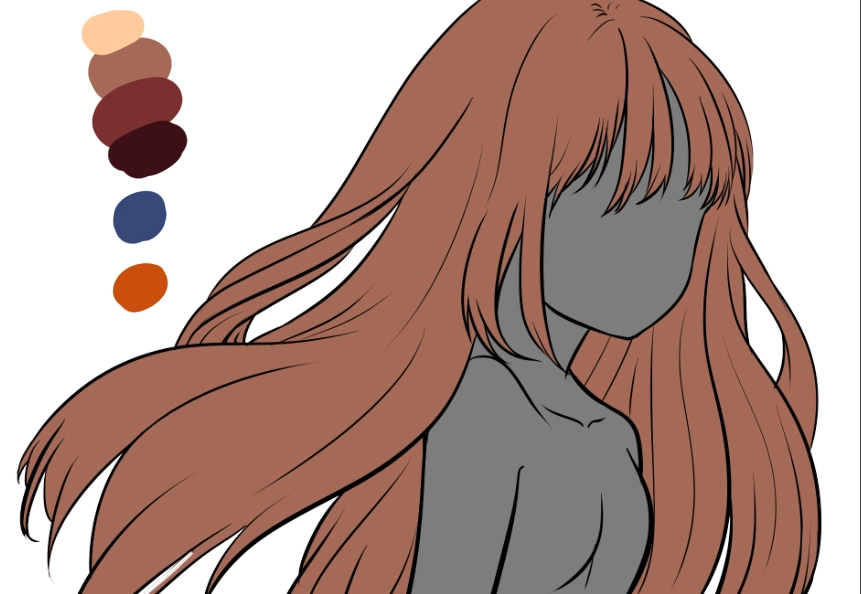
The first step in coloring anime hair is to color the overall shape of the hair (assuming you've already drawn the hair). We add a new layer for the base color (brown), then choose a color that suits the character's personality—whether it's brown, black, blue, or another color. We use the tool... Fill Tool To fill the inner spaces of the hair cleanly and quickly.
As you can see in the picture, I have placed on the left side the color palette, or the main set of colors that we will use to color anime hair, and it consists of the following:
- Main color: brown
- Shading: dark brown with a reddish tint
- Darker shading: dark brown
- Lighting: Shine color to enhance hair's shine
- Orange: To add a warm touch and highlight certain strands
- Dark blue: Used on the hair edges to give it extra beauty and depth
Step two
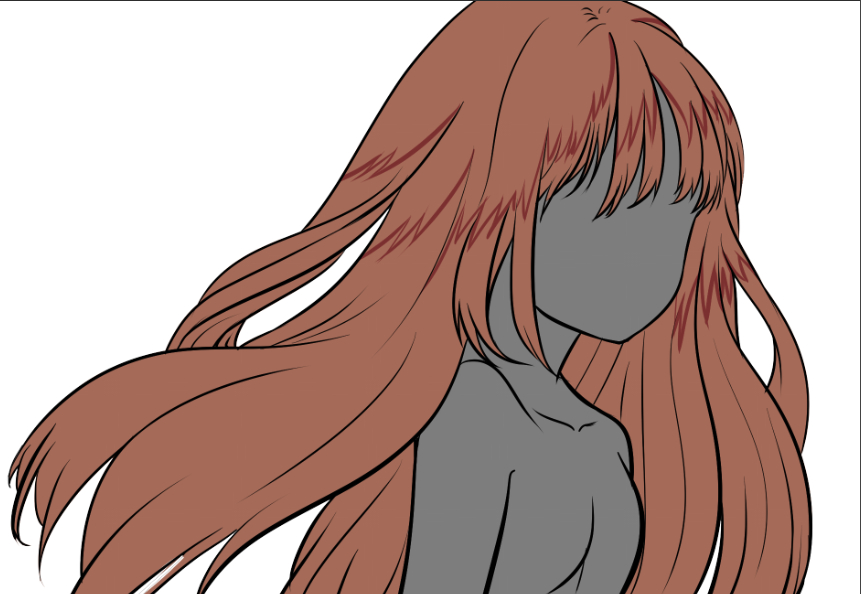
After coloring the hair, we add a new layer on top of the base layer. Using Pen ToolWe draw the shadow areas, which are often near the hair roots, behind the ears, or under curled strands. We try to draw these lines in the direction of hair growth with smooth, infrequent strokes.
Step three
The next step is to soften the shadows. We use Eraser Tool Using a soft brush, begin by blending the edges of the shading to create a gradual transition with the base color. This gives a natural touch to the shading and makes the hair look realistic.
We use a tool Fill Tool Again, but this time to fill in the areas we've highlighted with shade. We make sure to choose a color that's only one or two shades darker than the base color so that the gradient is harmonious and not overdone.
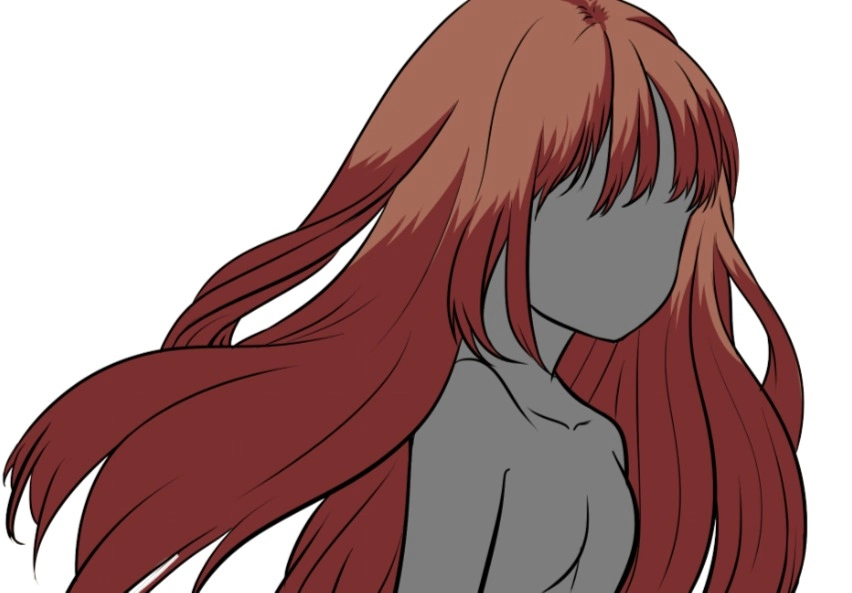
Step four
We add a new layer on top of the previous shading, and use it Airbrush Tool To add subtle shading at the points where light and shadow meet. This step creates harmony between the different layers of hair and gives a softer look.
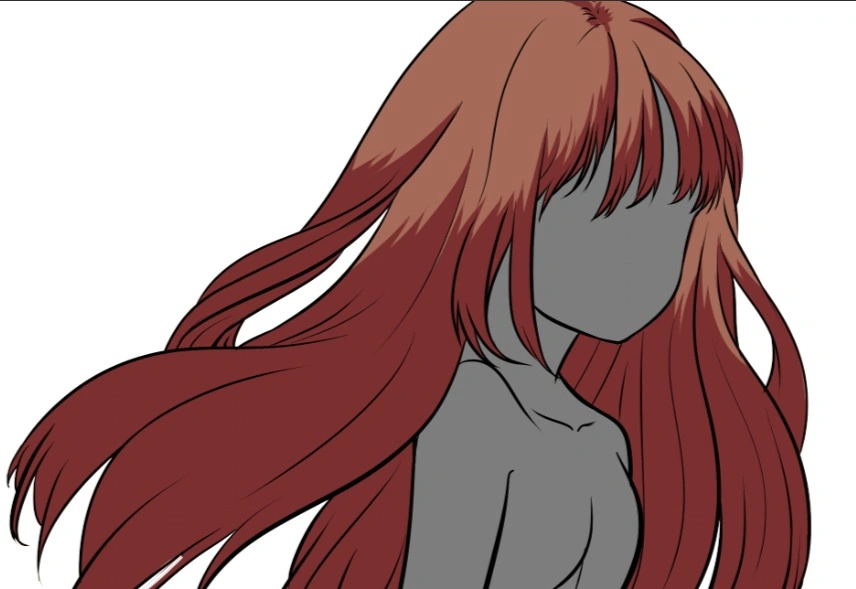
Step five
Now we move on to a very important part of coloring anime hair, which is adding highlights. We add a new layer and choose a light color such as white or light yellow. We use G-Pen or Mapping Pen To draw short, unevenly lengthed lines in the upper part of the hair or where the light falls.
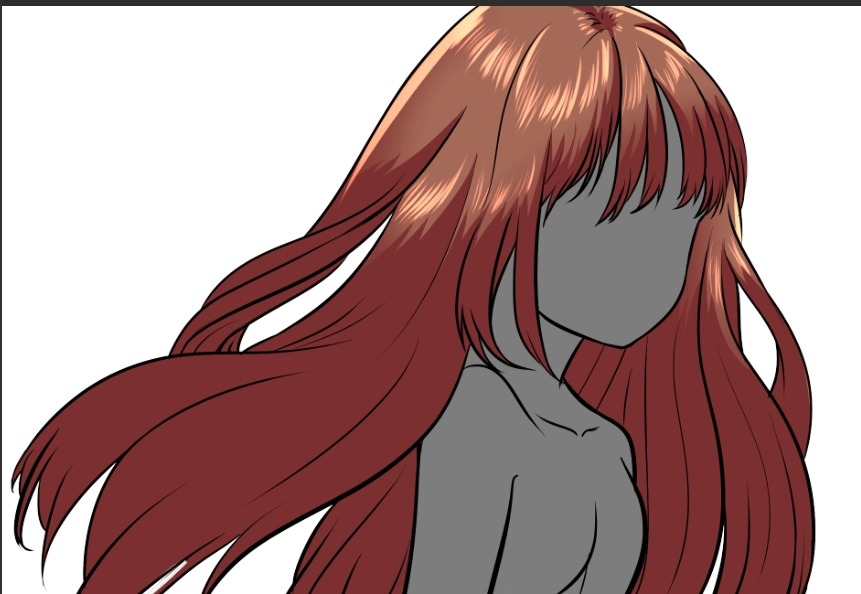
Step six
We add a new layer, choosing a shade darker than the previous one. We concentrate this shading on the inner strands, or areas that don't usually receive light, such as the nape of the neck or the base of the neck. A brush can also be used. Texture To give a rough or natural effect.
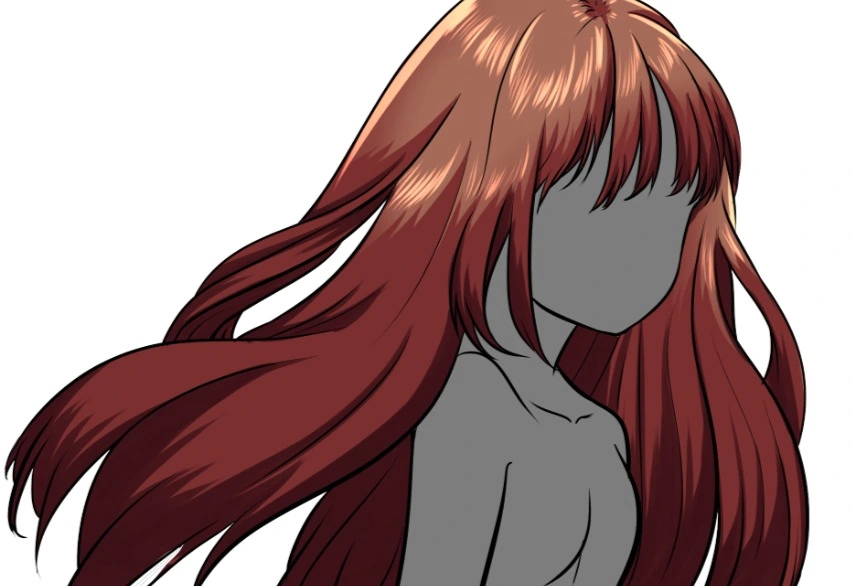
Step seven
In this step, we add a new layer and use Pencil Tool or Pen Tool To create loose, wispy strands of hair around the head, don't overdo it; just add a few randomly. Then, add another layer and use a translucent white airbrush to add some shimmer around the hair. These touches make the hair look more vibrant and glossy.
Learn to draw anime hair professionally and easily
After finishing coloring the anime hair, we review all the layers and adjust the transparency.OpacityFor some, the lighting is too strong or the shadows too dark. The goal is to create a balance between all the coloring elements so that the drawing is visually pleasing and harmonious.
Final result
By following these steps systematically, you'll achieve a stunning result, with hair appearing in realistic color gradients and a sleek shine. Coloring anime hair doesn't require complicated tools, but rather an understanding of light and shadow and layering techniques.
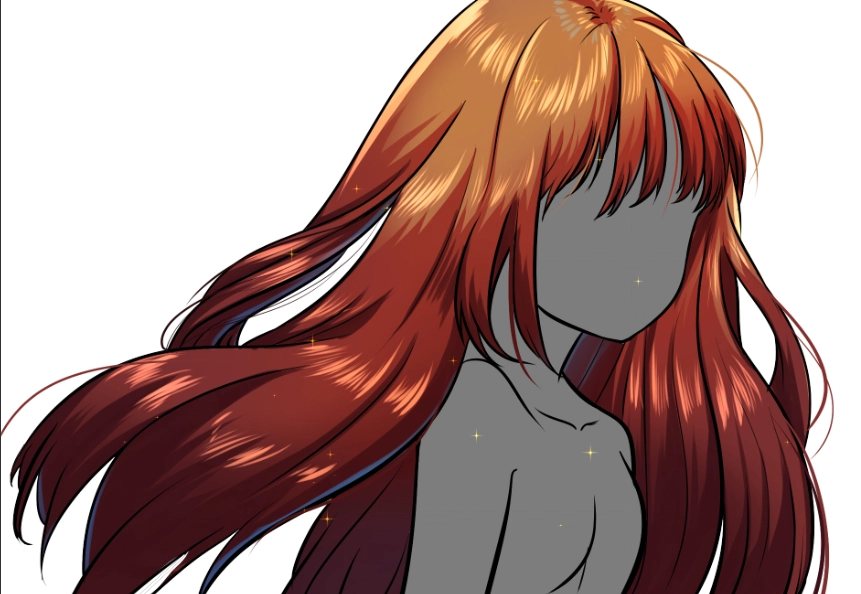
I hope this explanation is clear and useful to you, and that you find practical steps in it to help you develop your skills in coloring anime hair. Skill never comes overnight, but requires continuous practice and experimentation until you reach your own style and perhaps benefit from my style. Thank you and wait for me in a new lesson soon, God willing.