Hello, my dear friends! In this new tutorial, we'll show you how to draw an anime boy in easy and simple steps for beginners. Today, we'll learn how to draw a handsome and attractive anime character from the front in a clear style that you can practice in your notebooks or on your tablet. As you've come to expect from my lessons, we'll keep the steps simple and straightforward, and you'll see that drawing an anime boy is easy.
My online store has everything you need as artists
First step
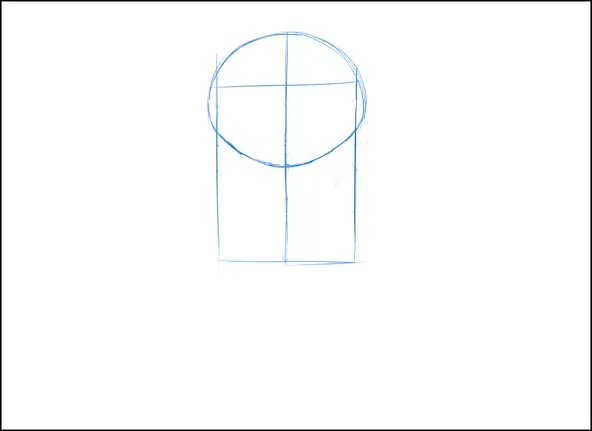
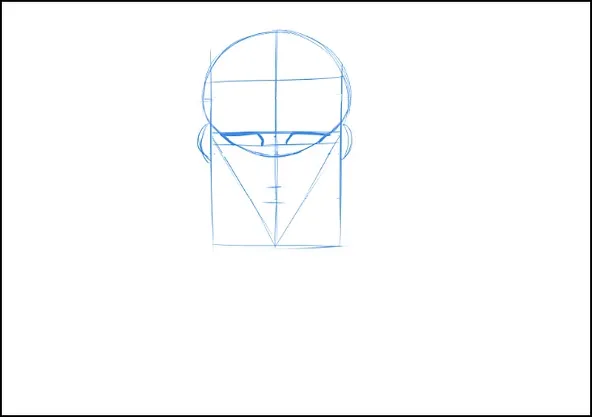
- We will draw a circle – it doesn't have to be a regular circle – and that will be the brain.
- And a line in the middle, “which will divide the face in half, so that it helps us to determine the location of the nose and mouth.”.
- Two vertical lines on each side of the circle, ”which will determine where to draw the ears.”.
Step two
We draw two parallel lines horizontally, which will determine where to draw the eyes and ears, then we draw a shape resembling the letter V.
On the side of the horizontal line, we draw a sharp rectangle – this will determine the size and shape of the eye – according to what you have chosen for the anime character, then we mark the position of the nose and eye.
Step three
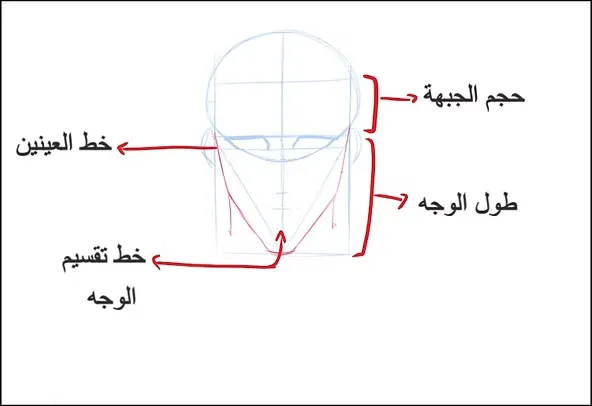
When drawing an anime boy, it is essential to take these things into consideration:
- The length and width of the face are important; we cannot draw a smooth or oval face, and we must not forget to define and highlight the chin well.
- As for the nose, it should be “pointed,” so to speak, and straight without any curve.
Step four
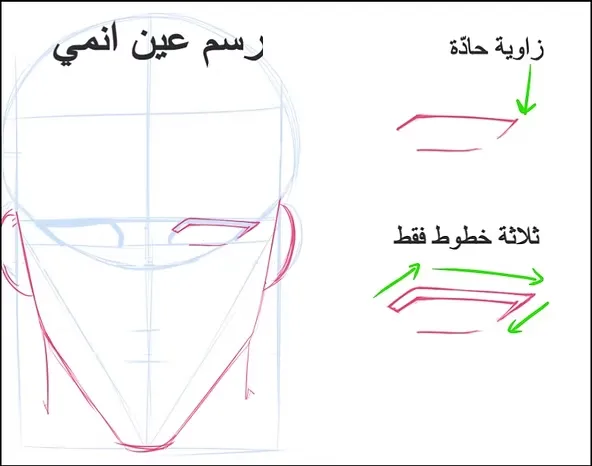
Before the step of inking in black, we must first define the shape of the eyes of the anime man we are drawing, using only geometric shapes.
Here I decided to draw with you two mysterious eyes, which I think are loved by many anime fans, and which will give the young man more attractiveness. It's very simple:
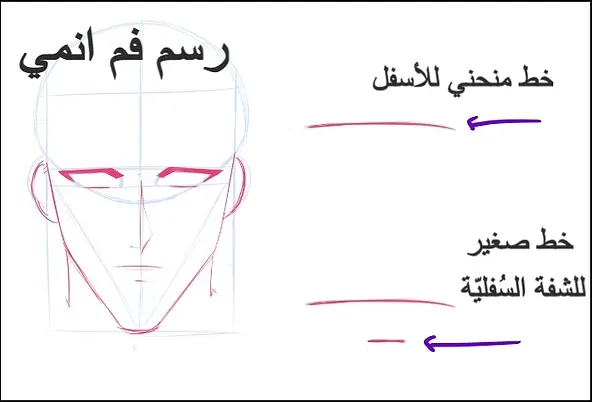
- We simply draw a straight line, and from it extends a short line at the end of the anime eye, the "tear duct".
- At the back of the eye, we draw a sharp angle downwards.
Step five
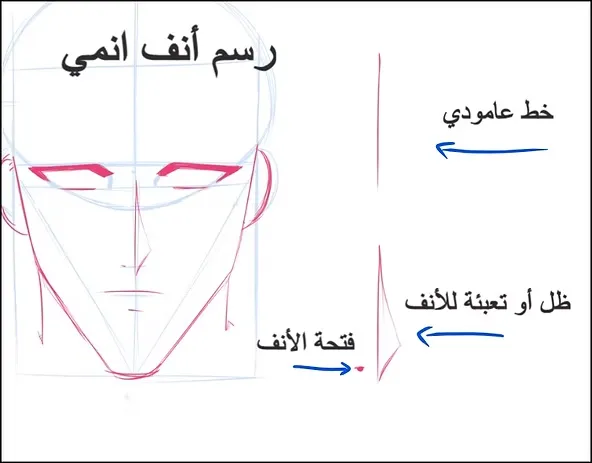
There are several well-known shapes in the anime world for drawing a nose, and today I chose a distinctive shape, which is drawing a vertical line in the middle of the place we previously determined for drawing the anime nose, and near it something resembling a shadow, in a triangular way.
You can add a nostril opening by drawing a dot or a small line; it's up to you.
Step six
We draw the mouth so that it looks frowning or serious, and it is a shape that curves downwards slightly.
Step seven
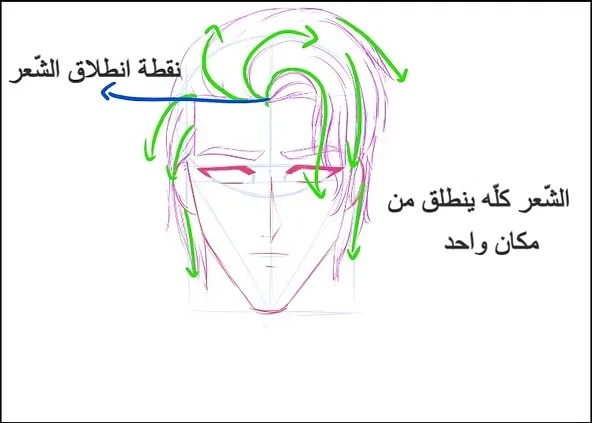
We choose the location of the hair, starting from the forehead. It is up to you to determine the width or area of the forehead, and from there, we draw the hair of the anime character.
We conclude by drawing the ears at each end.
Step eight
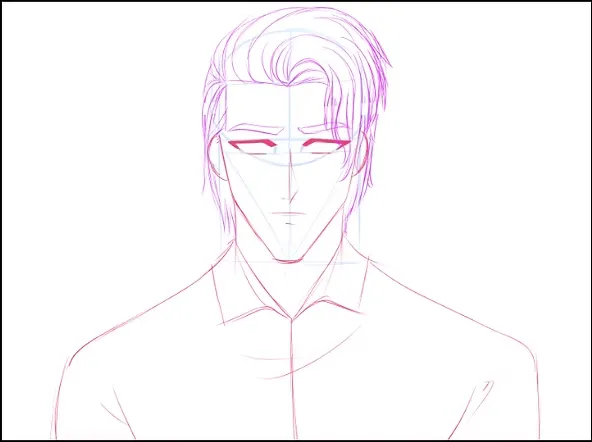
Next, we draw the neck and shoulders with simplified lines to ensure the correct proportion between the head and body.
Inking
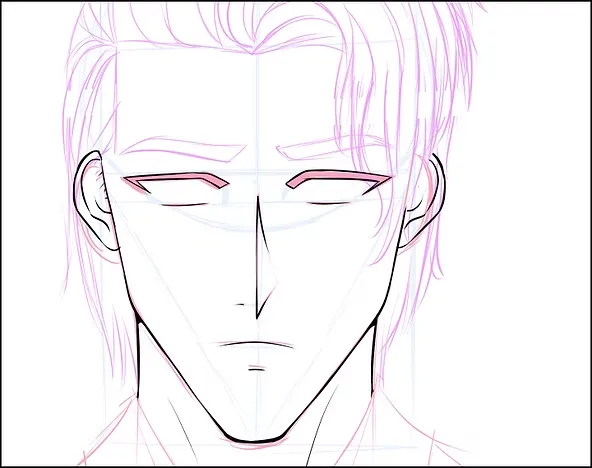
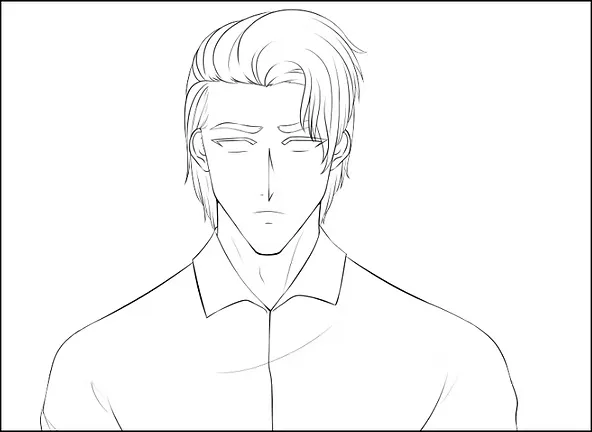
Here we have reached the easy stage, which is the inking stage, relying on the pre-existing sketch, and all we have to do is draw on top of it.
layer distribution
- We thin the previous layer.
- We create separate layers for each part of the character: the face in one layer, the hair in another, and so on with the clothes.
- We select the pen tool G pen And the black color for inking, and we begin drawing.
Finishing the inking
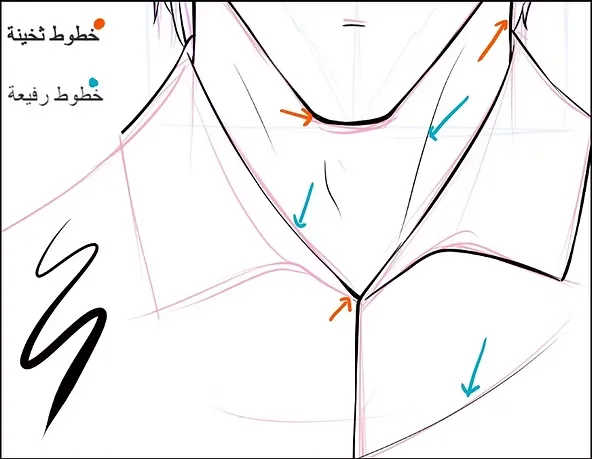
In this step, we focus on highlighting the fine details of the hair and eyes, and we define the clothing with clear lines—some thick, some thin. This makes the anime boy's drawing look professional, even if the lines are simple.
coloring
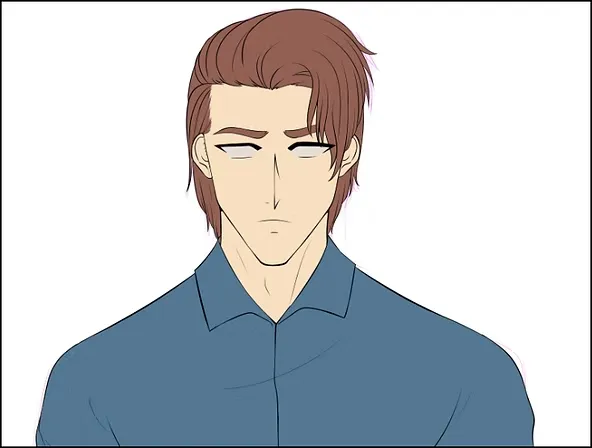
After the inking and drawing stage of a complete anime boy, we now begin coloring. In order to get harmonious colors, we must choose the appropriate colors, and in this step I rely on the Adobe website.
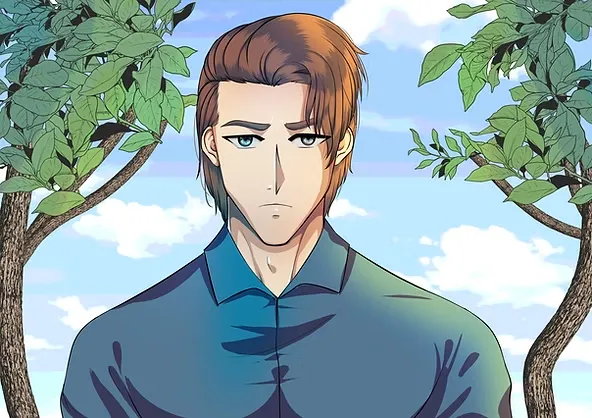
Since we are drawing a handsome young man with mysterious features, I will choose brown hair and a blue shirt, and stay away from bright colors, because Japanese anime studios rely on muted colors.
coloring steps
- We color the skin, hair and eyes, and then the clothes with the primary colors.
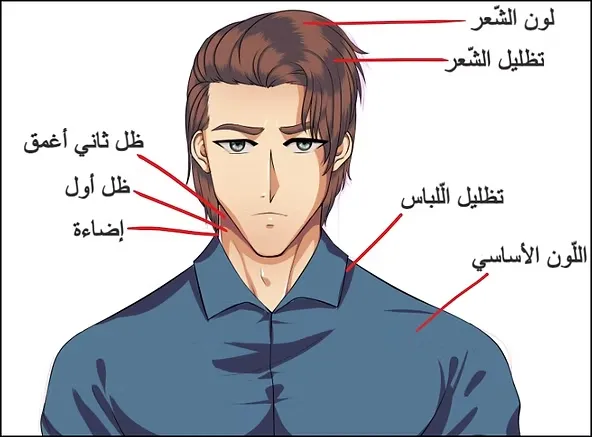
- We add shading by choosing a darker shade than the base color.
- You can add a second shade, which should be darker than the previous shade, but add it only at the corners.
- We draw highlights, and I only add them to the hair, and rarely to the face.
Finishing the inking and coloring
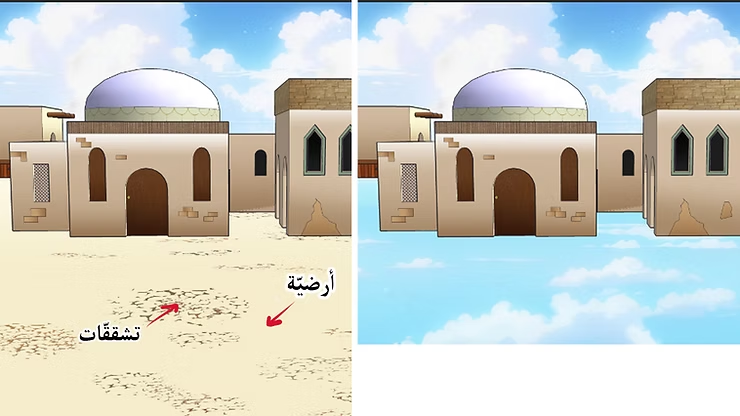
We have finished drawing a handsome and sharp-featured anime boy. At this stage, you are free to choose any background you want and insert it behind him.

Final result
This is the final result after completing the drawing of a handsome anime boy from the front, in an easy style and clear steps that you can repeat on other characters in your projects.
Learn how to draw an anime face step by step - face drawing lesson
This concludes today's lesson on drawing a handsome anime boy from the front, step by step and in a simple style. Wait for me in the next lessons, and until then, I leave you in God's care.