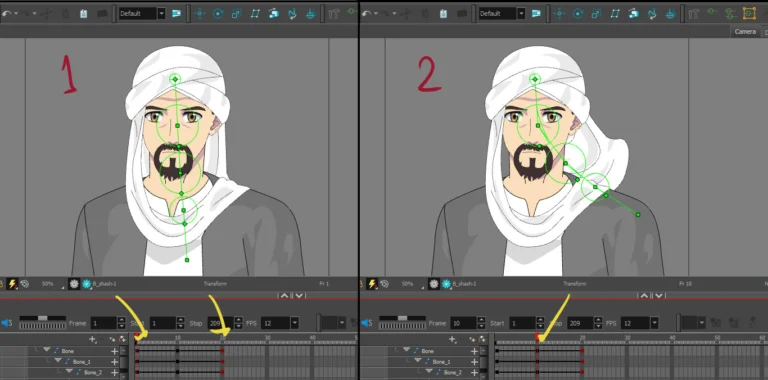
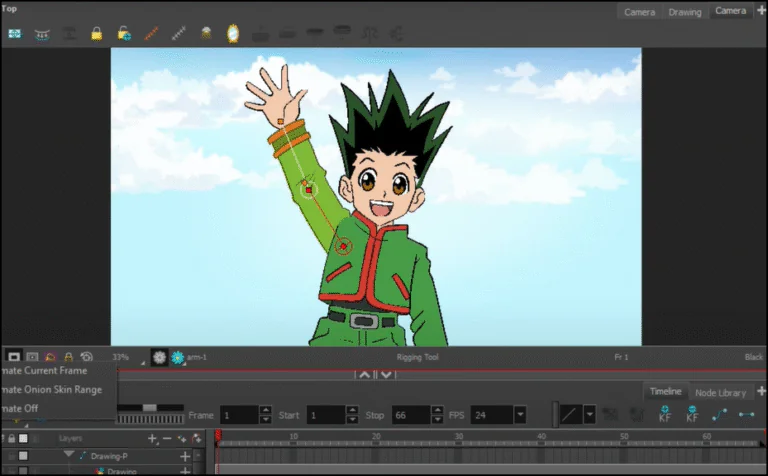
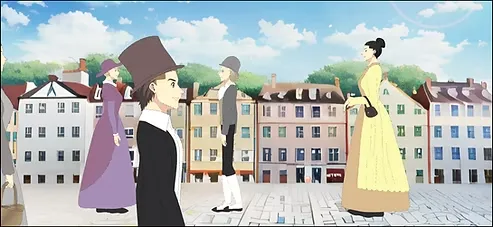
Welcome! Today we'll learn about "rigging" in Toon Boom Harmony. This lesson will explain how to use Toon Boom Harmony's rigging to animate anime characters using a live model. We can't animate characters using bones without first drawing and layering them within the program, so follow along with this simple explanation.
My online store has everything you need as artists
First step
We start by drawing the basic structure of the character, even if it goes a little outside the screen frame, that's okay.
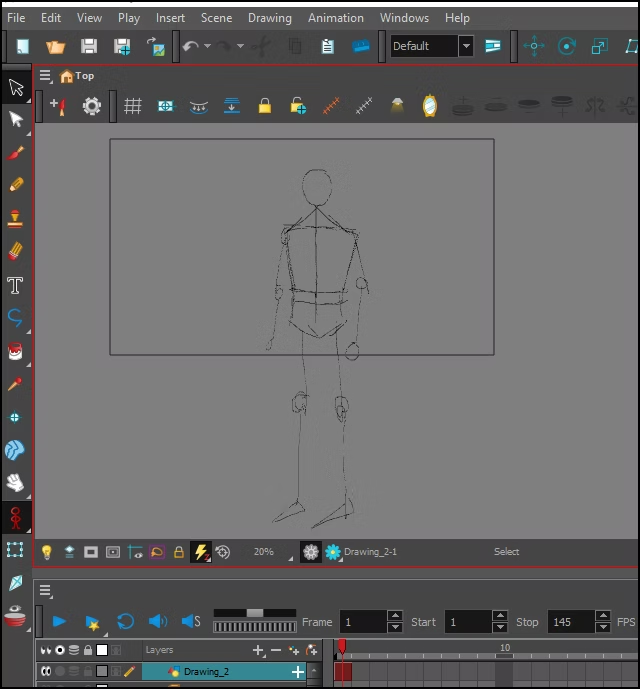
Step two
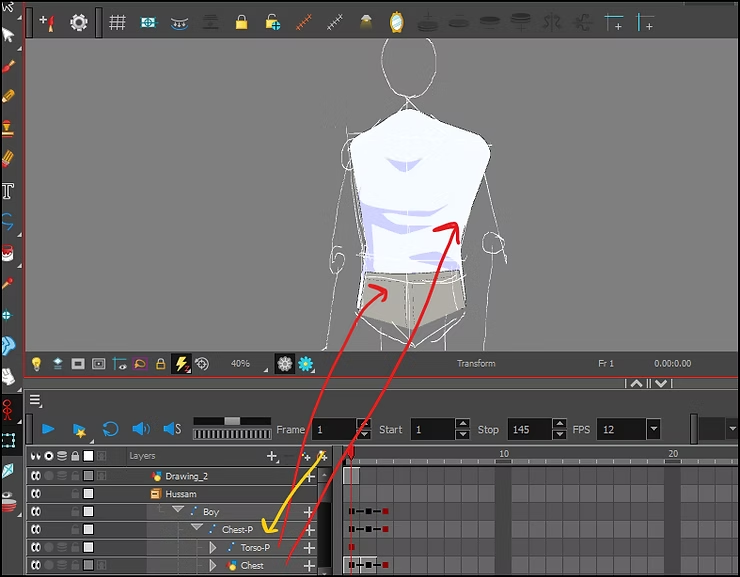
We add a new layer for the upper section, using the “Add Drawing Layer” tool. Then we attach the Bone tool to it using “Add Peg” (highlighted in yellow), and draw the entire torso within this layer.
It is preferable to name each layer after the part it represents, such as: shoulder or neck, to make it easier to refer back to it later during reggae.
Step three
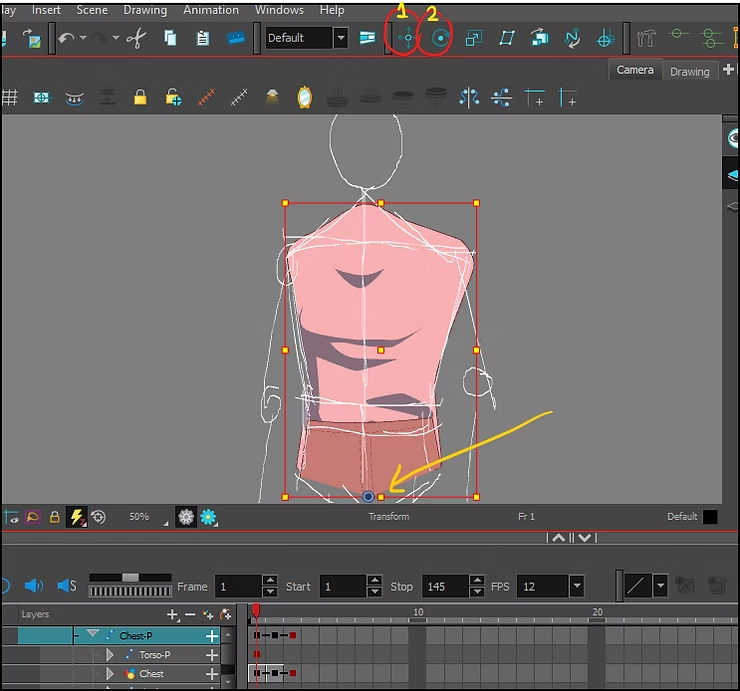
Don't forget to move the pivot point below the torso using the Pivot Tool; this is essential for achieving a natural movement later. The tool's position is shown inside the circle in the image.
Step four
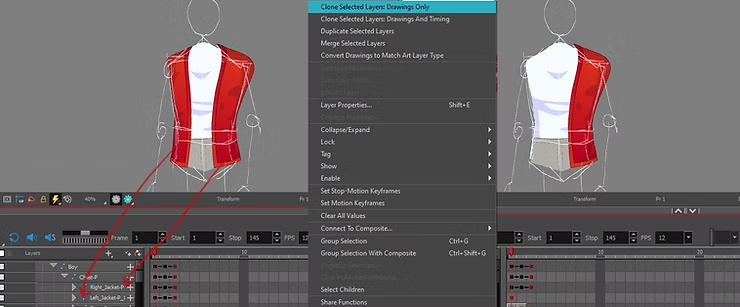
We add a new layer between the torso layer and its Peg, and draw the jacket. We also add a special Peg to it. Once finished, we duplicate the jacket using the Duplicate Symmetry feature (by right-clicking and selecting the option shown in the image).
We then adjust the pivot point of the jacket's "Peg".
Step five
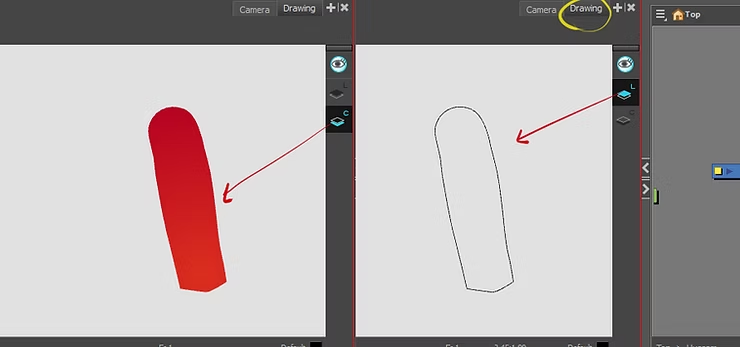
Within the jacket layer, we draw the upper arm. We use the Brush Tool (symbol L) from the toolbar, then we move on to coloring using the Paint Tool (symbol C).
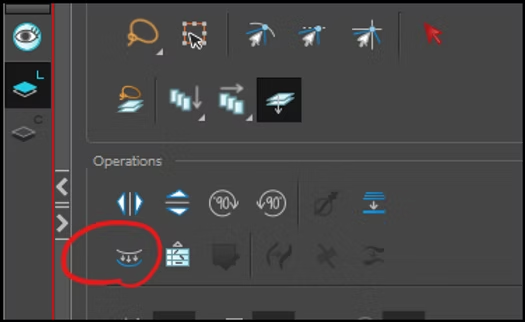
Next, we select the layer using the black arrow tool “Select Tool”, then we click on the desired layer icon from the right side.
Step six
We go to the coloring section (labeled C) and fill the arm with color again using the Paint Tool. Refer to the arrows in the image for more details.
Examine all the stocks carefully to understand how Reg Tone Boom Harmony works.
Step seven
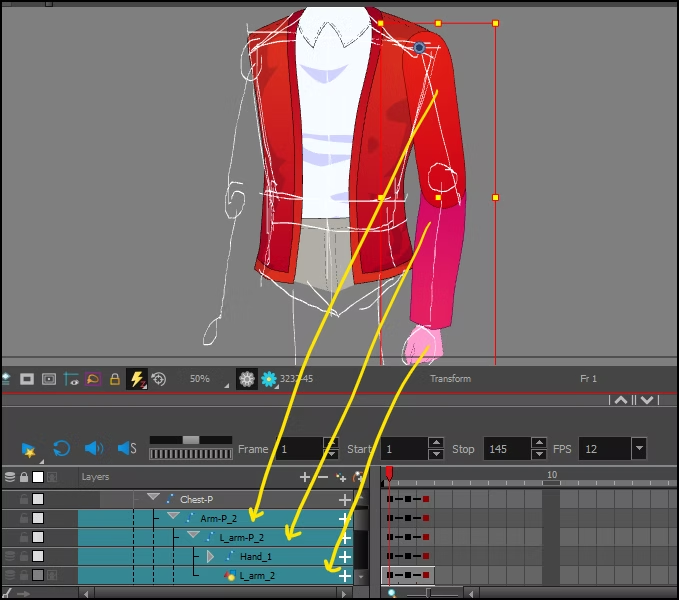
We add a new layer to draw the lower arm, from the elbow to the wrist. Then we add a separate "Peg" for it, and repeat the same steps to draw the hand.
Each layer is linked to a separate "Peg", as shown by the arrows in the image.
Step eight
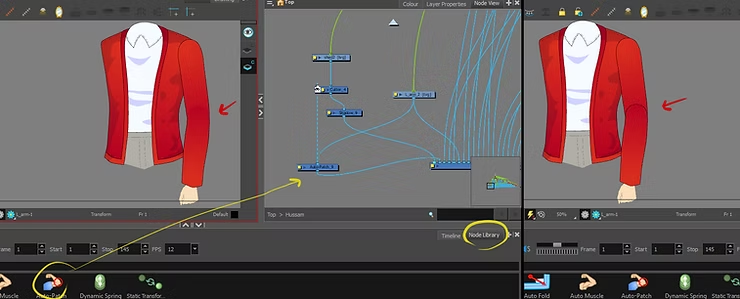
To hide the dividing line between the two parts of the arm, we use the “Auto Patch” tool located within the “Node Library” window. We drag it and place one at the top arm and another at the bottom arm.
Make sure that the inking and coloring layers are separate, otherwise the “Auto Patch” tool will not work.
Step nine
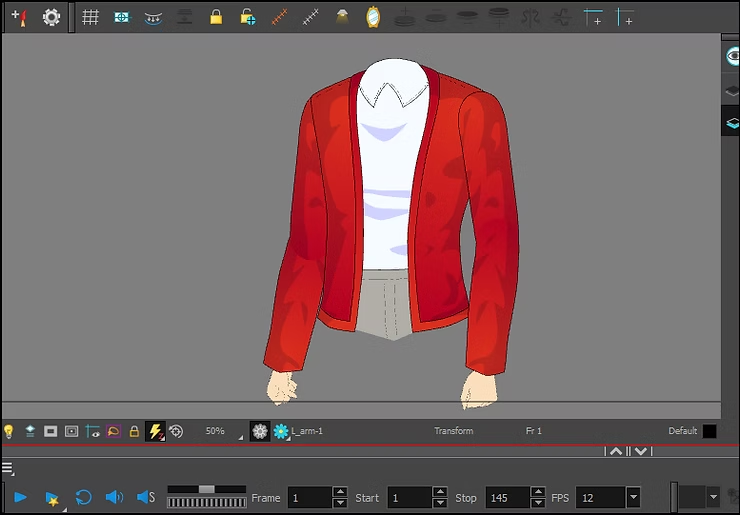
Instead of redrawing the other arm, we copy the completed arm using the symmetry feature we explained earlier. Any changes made to the original arm will automatically be applied to the copy.
We pull the new version to the other half of the body.
Step ten
In the trunk layer, we add a new head layer, then attach a “Peg” to it and adjust the pivot point at the bottom.
- nasal layer
- oral layer
- The ear layer (and we copy the other one symmetrically)
- Eye layer (and copy the other one symmetrically)
- The fringe layer (front hair)
- back hair layer
When the “Peg” head is moved, everything inside it will move automatically.
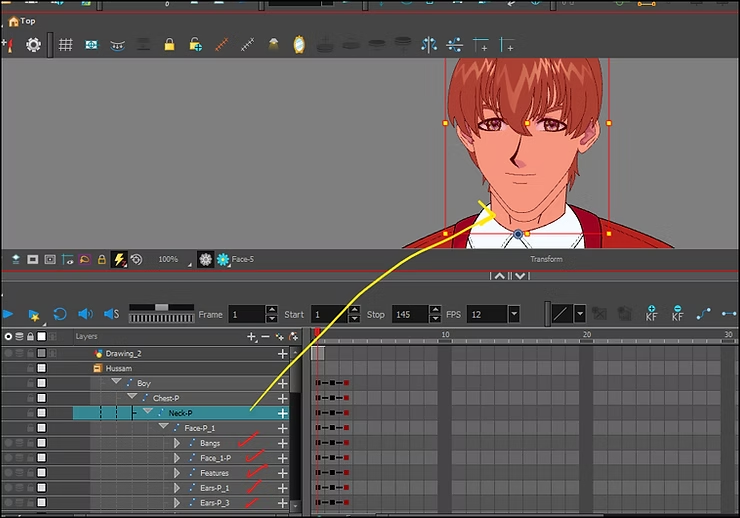
Note the results
Notice how each part has its own layer and "Peg". You can select and move each element individually (eye, mouth, hair, etc.).
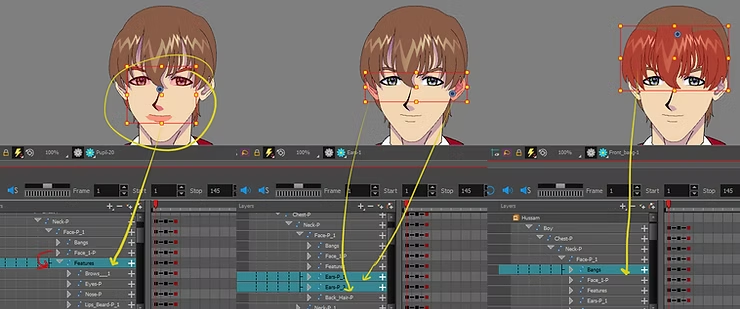
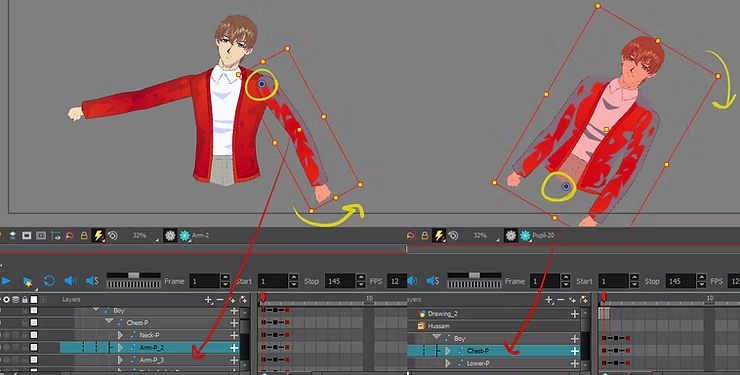
For example, when the trunk “Peg” is moved, the entire upper section moves, and when the arm “Peg” is moved, only the arm moves.
All we have to do is press the desired layer, then the letter B on the keyboard, to start moving.
It is necessary for the keyboard to be in English, in order for the keyboard to work in Toon Boom.
Step eleven
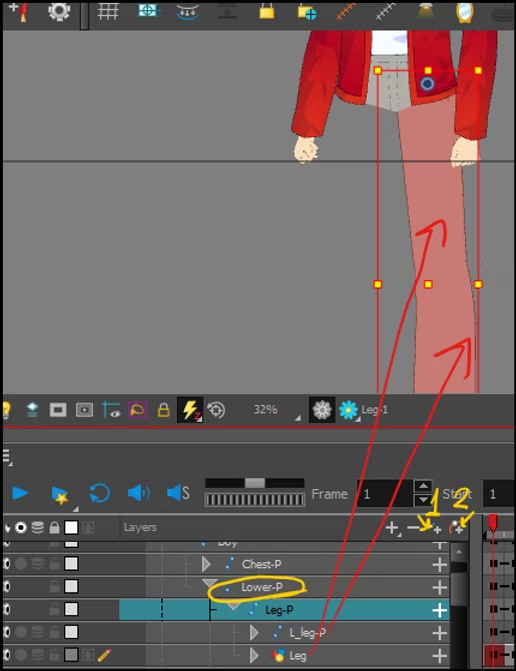
And here we are in the lower section, and as we did with the arm, we do here with the legs:
- We draw the upper leg, and ink and color it as we did the arm.
- We add “Auto Patch”
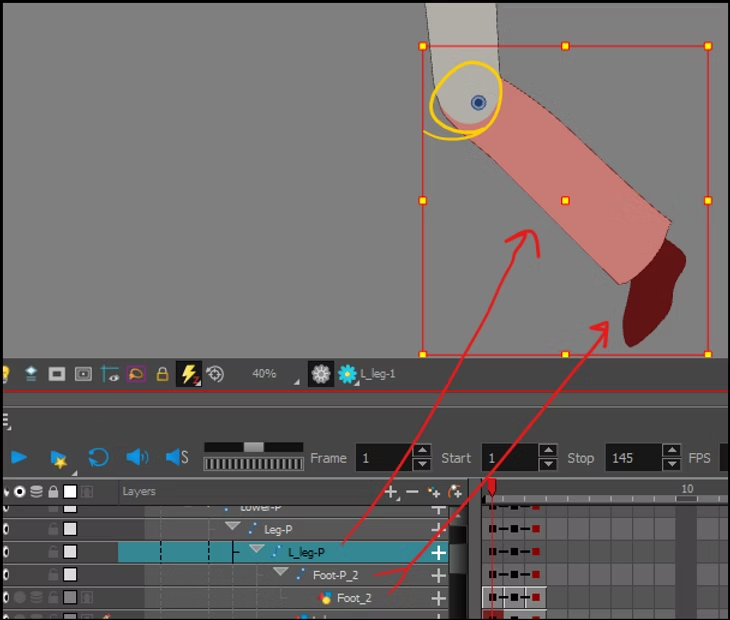
- We draw the lower leg inside the upper leg layer.
- We draw the foot inside the lower leg layer.
Important notes
It is important to accurately determine the pivot point, so that if we bend the knee, it is done without errors.
I have indicated to you with arrows the correct way to arrange the layers so that you can understand, so look at the picture carefully.
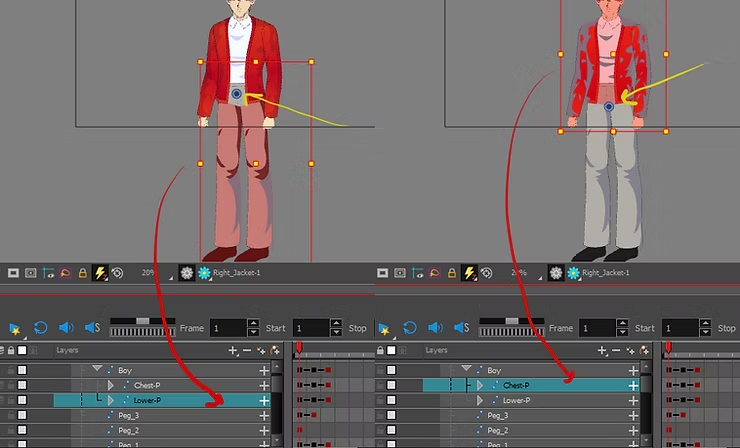
This image shows us the upper section and the lower section, and each has its own "big", so we can control each section separately.
Make each section (upper and lower) a separate “Peg”, and you can add a “Master Peg” to assemble the entire character.
Explanatory video
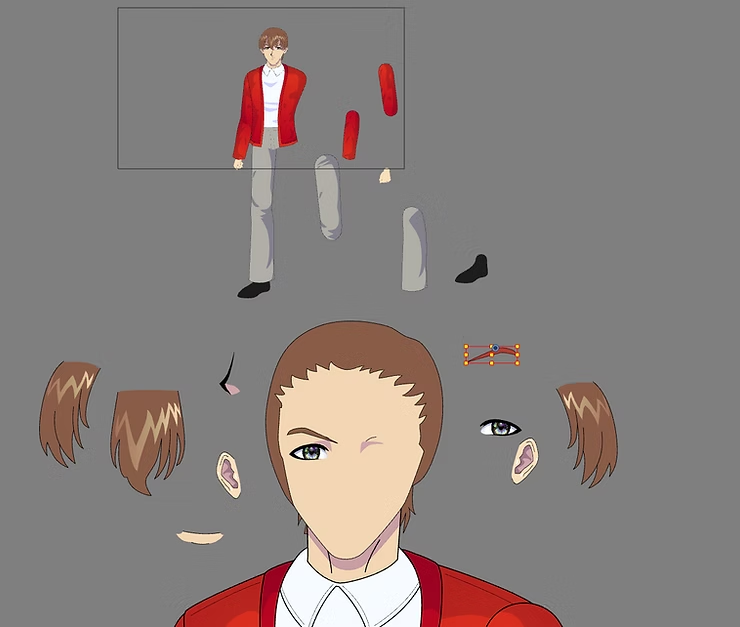
Illustrative image
The image shows how each part is separated into an independent layer, to facilitate movement without affecting the other parts.
How to animate birds in an easy style without drawing, like anime.
Watch this character from one of our Ramadan productions, where all the steps of Reg Tone Boom Harmony were professionally applied:
In conclusion, regarding our special lesson about Reg Ton Boom Harmony, the program is a powerful and unique tool for animating anime. Apply the steps, and wait for me with future lessons, God willing.