Welcome everyone! Today we'll learn step-by-step how to draw an anime hand in a simple and easy way, so you can master this important part that's essential for any character. Many of you want to enter the world of anime hand drawing correctly without complications, and today we'll explain practical steps, starting with drawing the basics, then adding bones and joints, all the way to inking and coloring using [unclear - possibly a specific technique or technique]. Clip StudioSo that you can professionally draw anime hands in your projects.
My online store has everything you need as artists
First step
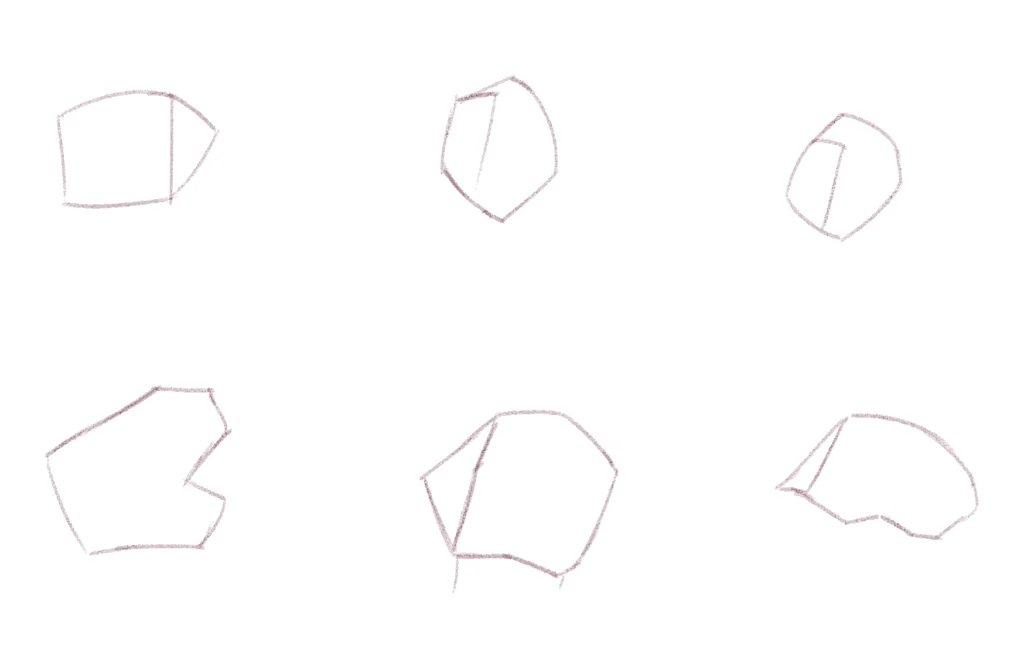
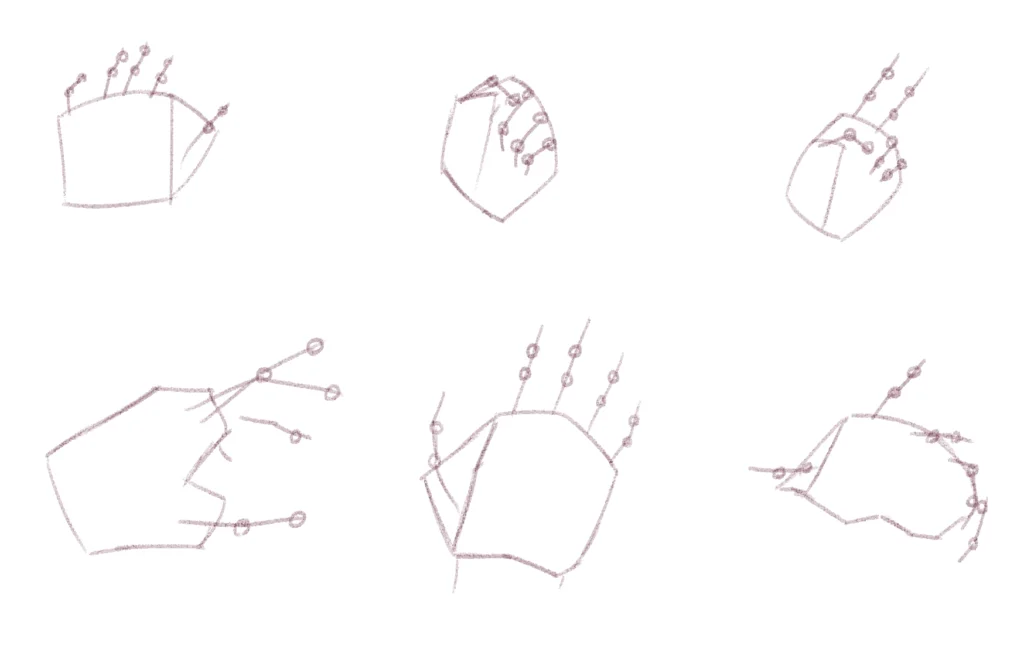
At the beginning of drawing an anime hand, we follow these steps: we draw asymmetrical shapes, so that the part at the wrists is slightly narrower than the side from which the fingers emerge.
Always keep in mind that the hand is slightly wider than the arm at both ends. Next, add a triangle starting from the bottom of the square and ending at its edge; this will be where the thumb will be when drawing an anime hand.
Step two
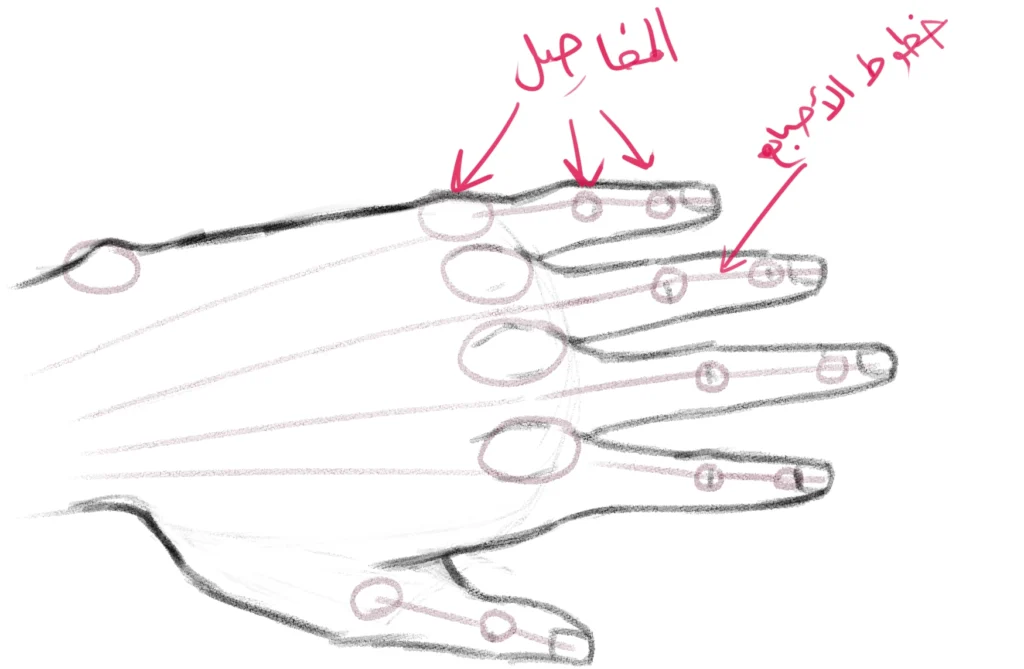
Now we move on to drawing what looks like bones, by drawing four lines from the top of the square representing the fingers, and drawing an additional line at the triangle designated for the thumb.
These lines should not be individual but should be drawn as three adjacent lines to form the entire finger, since the finger consists of several joints that form three sections in each finger when drawing an anime hand.
Don't forget to consider the required movement before you start drawing, and the direction you want. Do you want to draw an open hand or a closed hand?
We now draw small circles on the lines we drew for the fingers while drawing the anime hand, as these circles represent the joints that are found in one finger.
Step three
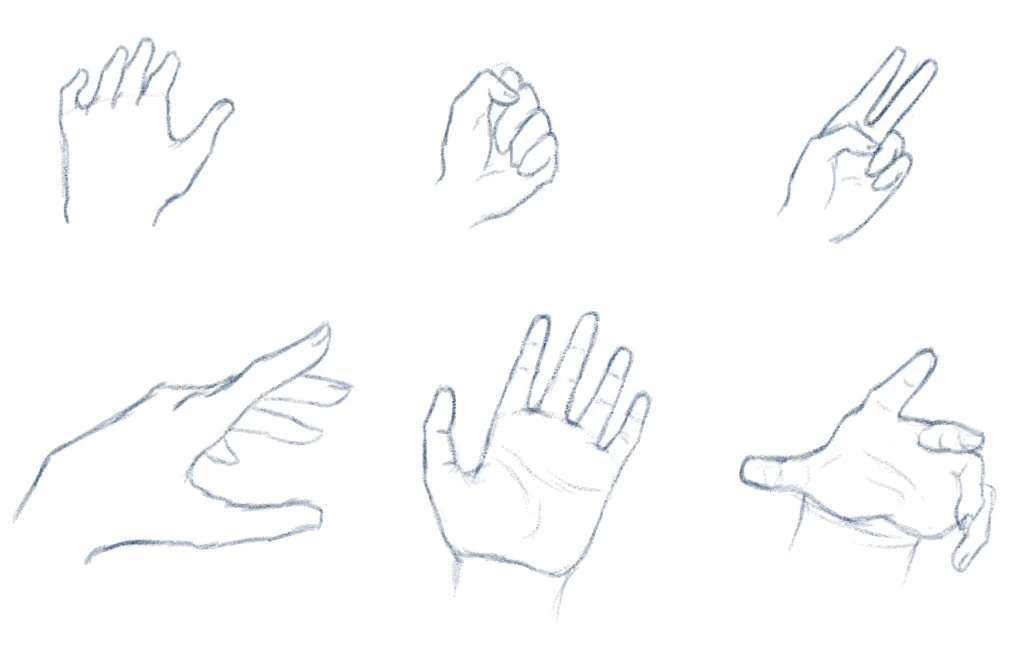
At this stage of drawing the anime hand, we fill it completely, focusing on the outline without drawing directly over the lines. Instead, we draw along the edges to ensure the hand's shape is fully and symmetrically complete. At the wrist, we draw a light line to indicate the separation between the hand and the arm.
You can add extra details such as wrinkles and nails to add realism to the anime hand, and don't neglect the small details that show the beauty of the hand.
Step four
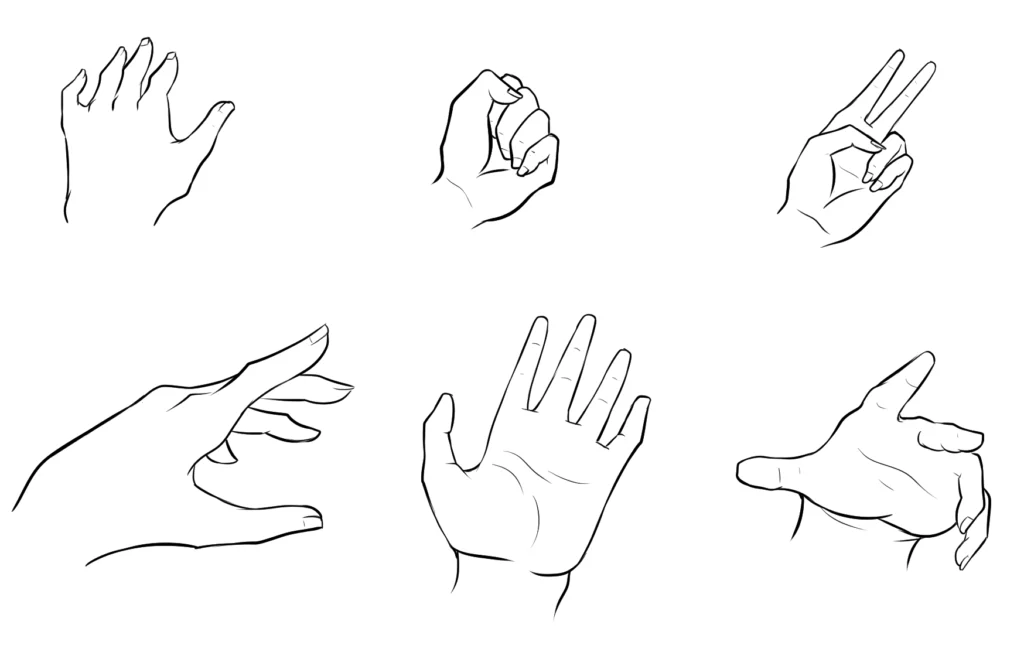
Now we move on to inking. Here we'll need pen tools, and a small, precise size to handle the details. Follow the previous guidelines for the hand and fingers, inking the outlines first, then the smaller details like the nails and wrinkles.
The ink should be stable so that coloring is easier later, and don't forget to clean up the lines after you're finished using an eraser to remove excess lines.
Final result of the hand drawing lesson
After inking, your hand will be ready for coloring. You can use Clip Studio or Photoshop for coloring because they provide you with easy control over shadows and colors, and they provide multiple layers that help you control the colors without affecting the basic lines.
You can also use appropriate and different skin tones, and then you can add shadows to the joints and a slight protrusion of the bones to make the hand appear three-dimensional.
How to draw feet in anime style (complete)
Close-up image
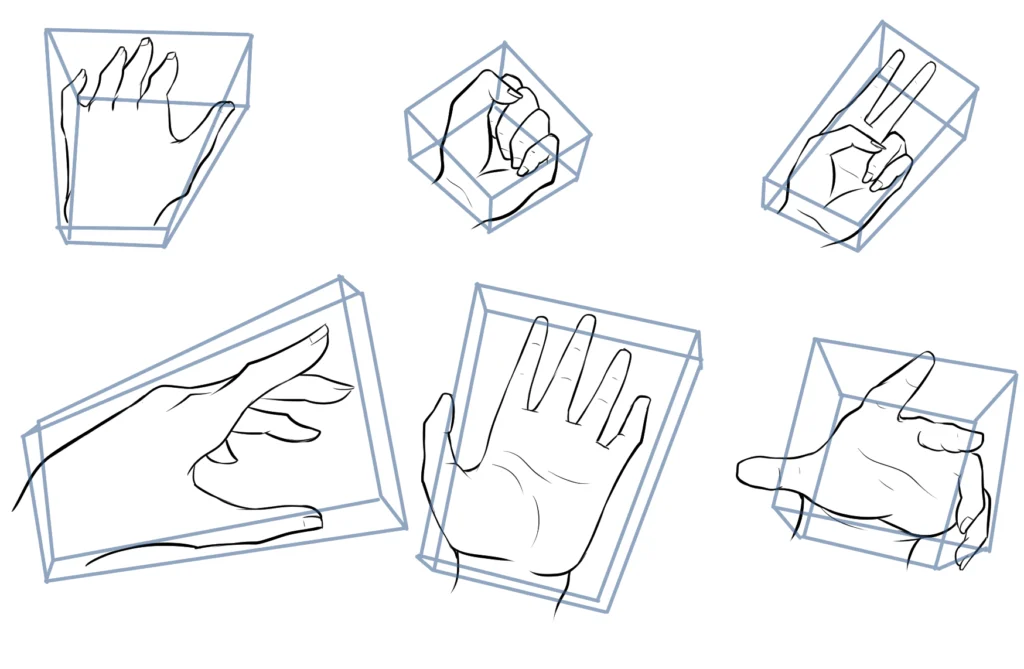
Look closely at this illustration of the bones inside the hand. It is important not to neglect the slight protrusion of the bones as you follow the steps, especially at the joint areas marked by the small circles, because they show the realistic nature of the hand.
You will notice that the finger lines are made up of three short, connected lines, separated by the joints. This is necessary when drawing an anime hand to differentiate between the back of the hand and the palm, and to show the natural movement and curves within the palm.
By applying these steps regularly and systematically with continuous practice, you will undoubtedly be able to master drawing any part of the human body with ease and high professionalism, and you will clearly notice how this advanced skill will greatly raise the level and quality of your drawing work in an unparalleled way.
Repeat reading the lesson more than once until you have fully mastered the stages. Sometimes we may not understand at first glance, so it is okay to repeat reading the lesson on drawing anime hands, because it will make you pay attention to things you did not pay attention to before.
Thank you for reading today's explanation, and we hope to meet again in the future, God willing.