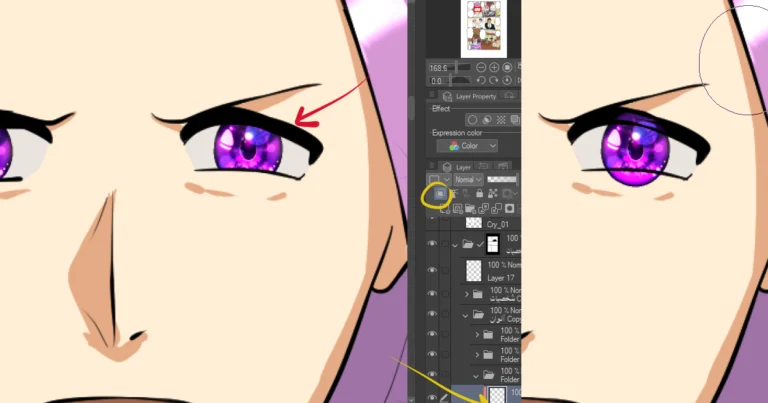
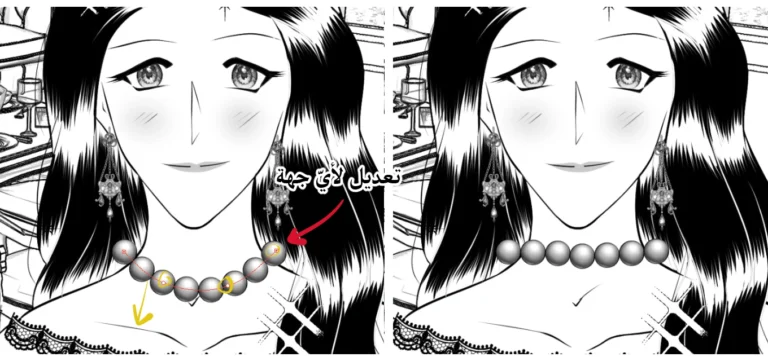
Welcome to the first lesson of its kind on my site, which is about webtoons, a type of comic book that is displayed on the Internet and is often in color, because it is not printed, unlike manga, which is in black and white, because it is printed at a low cost. In general, I had to explain the difference briefly before entering the lesson, and we will use the computer or the phone, it doesn’t matter as long as the steps are the same.
Note: The link to read this webtoon is within this lesson.
The first step is preparing the script.
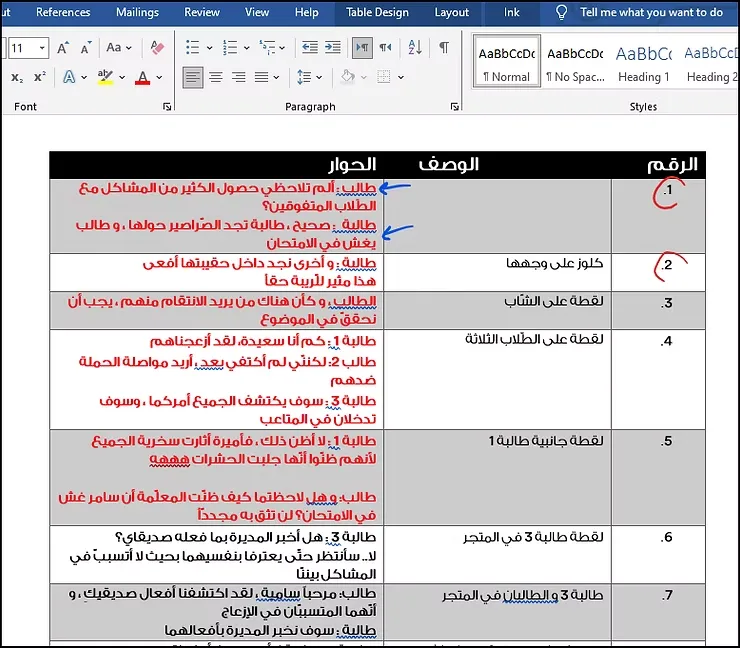
We write the story that will turn into a webtoon and help in designing the webtoon. You have the freedom to write it in any program you want, and we divide it in the table, each number representing a specific scene, and next to it the description and dialogue.
While scheduling the scenario is optional, it is practical in terms of saving time and effort.
Step two: Balloons and dialogue
Now we open the drawing program that we will be working on. The first thing we have to do is define and divide the scenes that will appear on the page. In webtoon design, the scenes are often below each other, but we can arrange them like Japanese manga.
Before drawing, it is necessary to add speech bubbles to the pages, so that we know the space allocated for drawing the characters, because adding the bubbles after drawing will cover the characters and you may not find enough space.
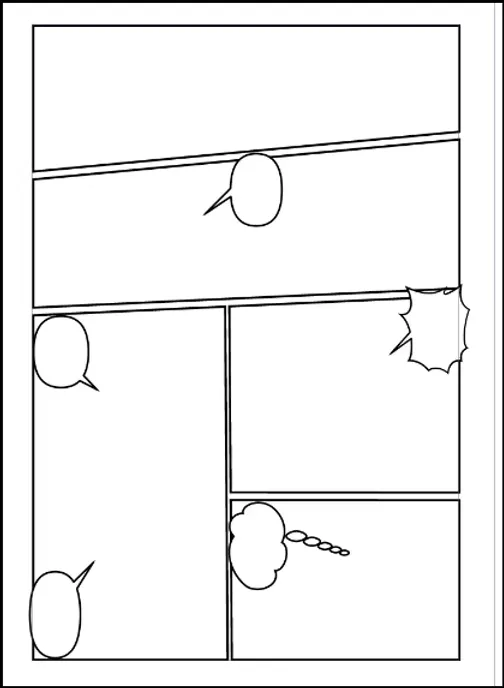
Step three: The sketch
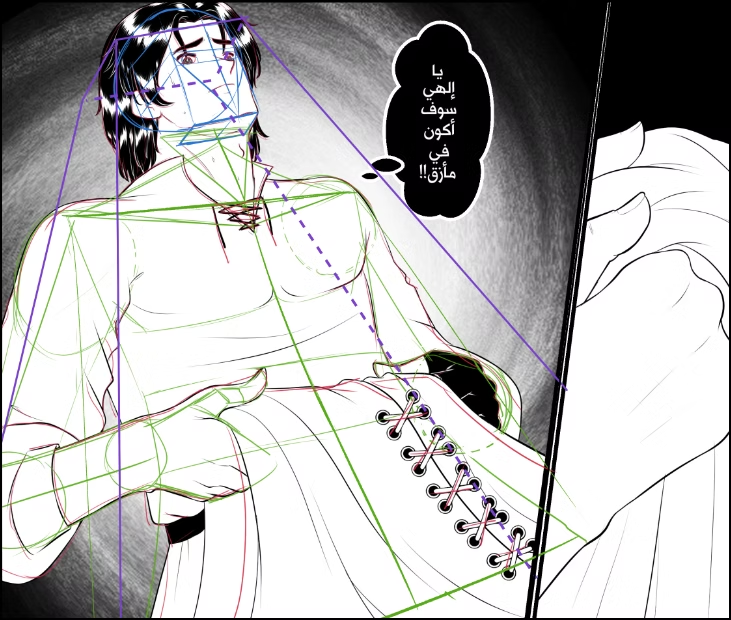
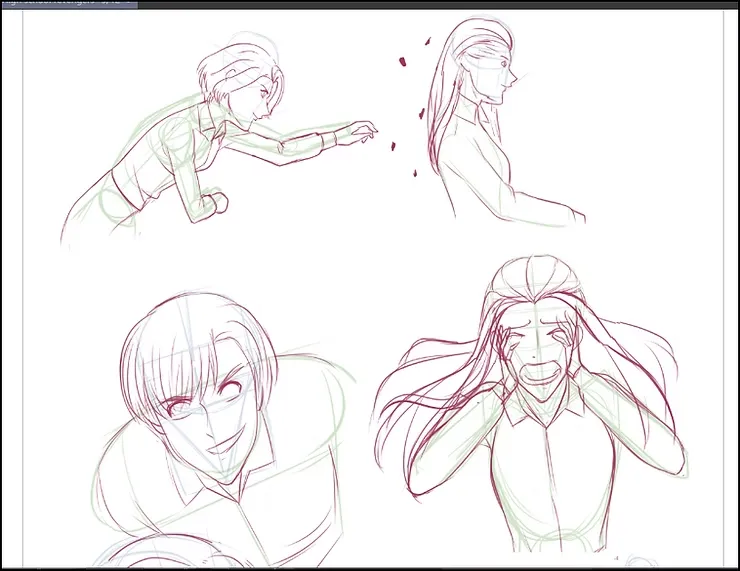
We begin by sketching the basic outlines of the scenes, which could be:
- The green color is for the initial form of the body.
- The blue color of the face.
- The color red is for the detailed drawing.
Step four: Inking and coloring
After the sketch, the inking stage will come, in black. We lighten the sketch layer, and then we start drawing directly on top of it in a new layer.
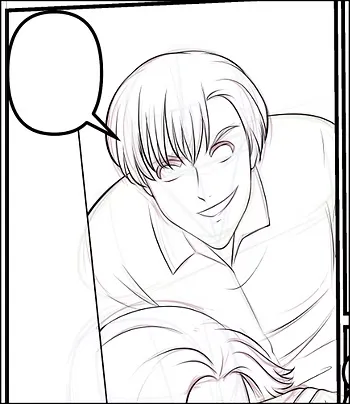
advice
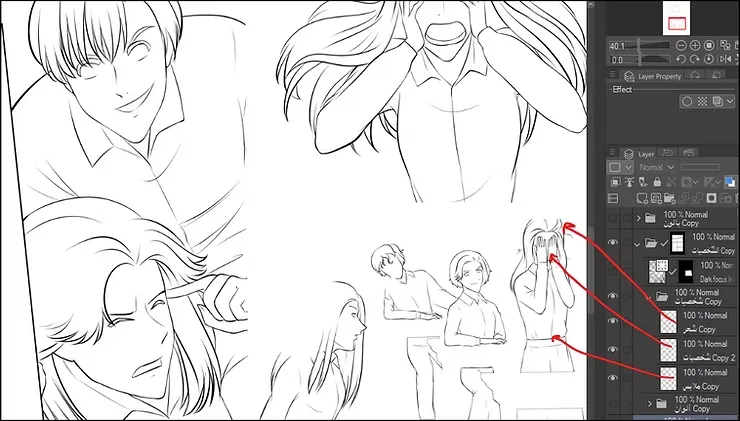
It is essential that you ink each part separately, the hair in a separate layer, the body and also the clothes, and the picture below is a good example.
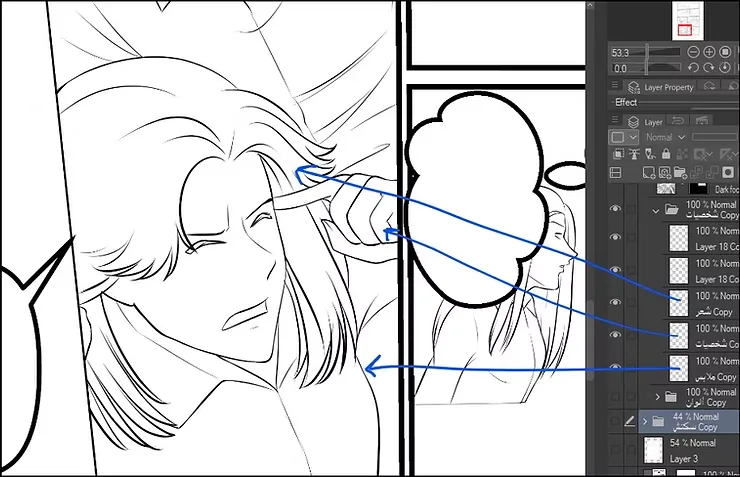
Layer arrangement
The method is as follows: we add a new folder dedicated to inking, and inside it a folder dedicated to coloring, and each folder has a layer.
- A layer for drawing hair.
- Body drawing layer.
- Clothing and accessories drawing layer.
Step five
We add a folder for coloring, and inside it we add a folder for each part of the drawing, as follows:
- Skin coloring folder.
- Facial features coloring folder.
- Hair coloring book.
- A coloring book for clothes.
- My choice is the folder for coloring add-ons and accessories.
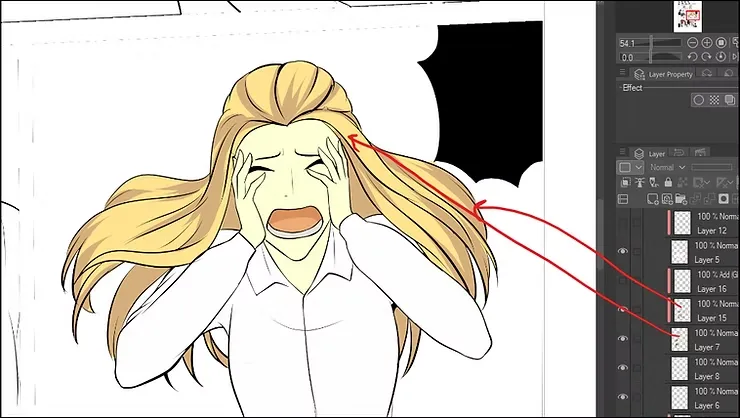
Example: In the hair coloring folder as shown below, I colored the hair yellow, and in a separate layer I added the shadow, and in an additional layer, we can add hair shine.
Step six: Backgrounds
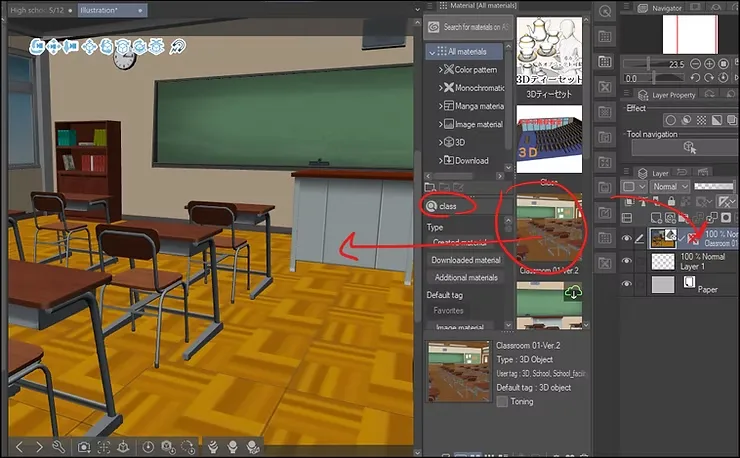
As you are used to, I do not draw the backgrounds myself, but rather use 3D models, and this is what mangaka and webtoons always do. .
We go to Window > Material > 3D To open the 3D materials library, then select the section. Body type or Background Depending on the type of model required, we then drag the 3D element (row) directly from the library to the desired model. CanvasIt is then added as 3D layer inside Layer Panel.
To read this webtoon in its entirety, from Here
Step seven: Convert the row into a drawing
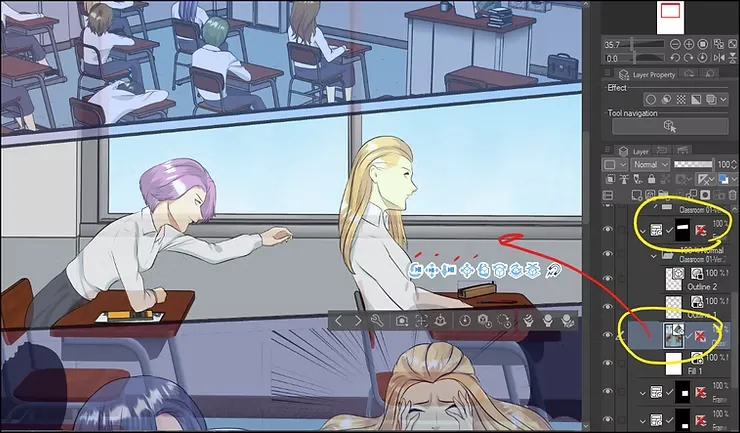
Right-click and select Convert to lines and tones. This is how the 3D row is converted into a 2D image similar to the style of a webtoon.
Step eight: Adjusting the colors
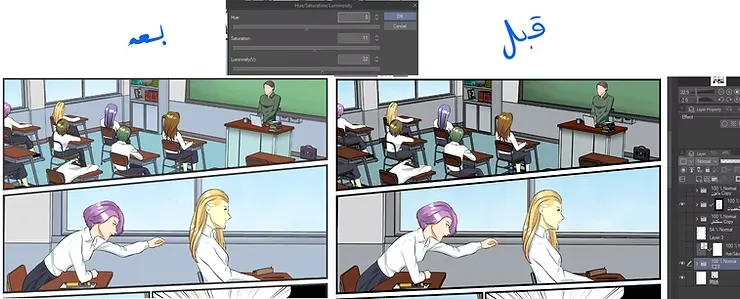
Go to Layer > New Correction > Hue/Saturation/Luminosity to change the color tone and adjust the bubble strength and sharpness. The Hue slider lets you change the color harmony, Saturation lets you control the color intensity, and finally, Luminosity lets you adjust the overall brightness. After editing, you'll notice how much more vibrant the image becomes, perfectly suited to the webtoon's atmosphere.
Step nine: Effects
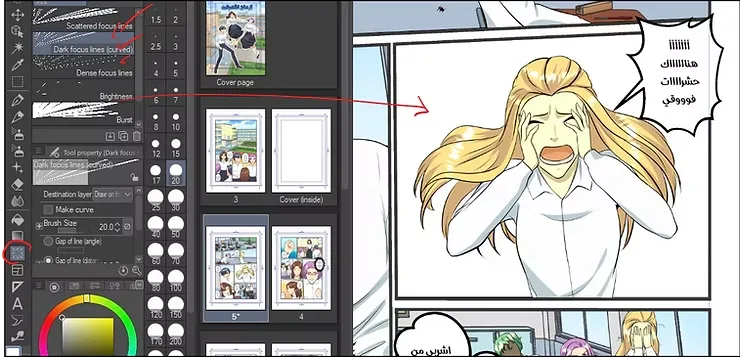
It is important that some shots contain effects that express the characters' emotions, such as screaming, shock, and other feelings, and here I will show you how to do that.
From the left menu, we select Figure, specify the appropriate shape of the effect and its intensity, and add it to the panel.
A closer look
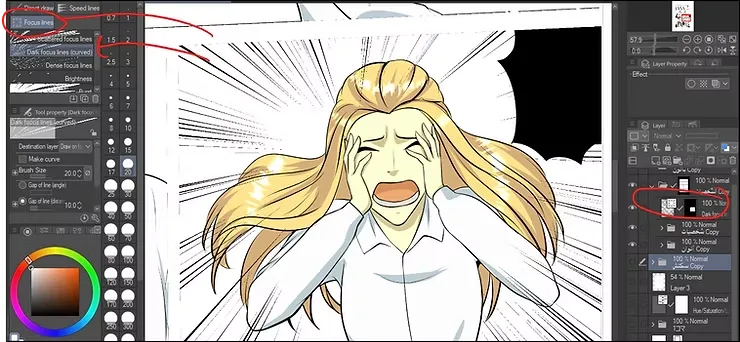
A layer with this effect will appear behind the girl; you can control the color and thickness of the lines.
The presentation method for the web design lesson
Webtoons are known to be displayed by scrolling down, as they are designed for mobile phones, so we should follow that method when publishing.
Final result
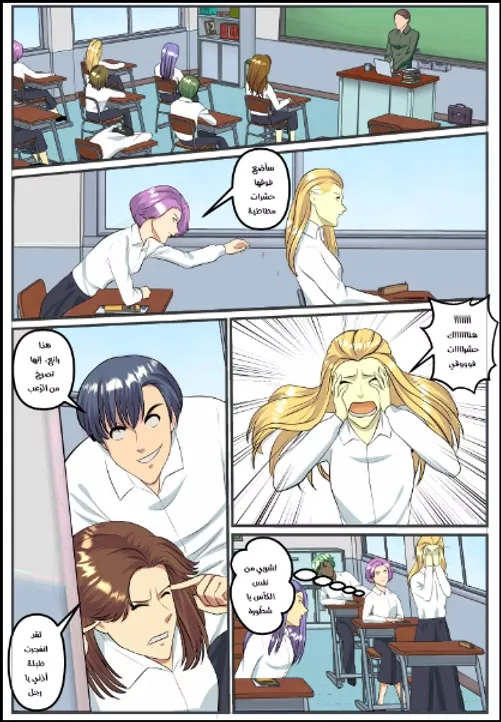
And this is the final result of the webtoon design method, and the method of displaying a full page.
Thank you for following the lesson and benefiting from it, and I will see you in future lessons, God willing.